I love Star Trek and I want to make a space game. So I decided to learn how to do that. I know there are already approximately a million space games out there but of course I want to make my own. Where everything is exactly the way I want it.
So what’s the first thing a space game needs?
Stars
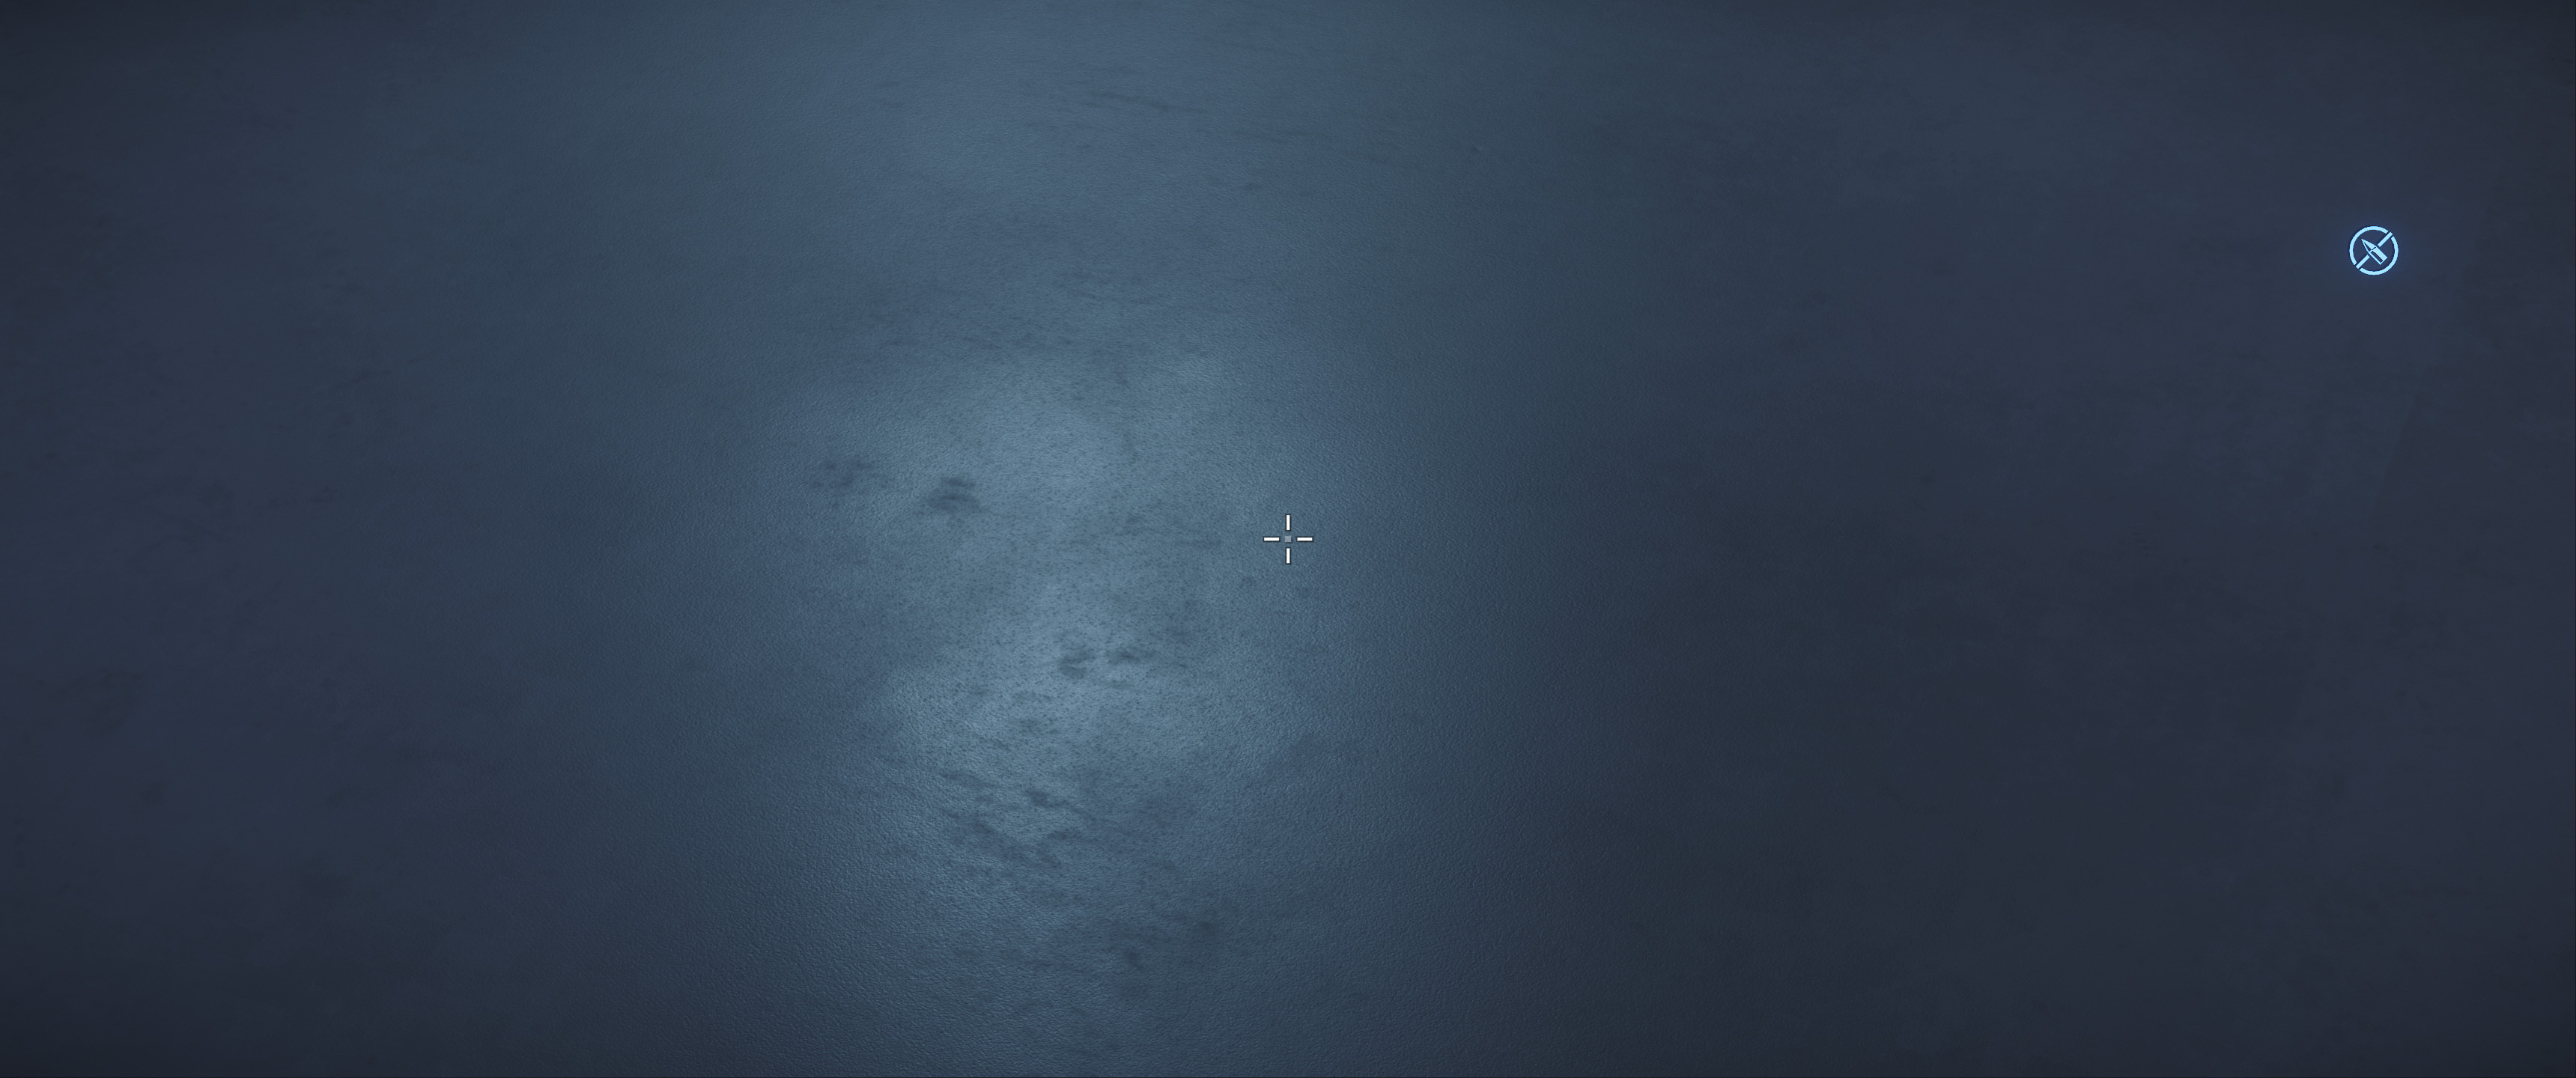
My first thought led me to my old trusty tool Photoshop for this, but then I remembered that I’ve been learning Substance Designer recently. And how that is the way of creating textures. Including a starfield for a space game.
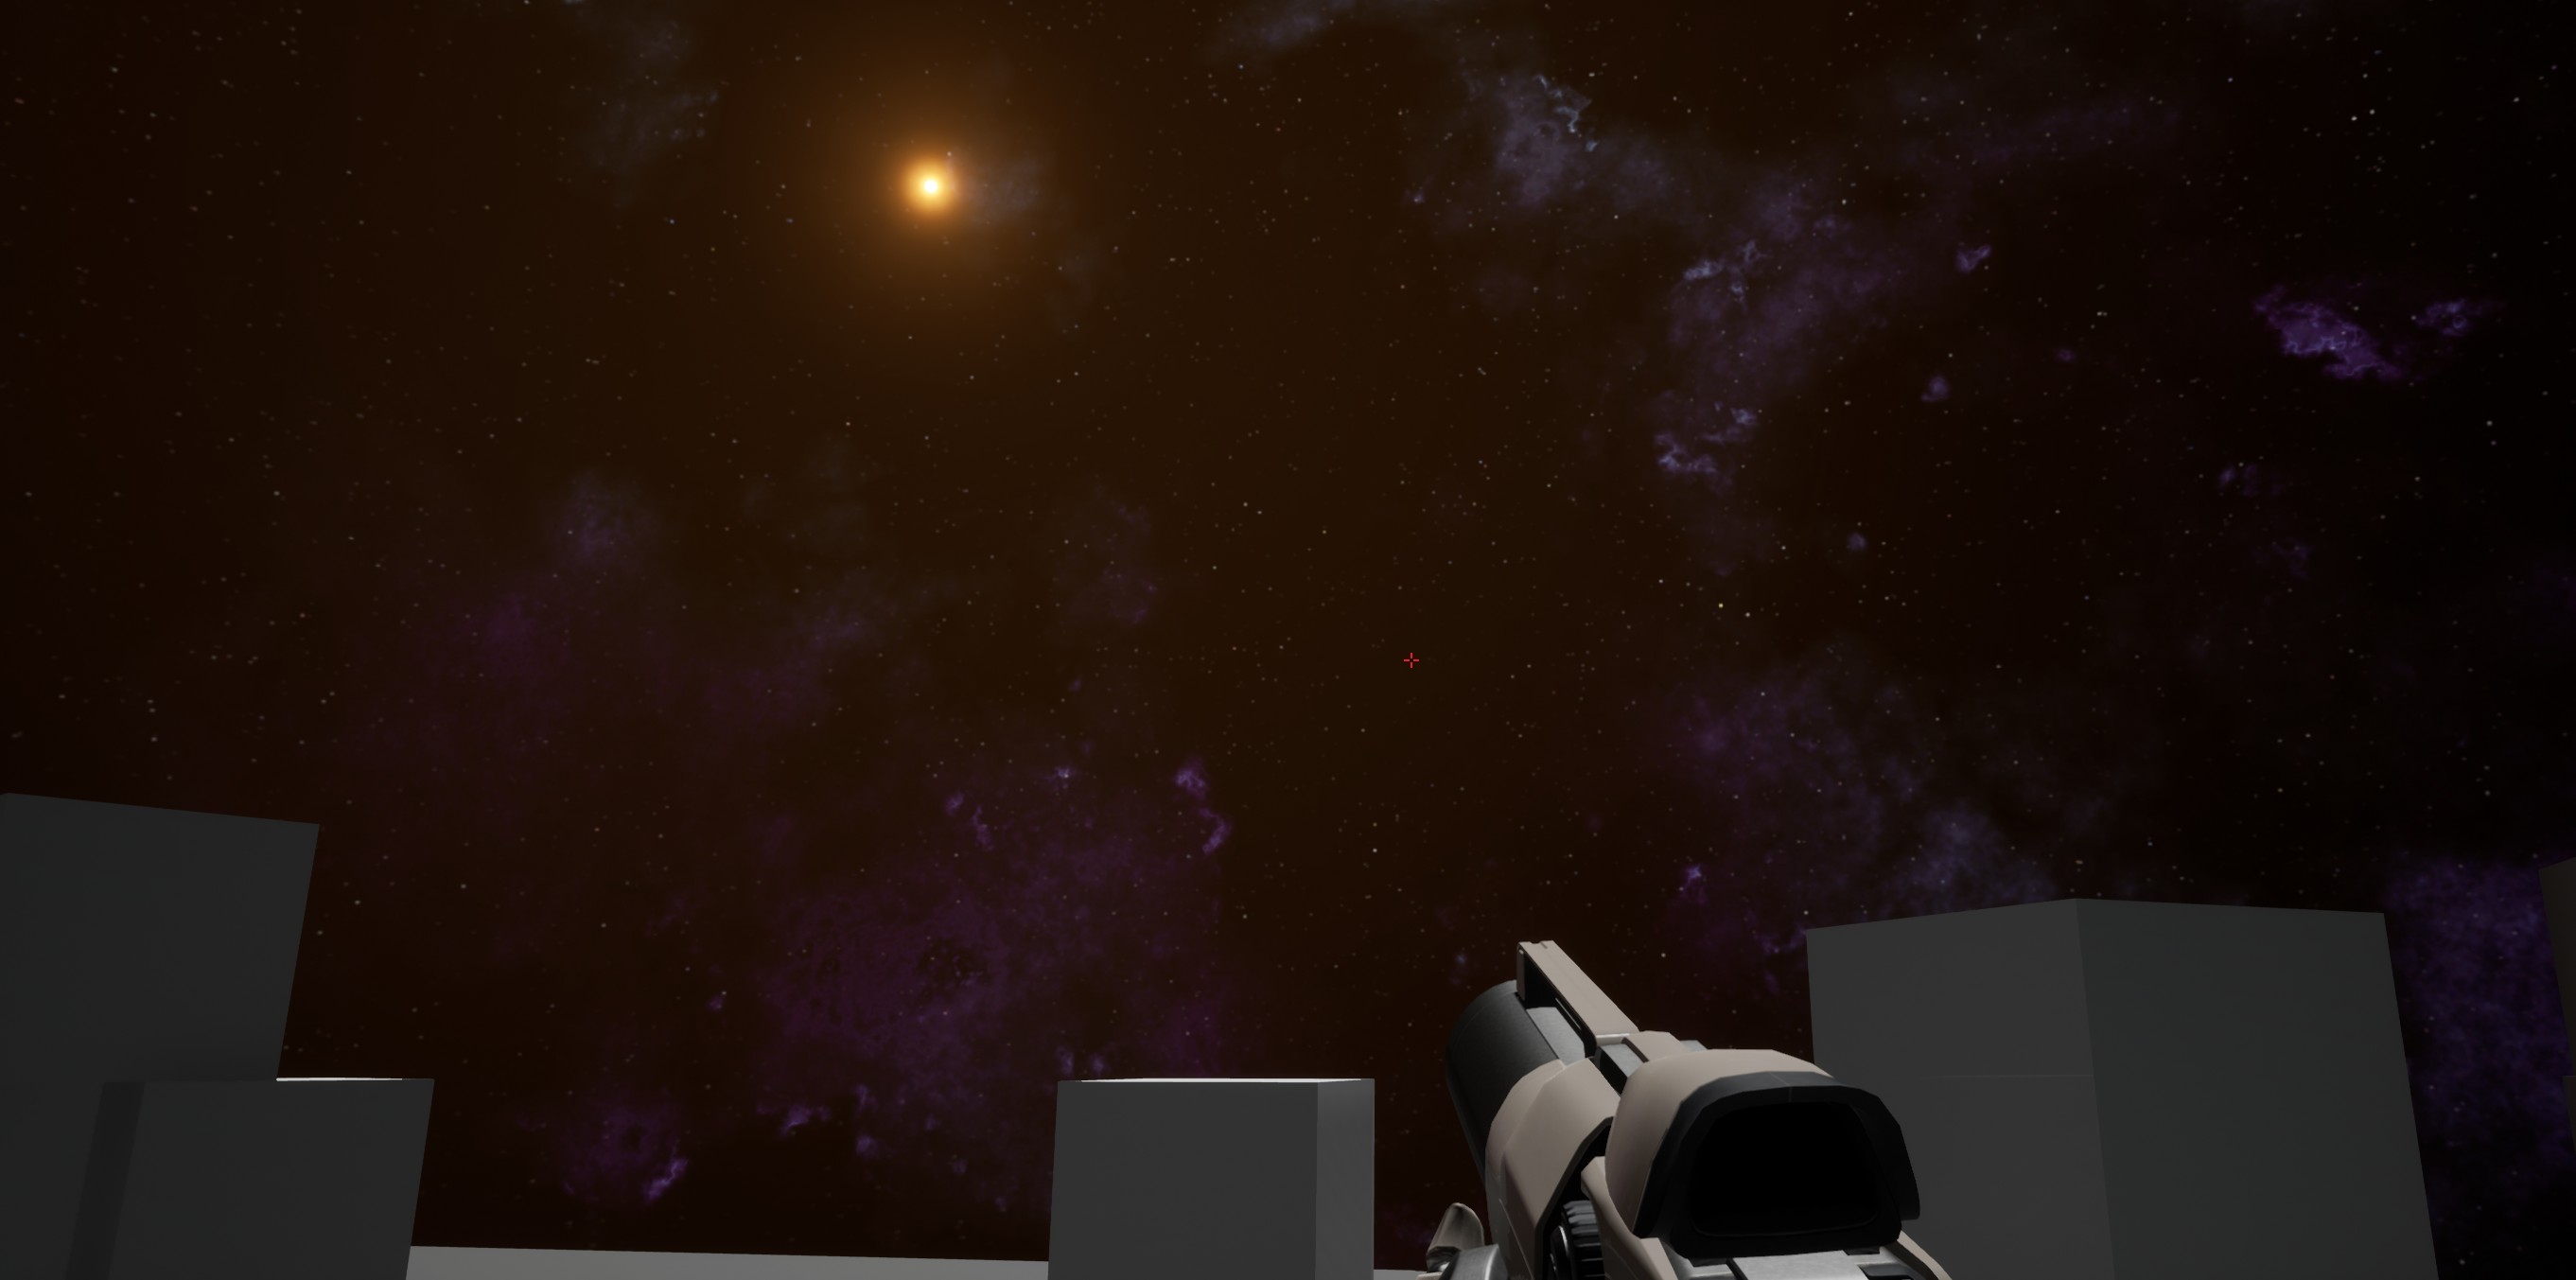
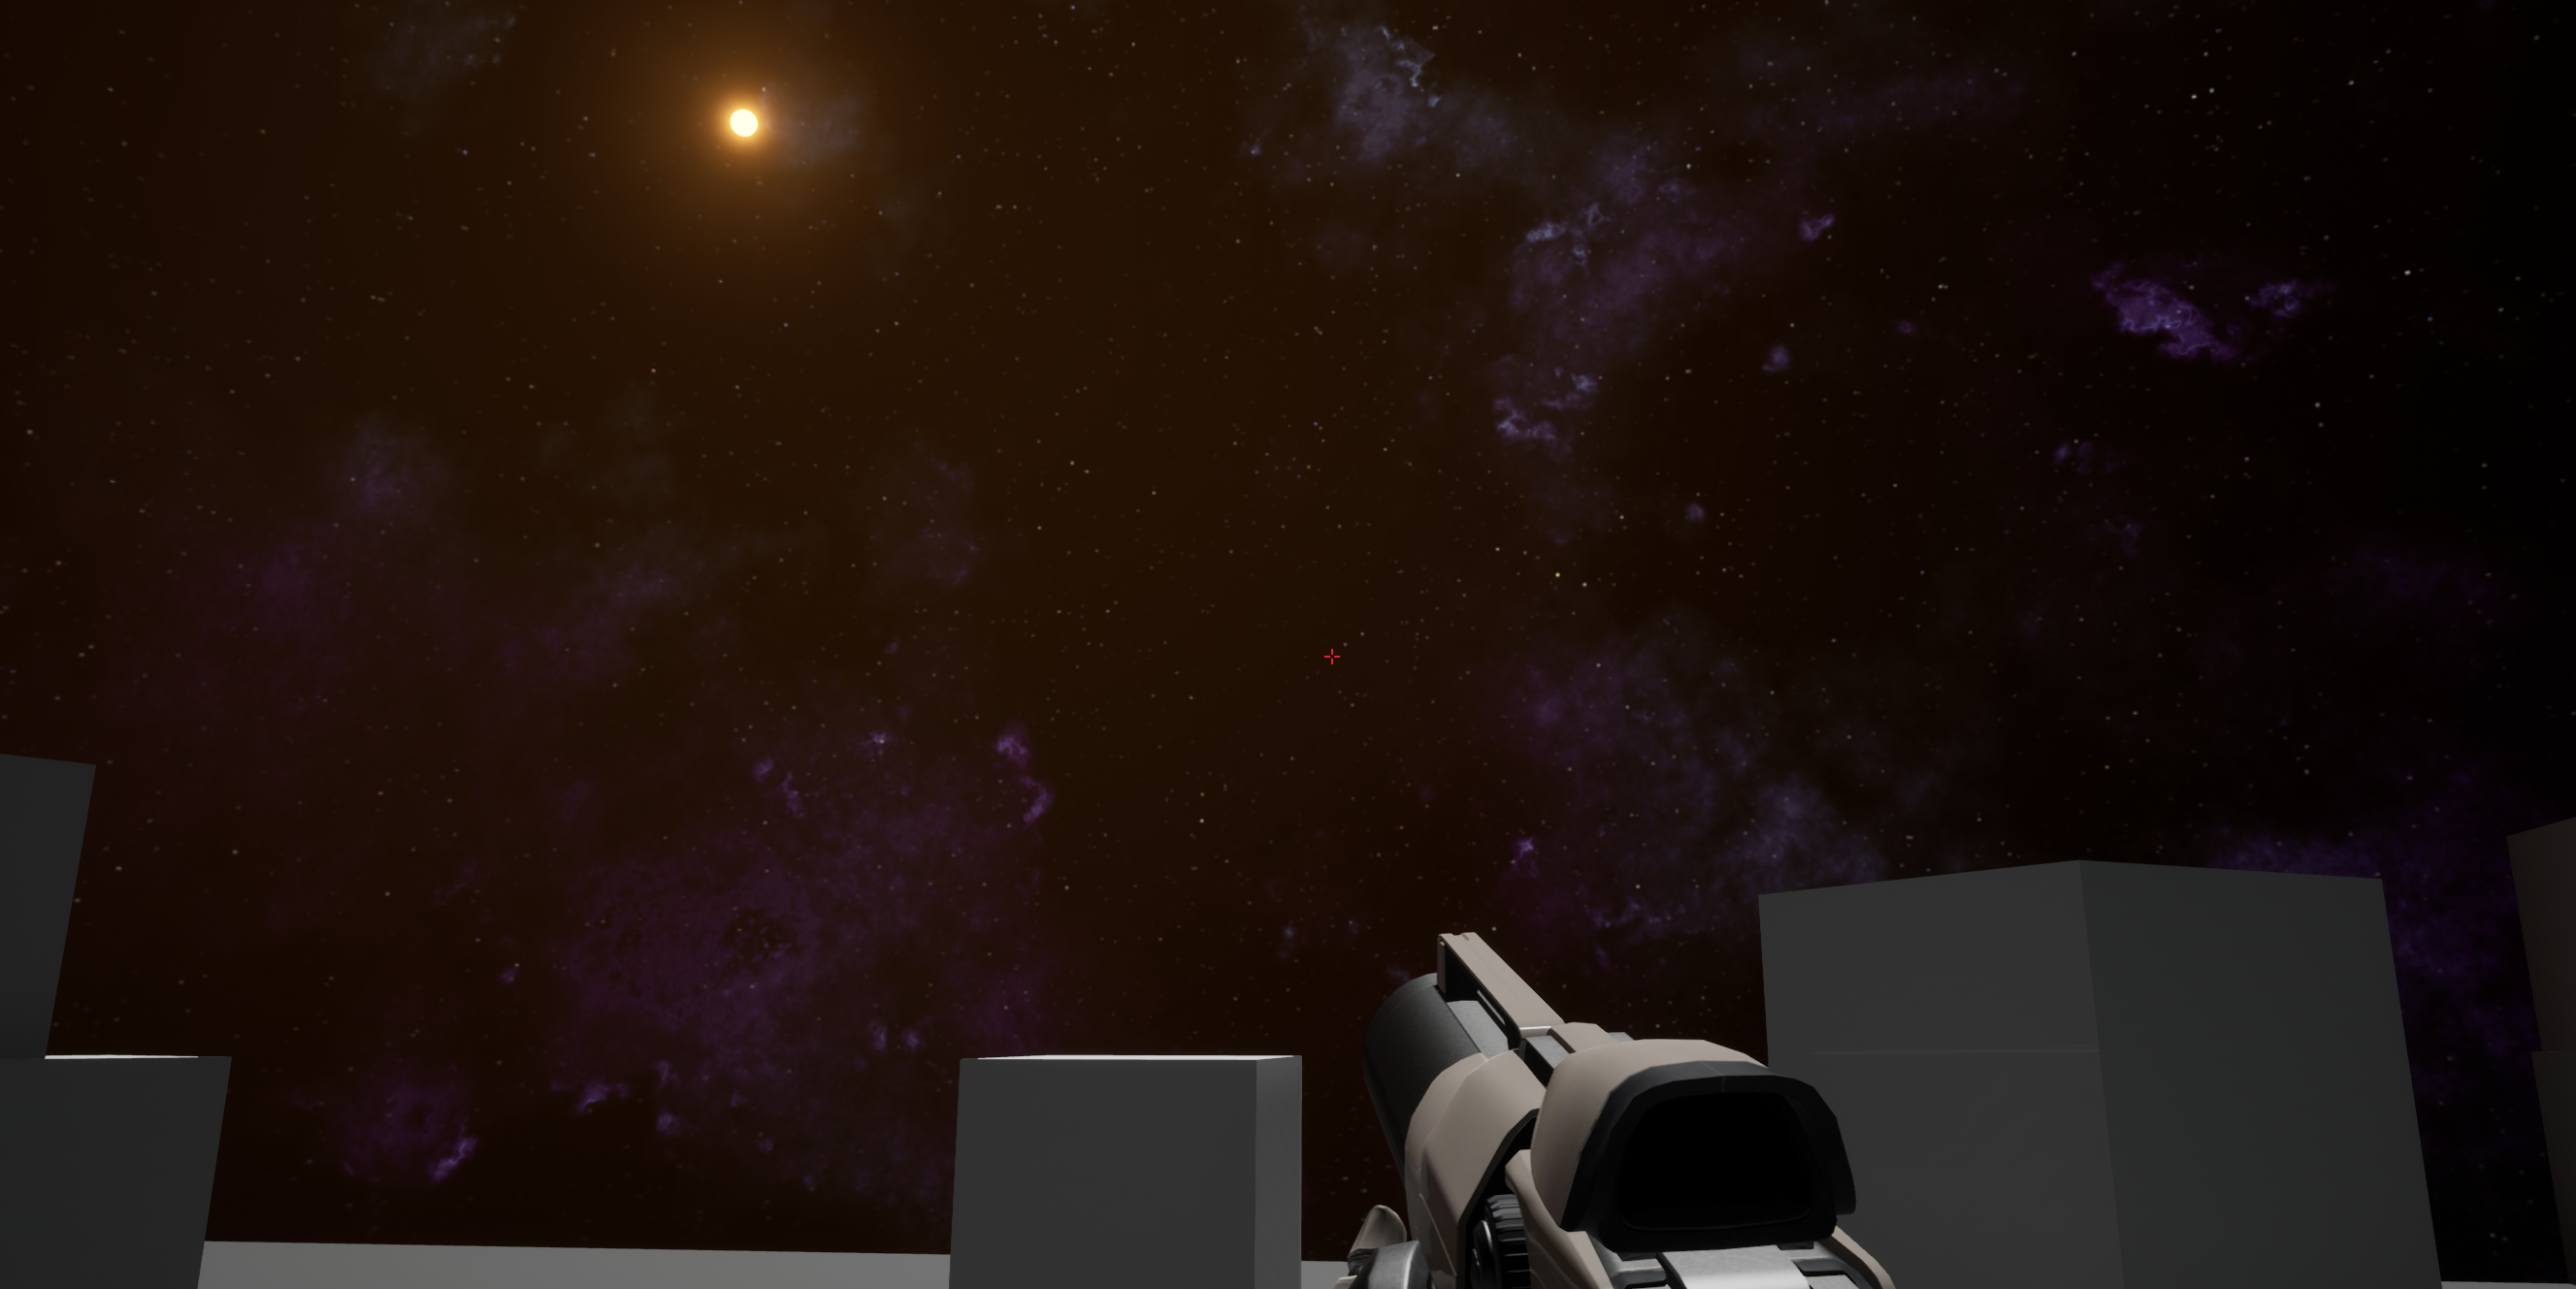
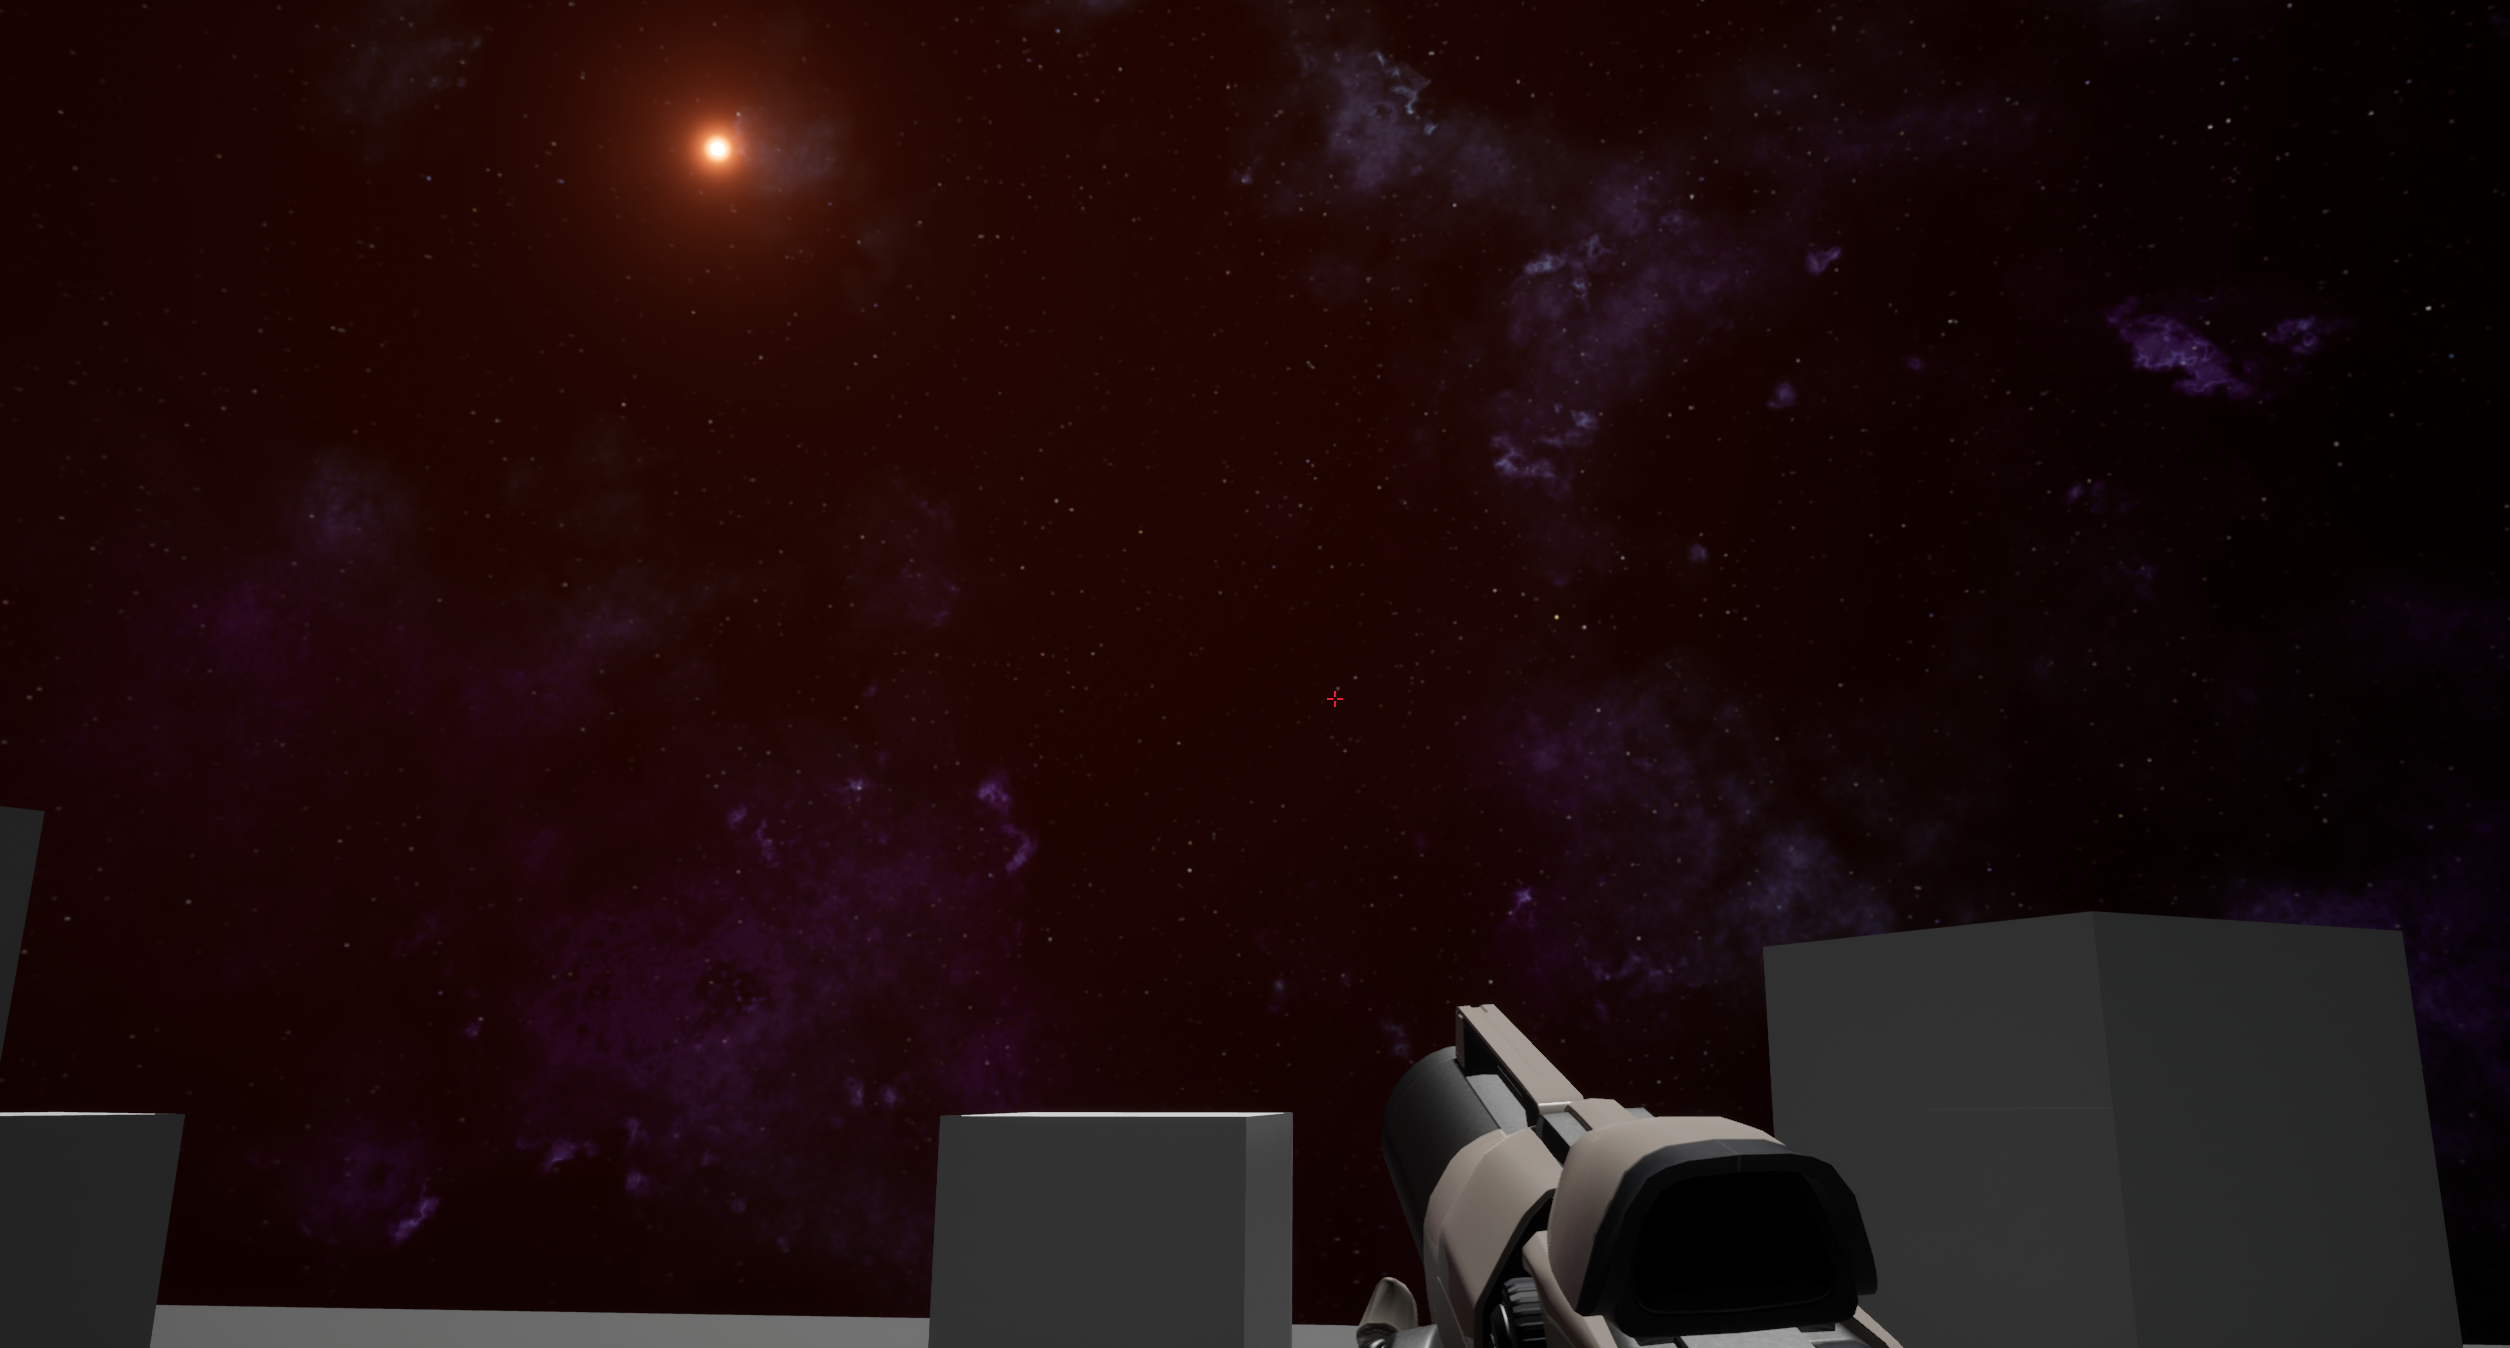
Some googling led me to this tutorial. The short version of it is: Create white noise and then a buncha’ more white noise to achieve a good balance of stars vs empty black space, then add a little color. This is my result:

And this is my Substance Designer graph.
Next steps would be making nebulas, but I’m not capable of that right now. My guess for an advanced way to do it would be playing around with smoke simulations in e.g. Blender and render a tileable texture, or a Cubemap, to overlay on the stars. That way they may look volumetric and awesome à la Eve Online. A simpler approach would be to play around with “cloudy” noise in Substance to achieve good looking but perhaps flatter nebulas.
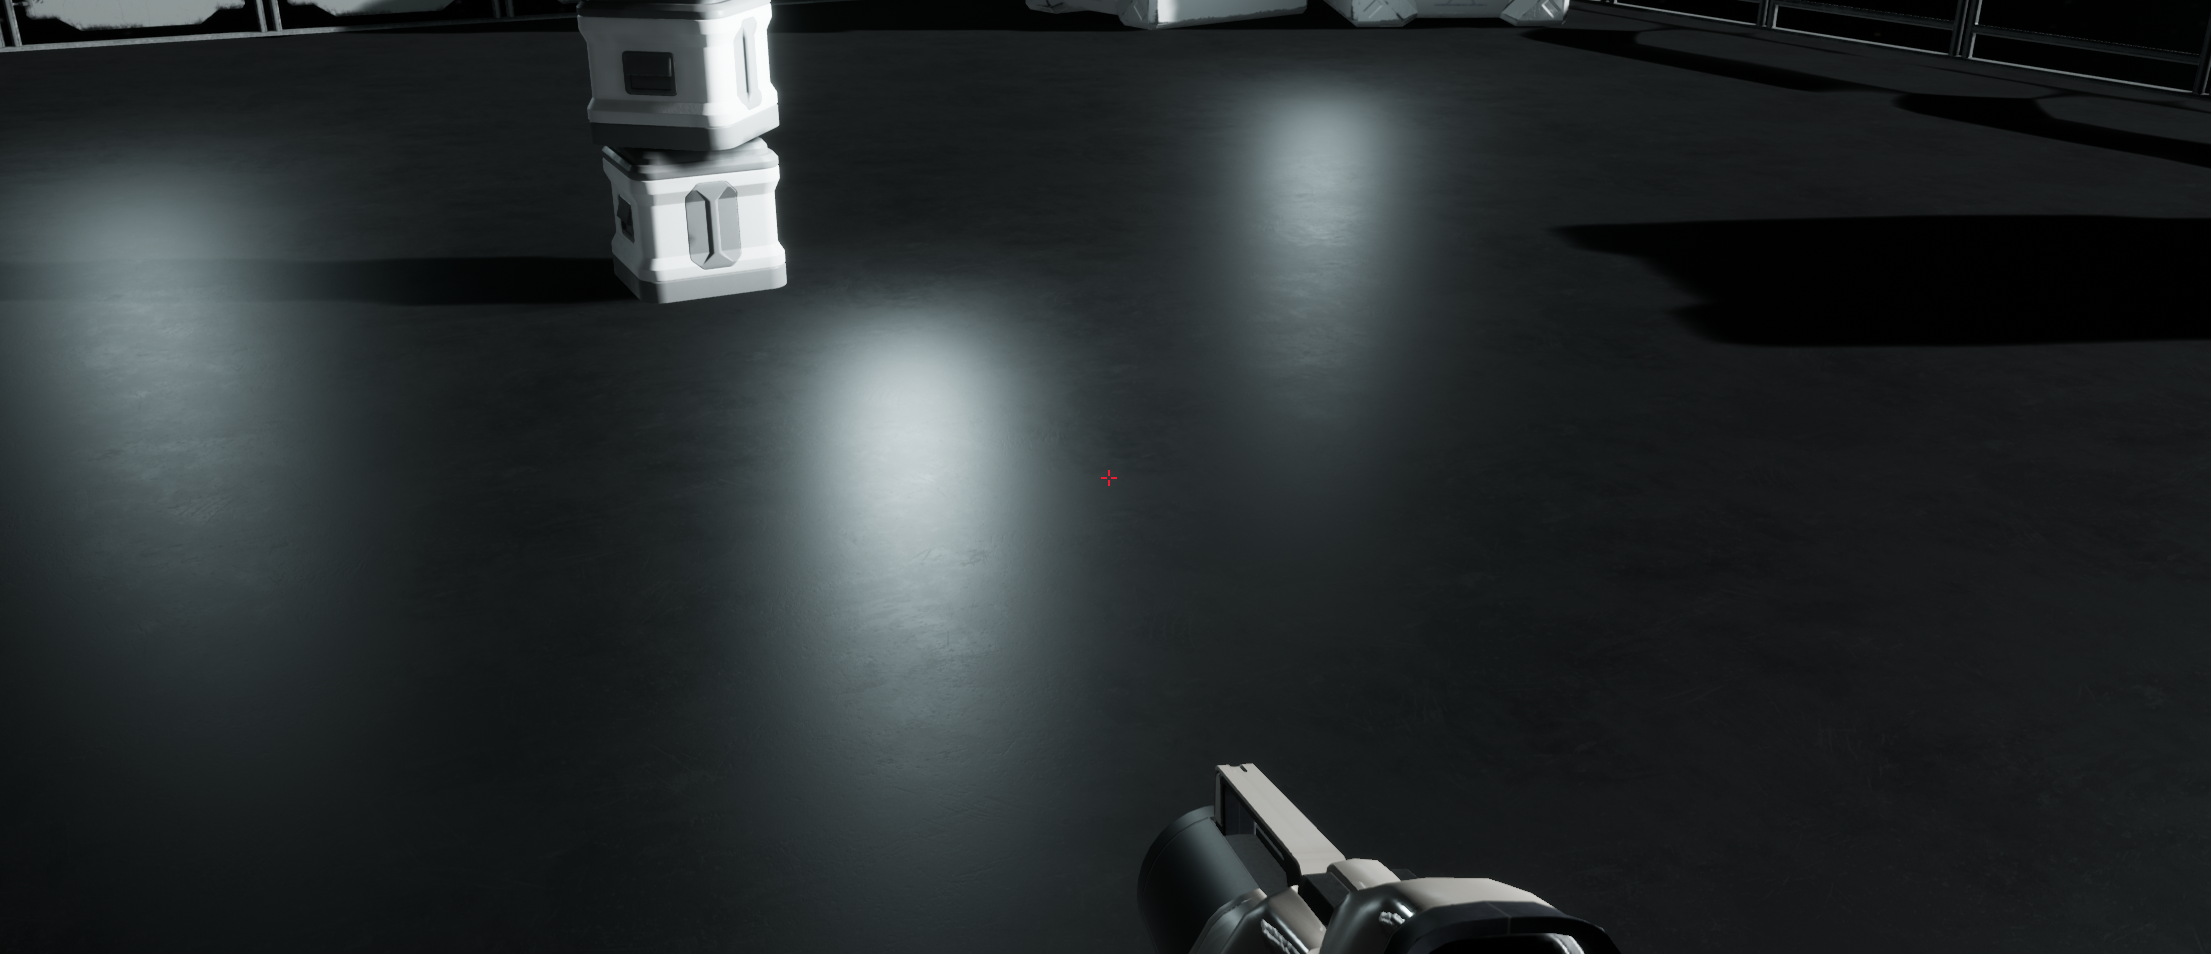
So now that I’ve got a tileable starfield texture. How do I actually map it to a sphere (“skysphere”) in Unreal Engine? Now that’s a good question.
Cubemap
At first I thought a Cubemap was the answer since I’ve used that technique before. But it turns out I could not find a way to export such a thing from Substance Designer. I can only export 1 tileable texture, but I need 6 (sides of a cube) different tiles that neatly stitches together in the seams of a cube, to map onto the “skysphere” in Unreal Engine.
Equirectangular projection
Instead I found this article that shows a method in Substance Designer to convert a texture to Equirectangular projection, a.k.a “stretch the poles so you can wrap it around a sphere”.
I added that to my above Substance graph, feeding the output into the input of the graph from the article.
Here’s what it looks like in Unreal Engine:
As you might be able to tell, the stars are not very high-res. The reason being I can only wrap one single 4k image around the whole skysphere, whereas with a cubemap I’d have one 4k image for each 6 sides of the “cube”.
Nebulas
I changed my mind, let’s make some basic background nebulas.
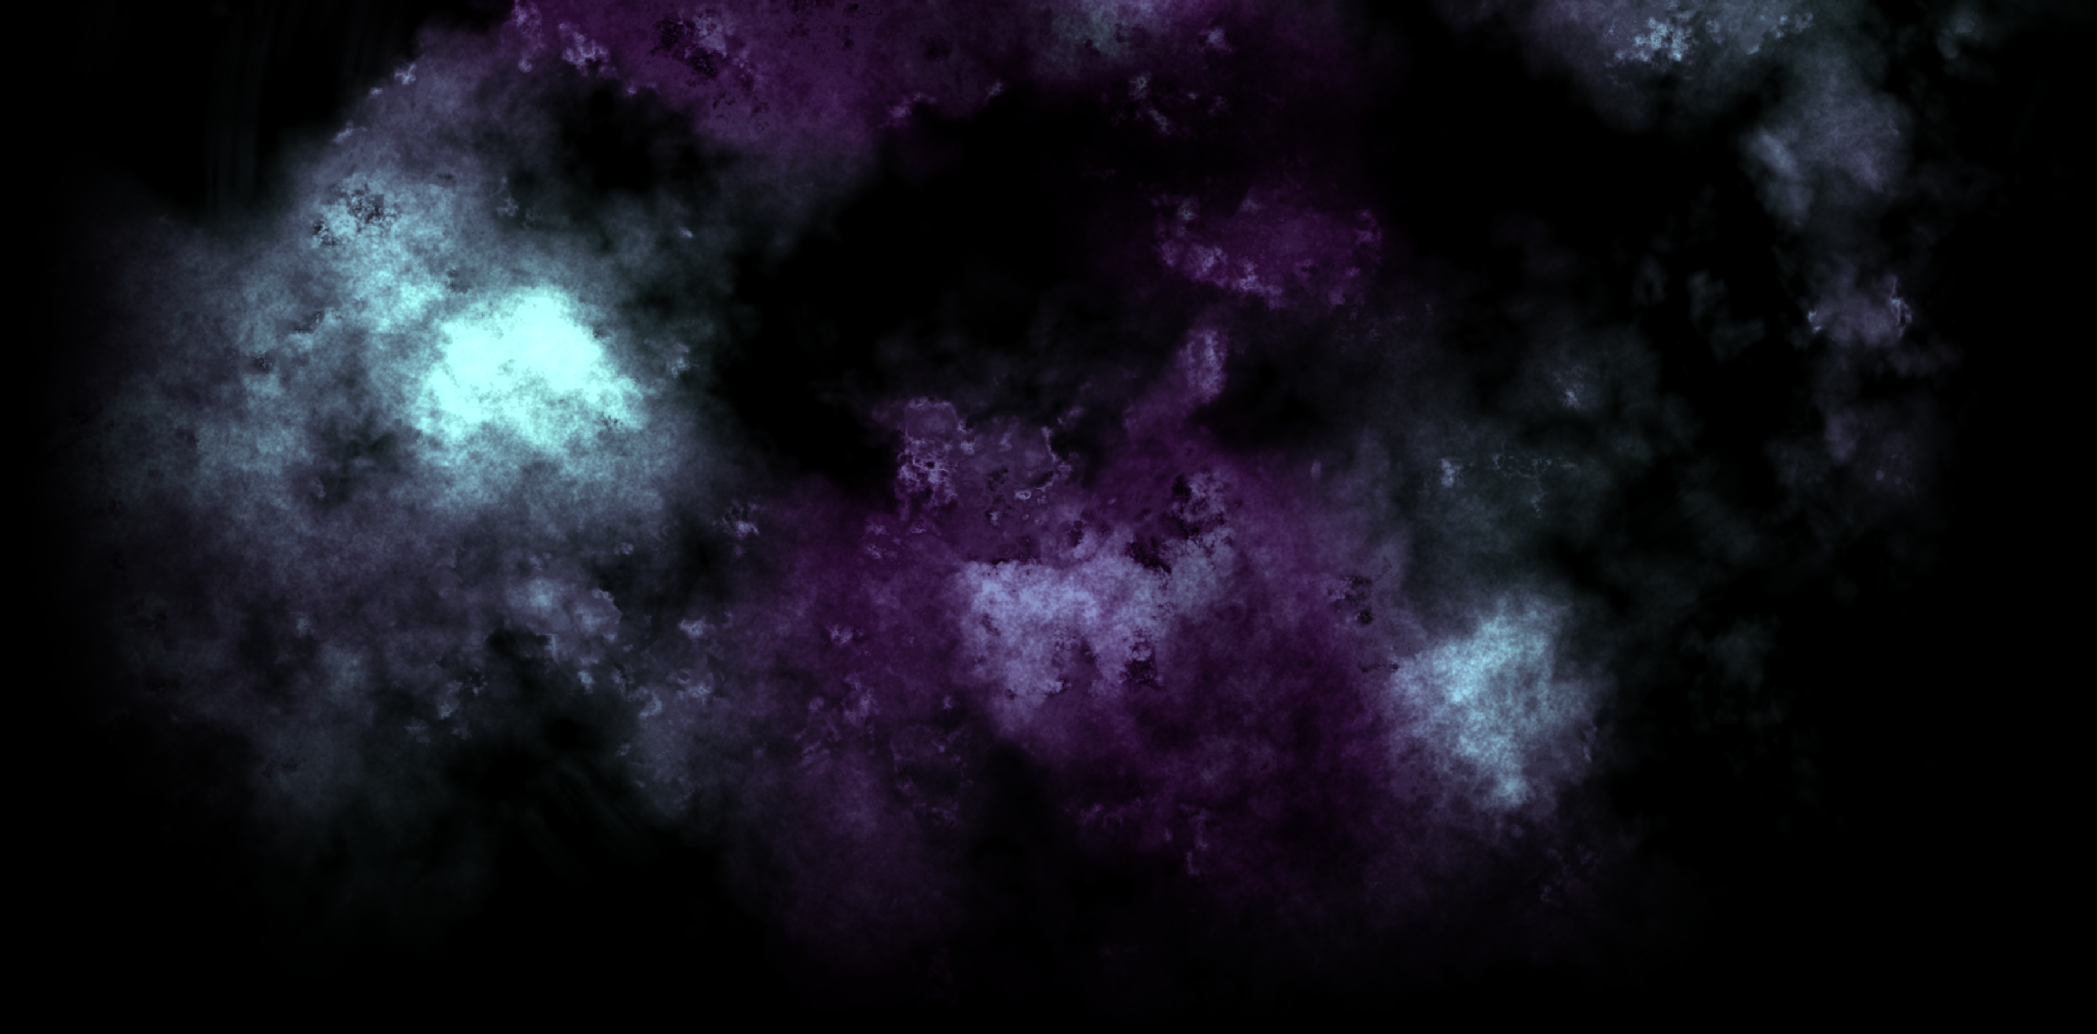
With inspiration from this video and a lot of experimentation I created what I would rather like to call “space clouds”. Calling it a nebula would be a bit ambitious:
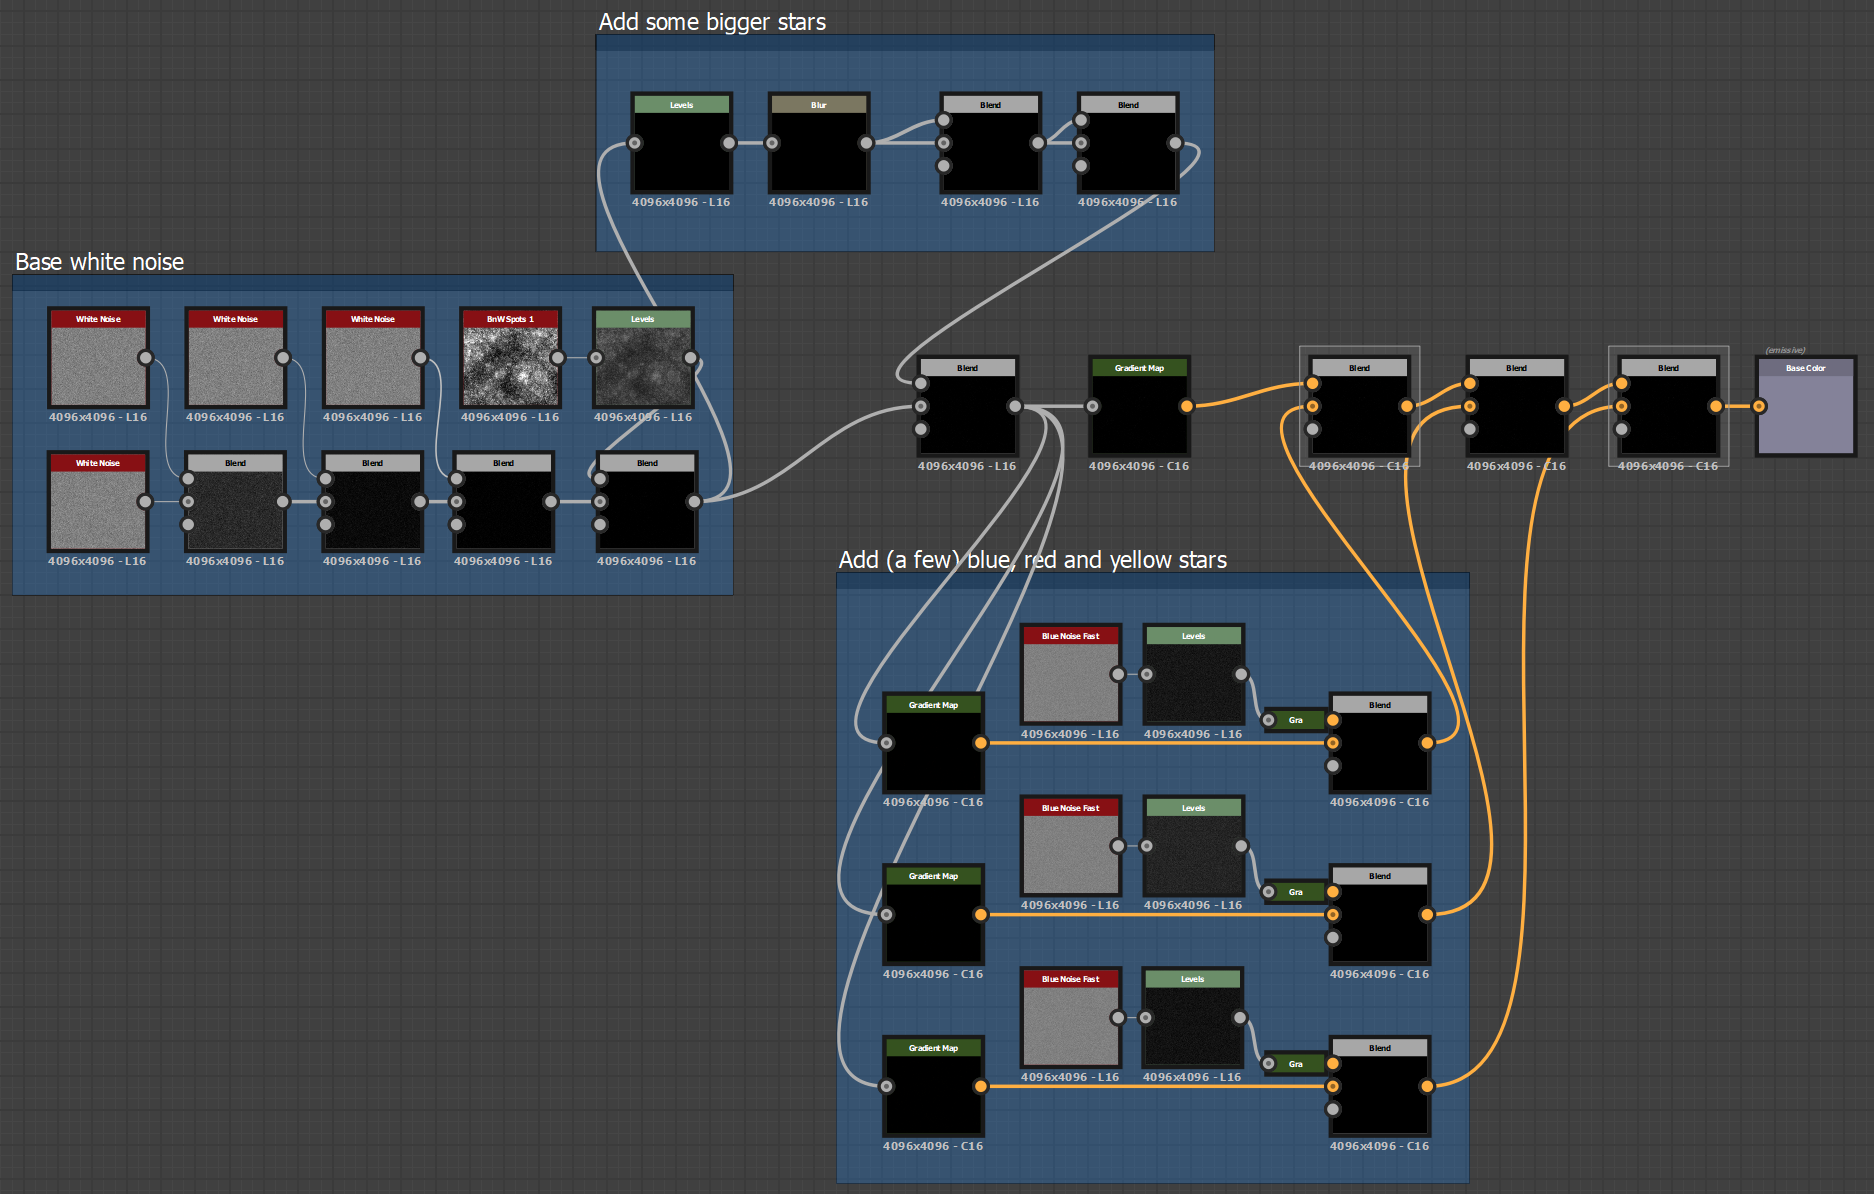
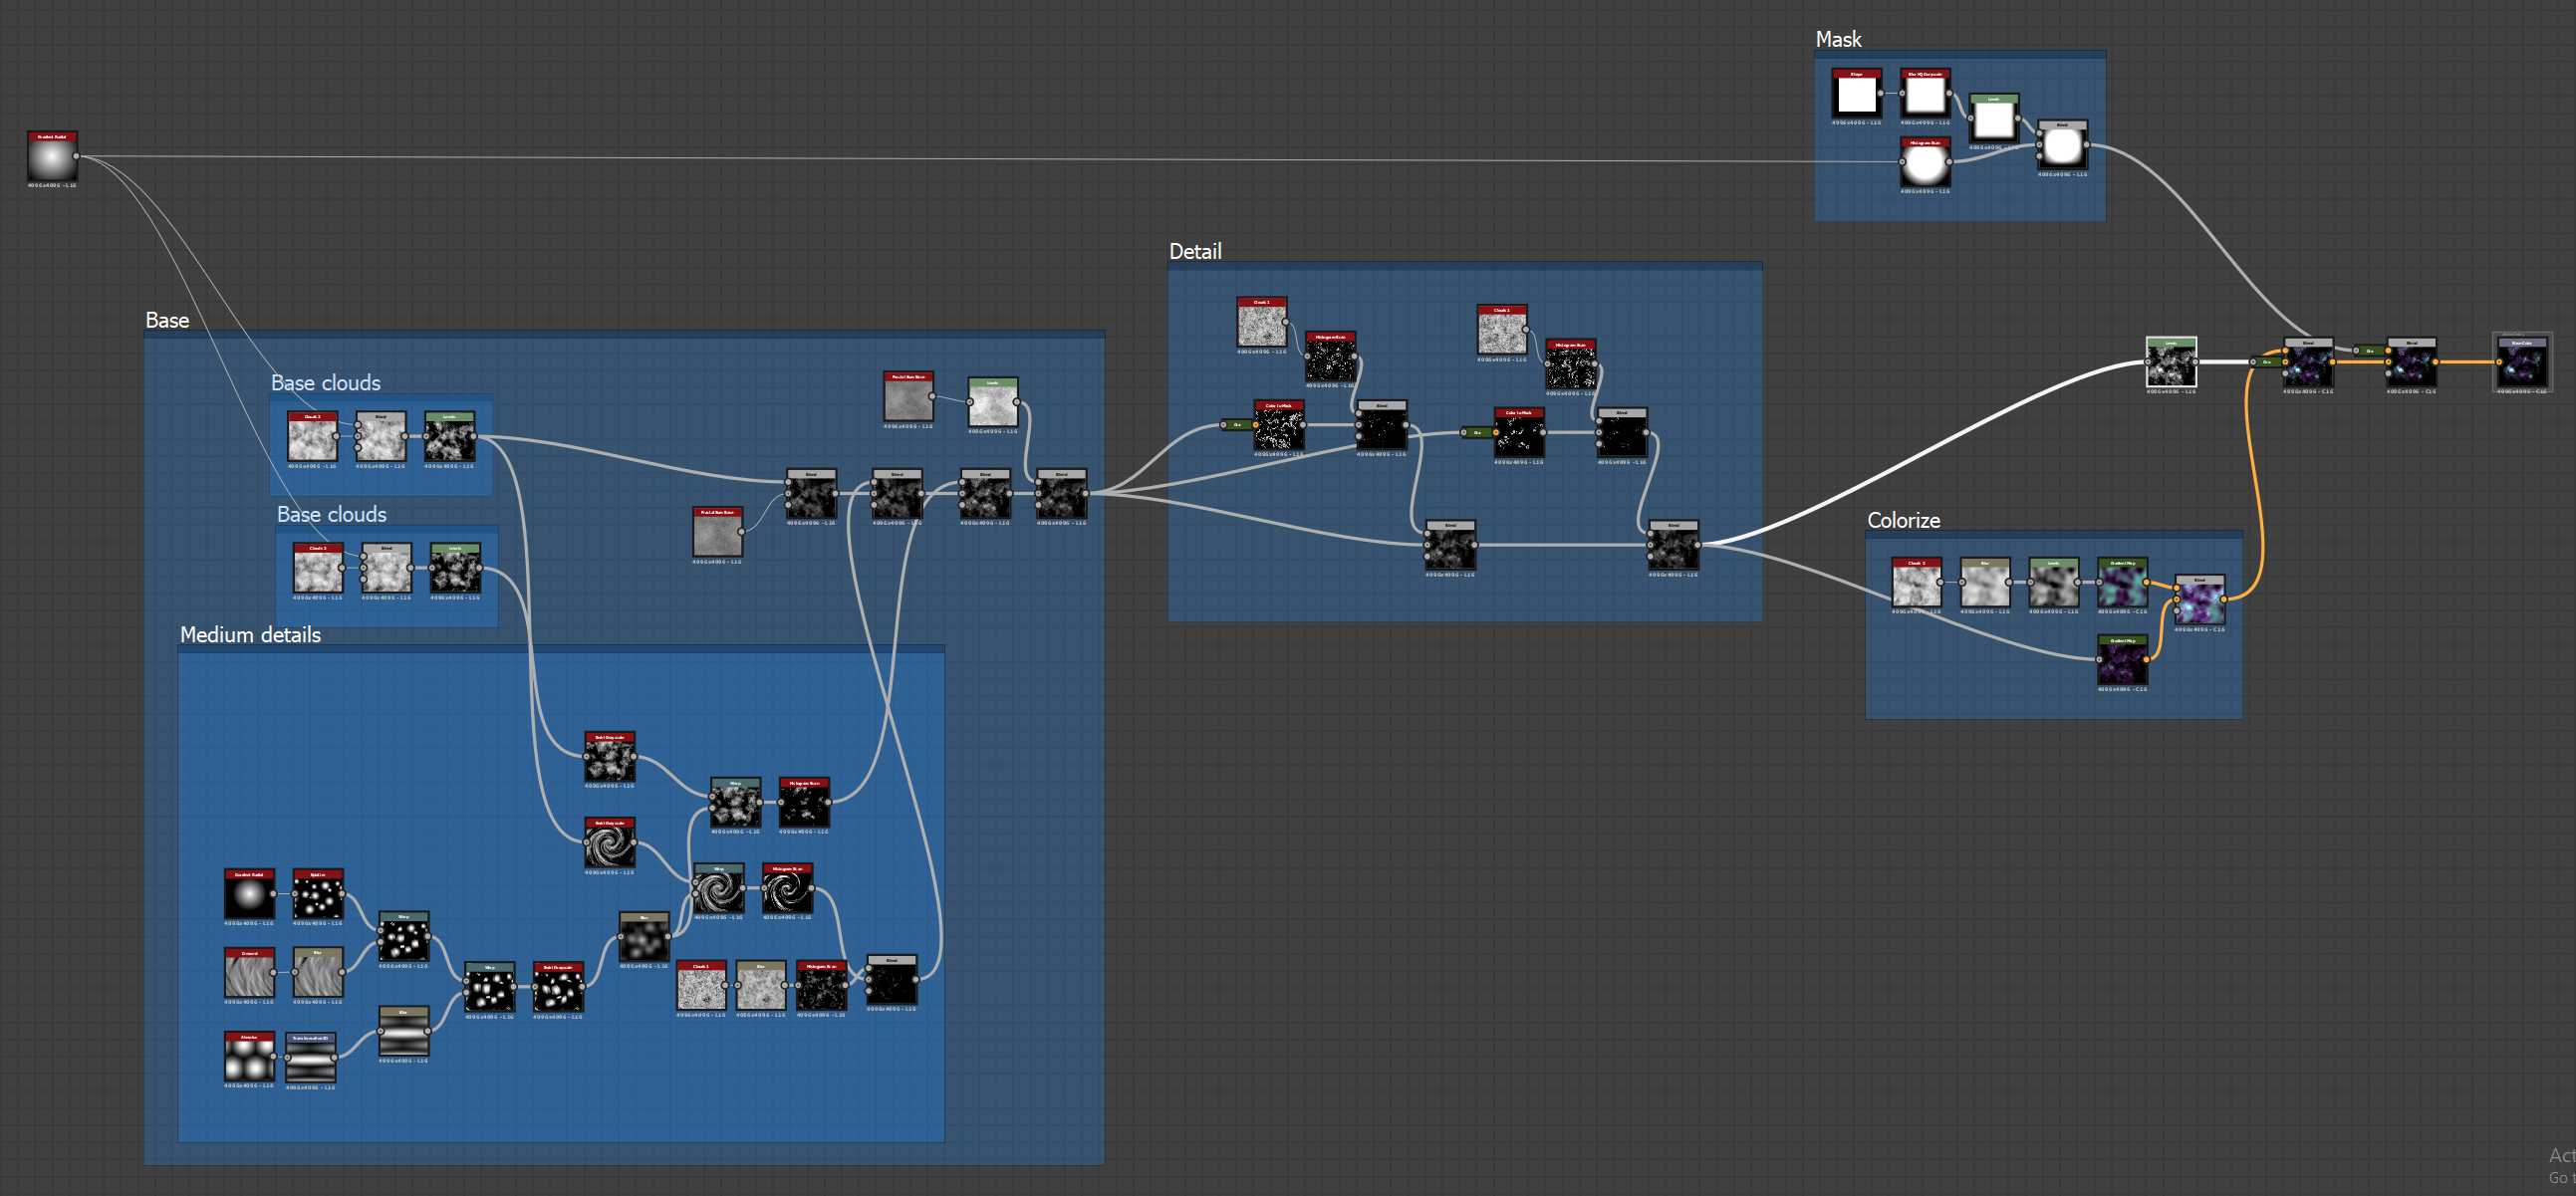
And this is my Substance Designer graph. It’s too big to be readable in one image so I might cover it in a separate post. The short version is that it’s made out of many multiplied layers of cloud noise, then some details are extracted that are both added and subtracted to give depth and create a space-y (?) feel.
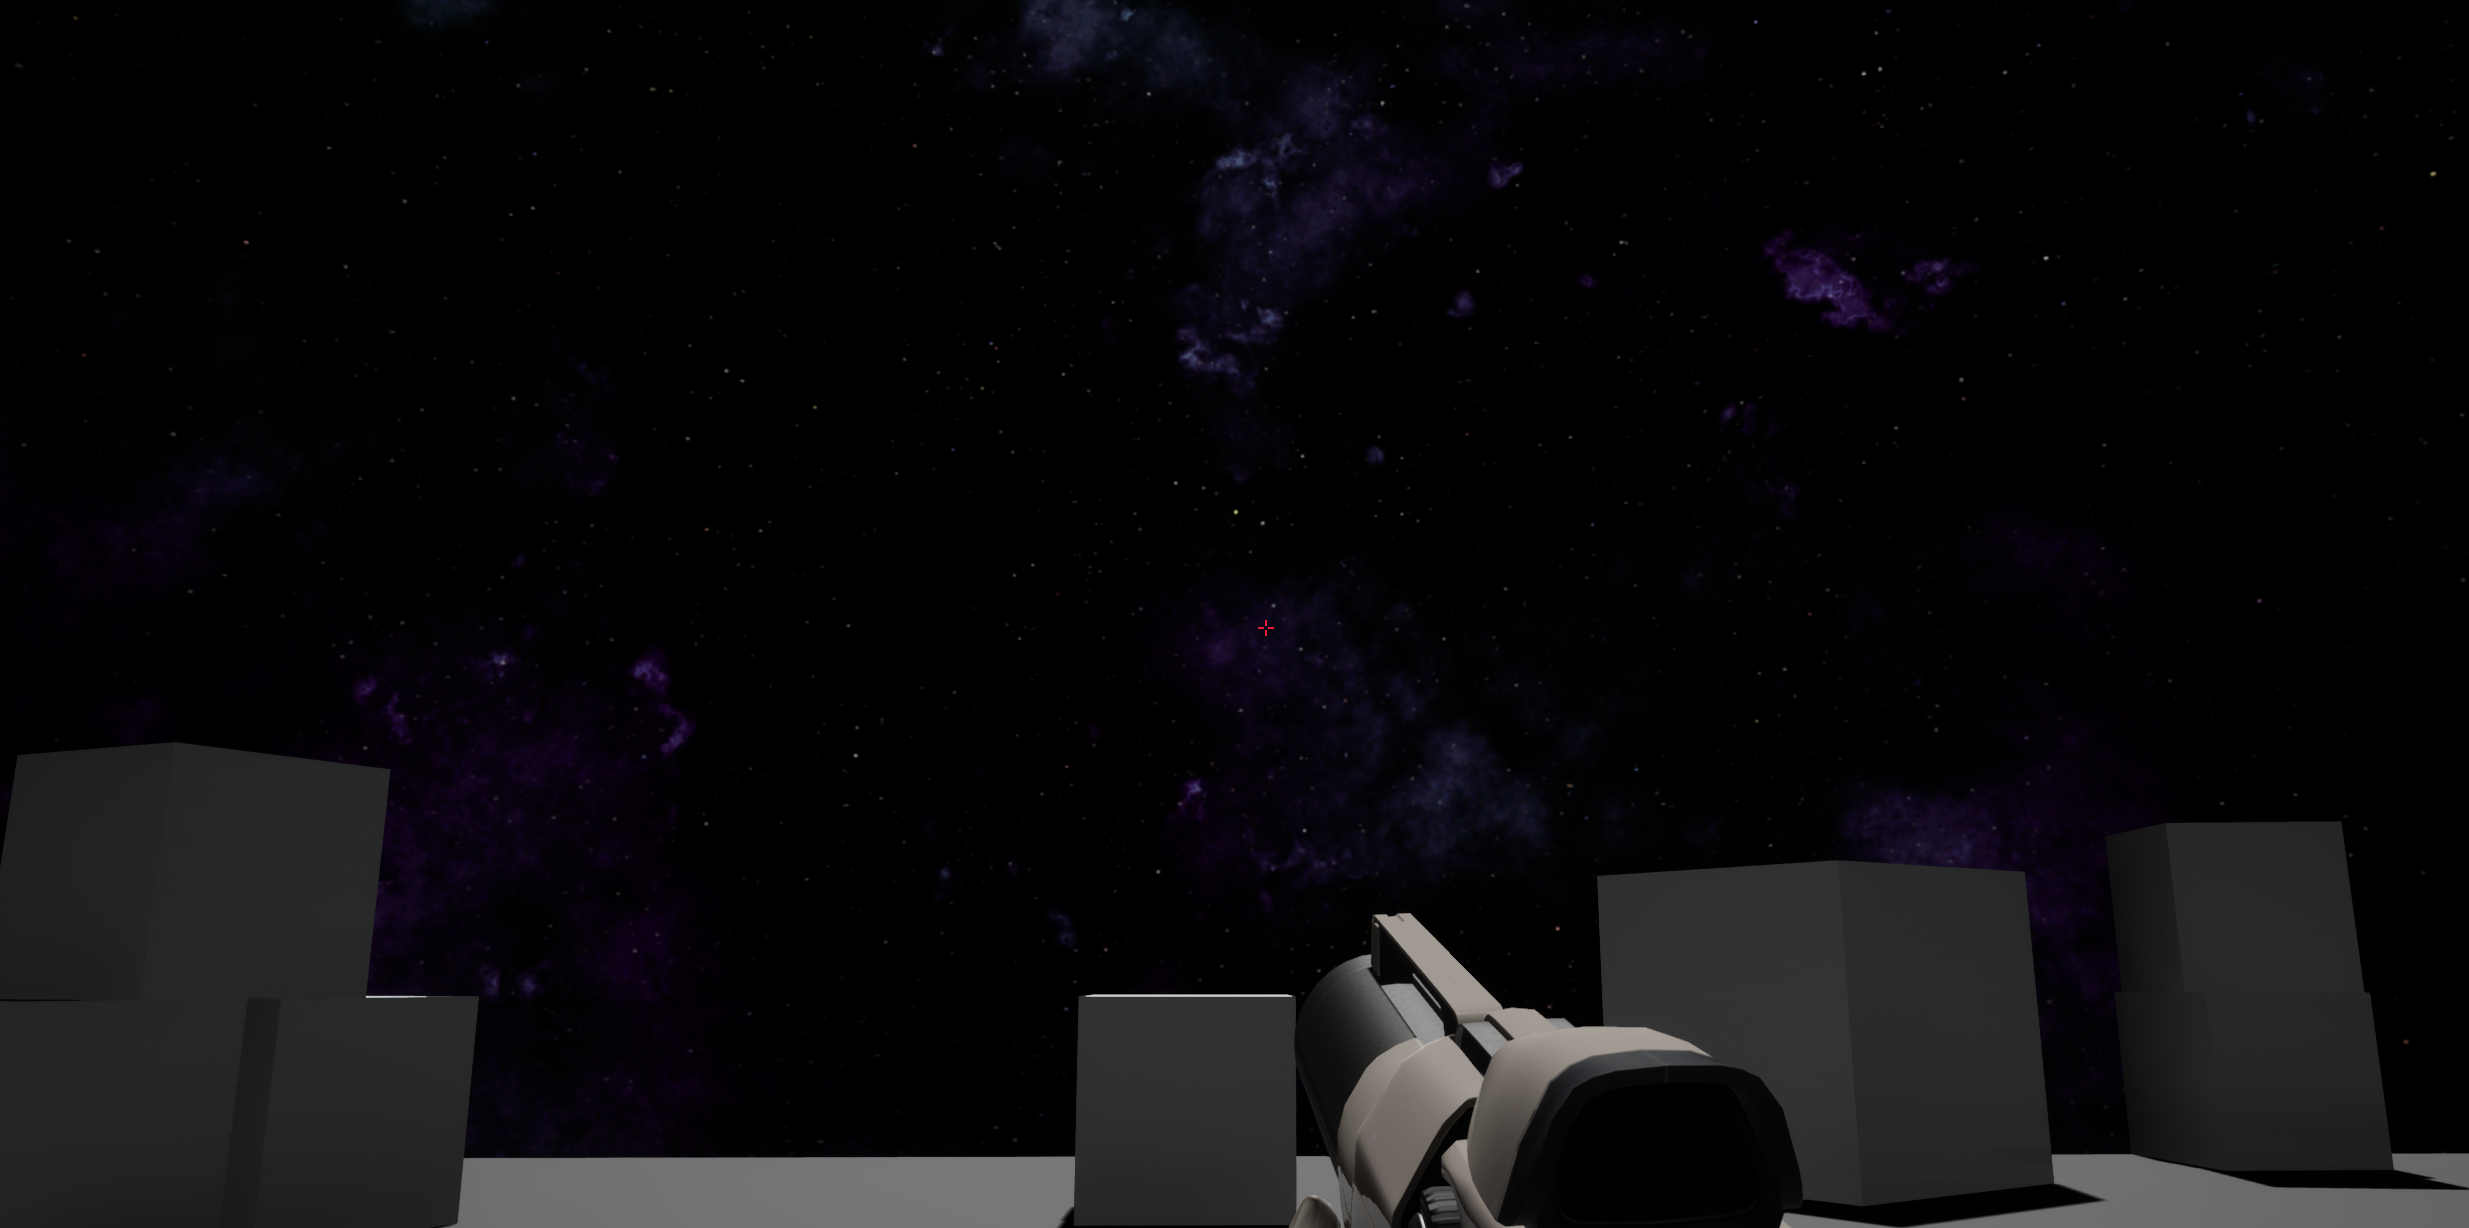
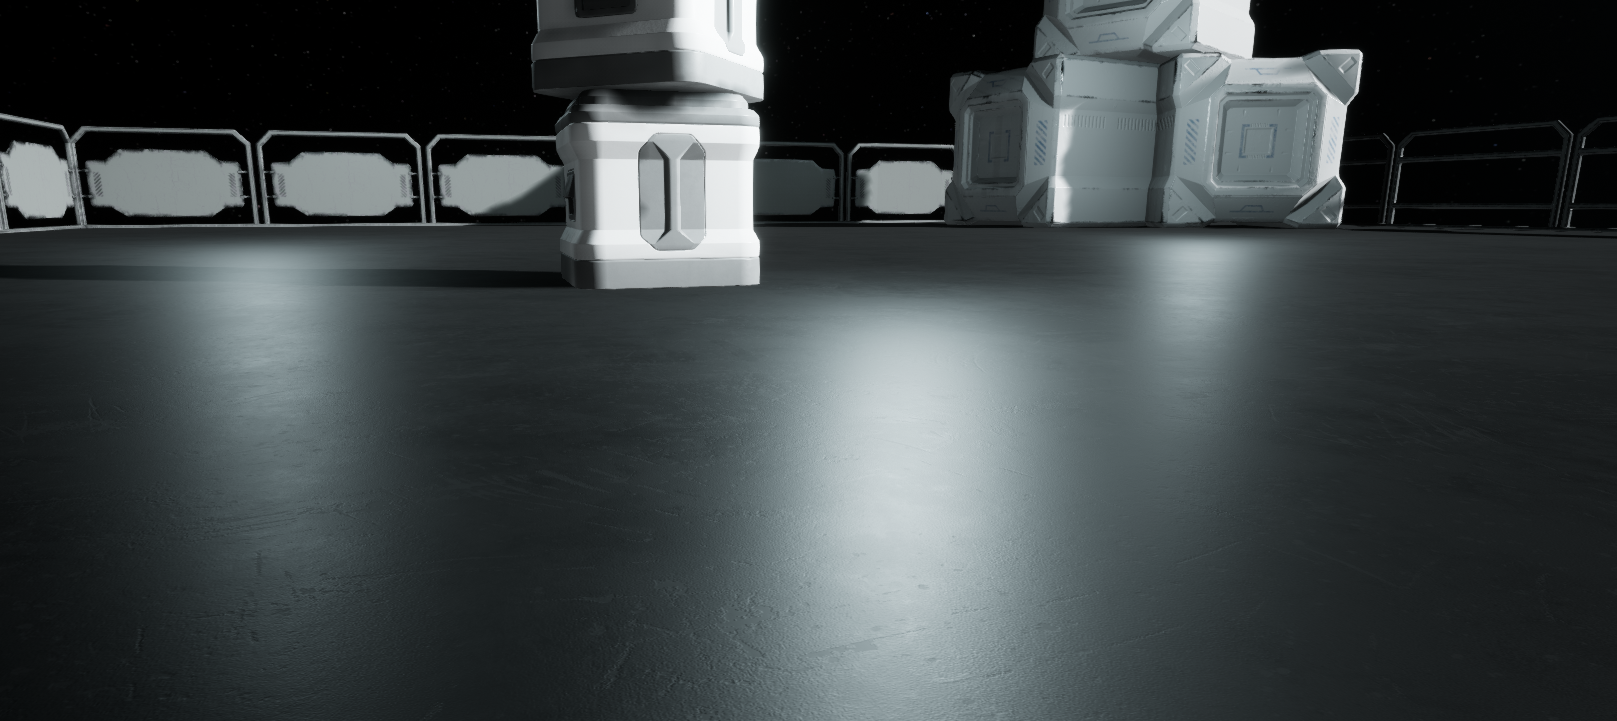
In Unreal Engine it looks like this, with some tweaks to density and intensity parameters:
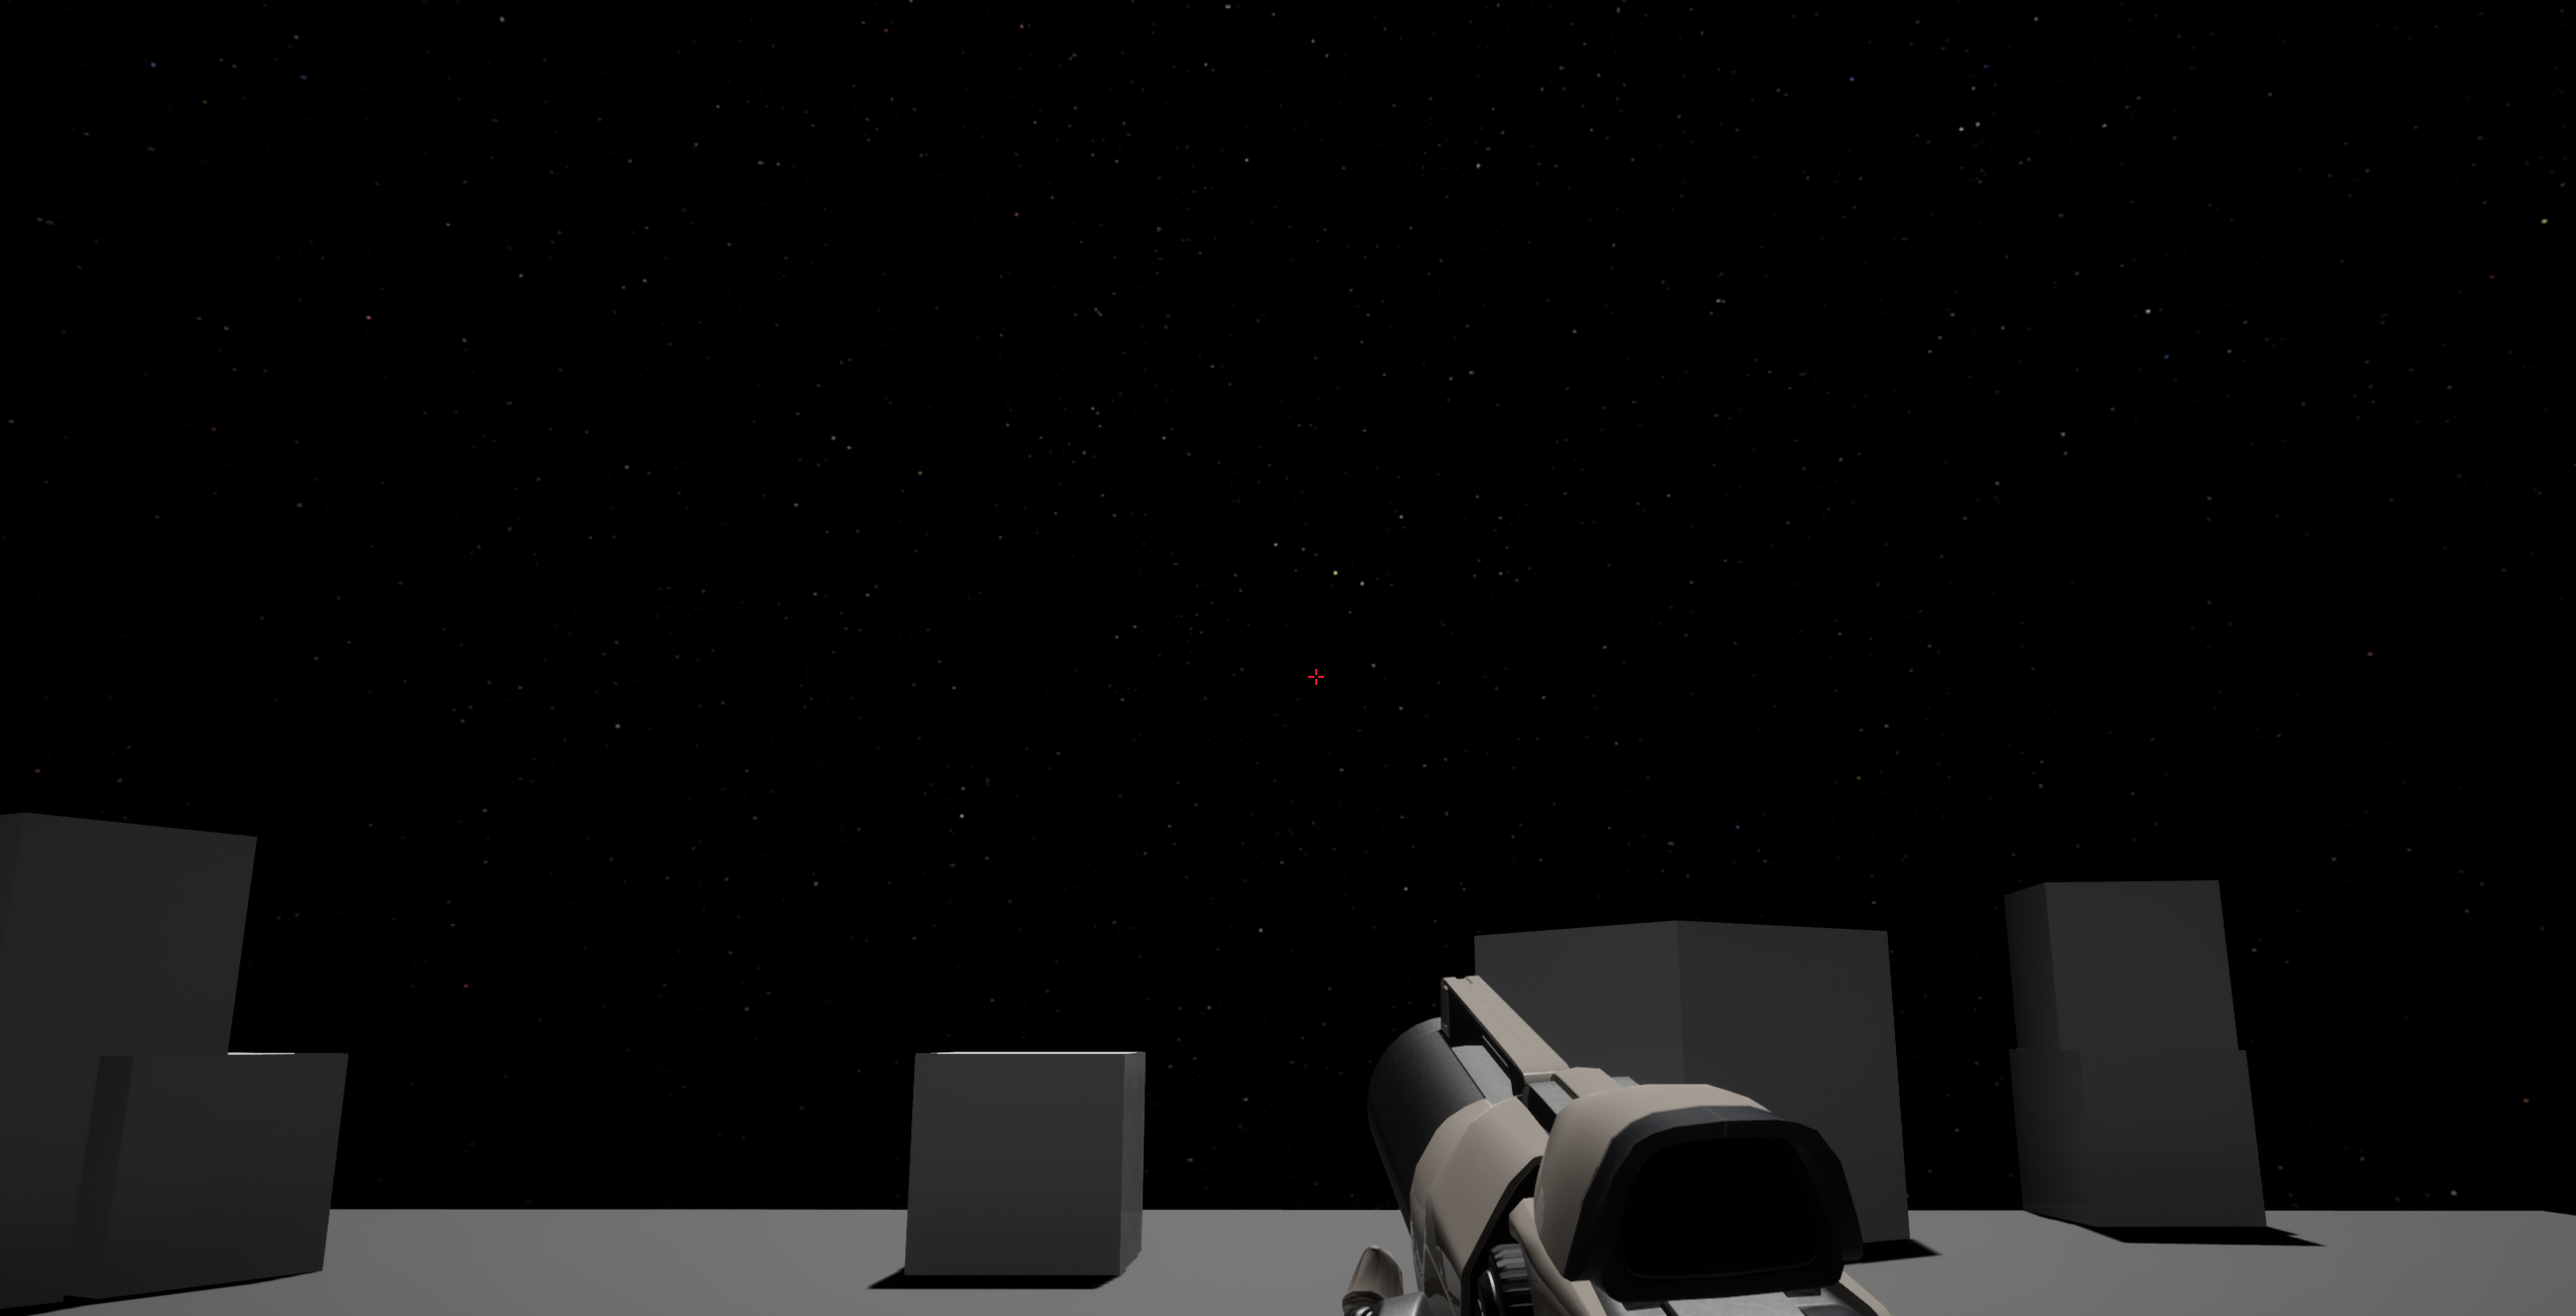
Here’s an earlier attempt that looks cool but is way too intense.
The setup in Unreal is that I’ve mapped 3 different variations of the space clouds texture onto 3 different curved planes in the distance. Since Substance Designer is all about procedural generation of textures I can change the “seed” number that generates the clouds in Unreal and get different variations of the space clouds.
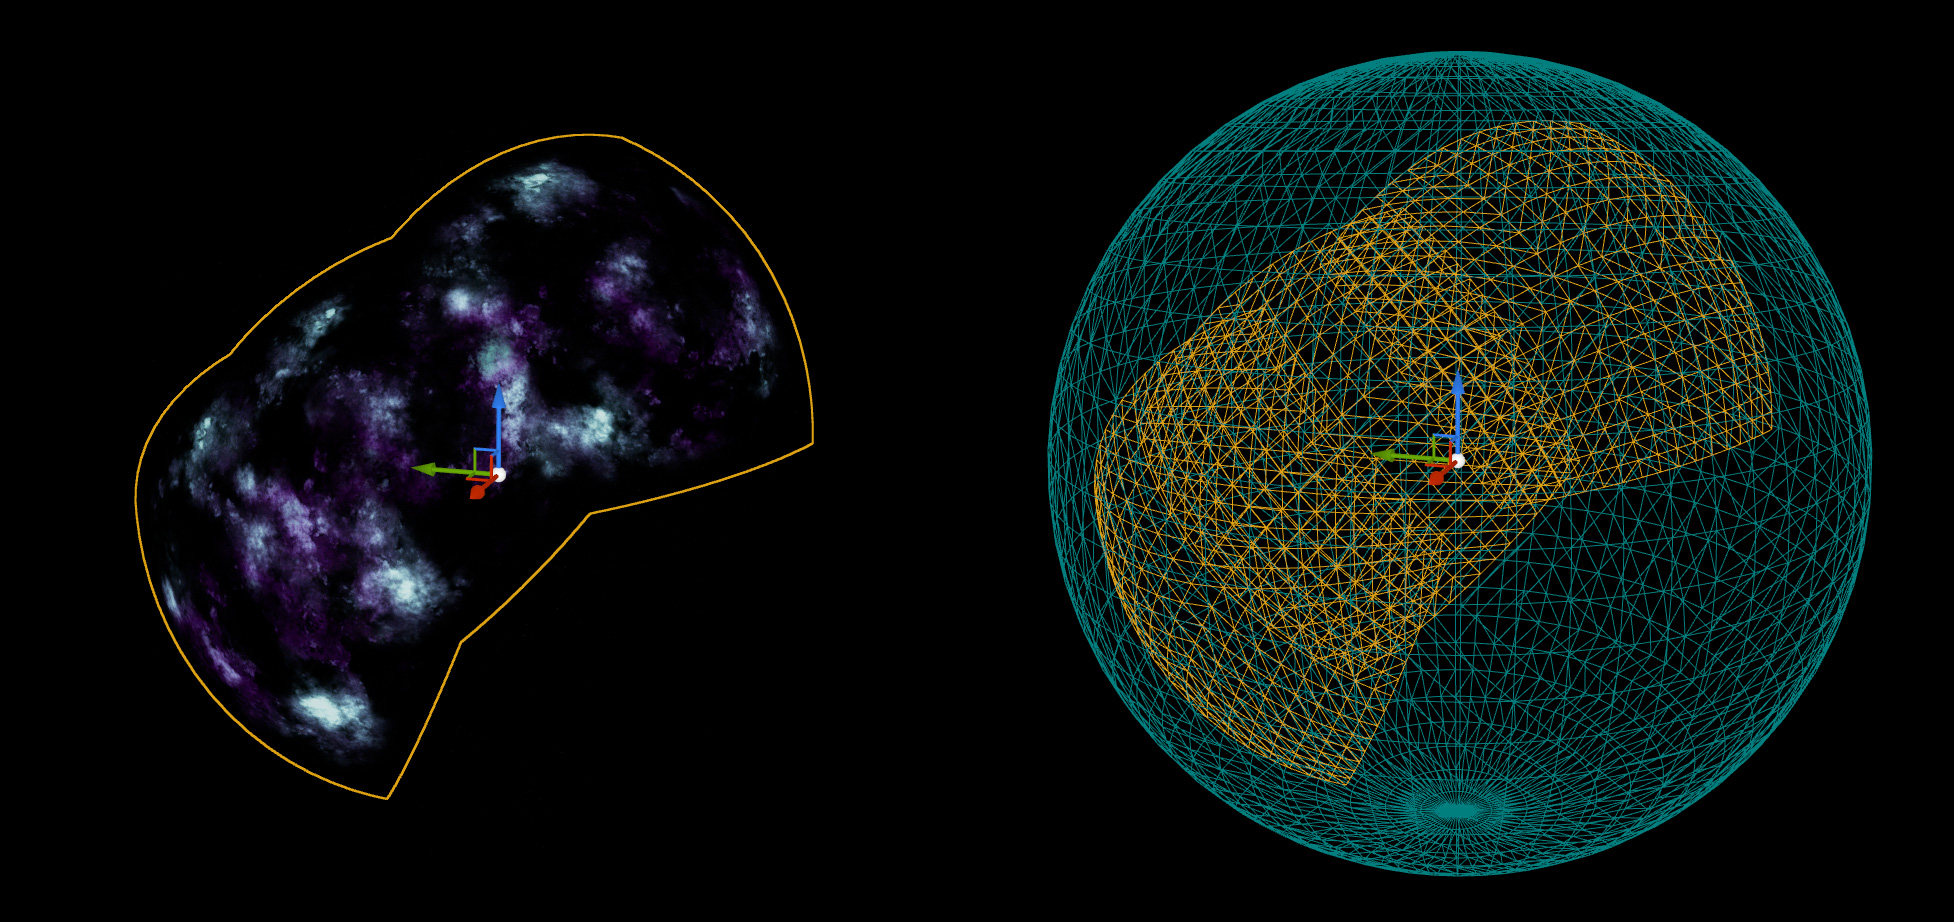
Below are 2 zoomed out views of the level, one normal and one in wireframe mode, where you can see the 3 curved planes better.
Sun
A space environment would not be complete without a sun, as I’m imagining one would be zooming between solar systems for the most part. So a local sun with an aesthetically pleasing color is a must.
Looking at Eve Online, Star Citizen and Elite Dangerous as inspiration I created something that is not even remotely close to their suns, but it works.
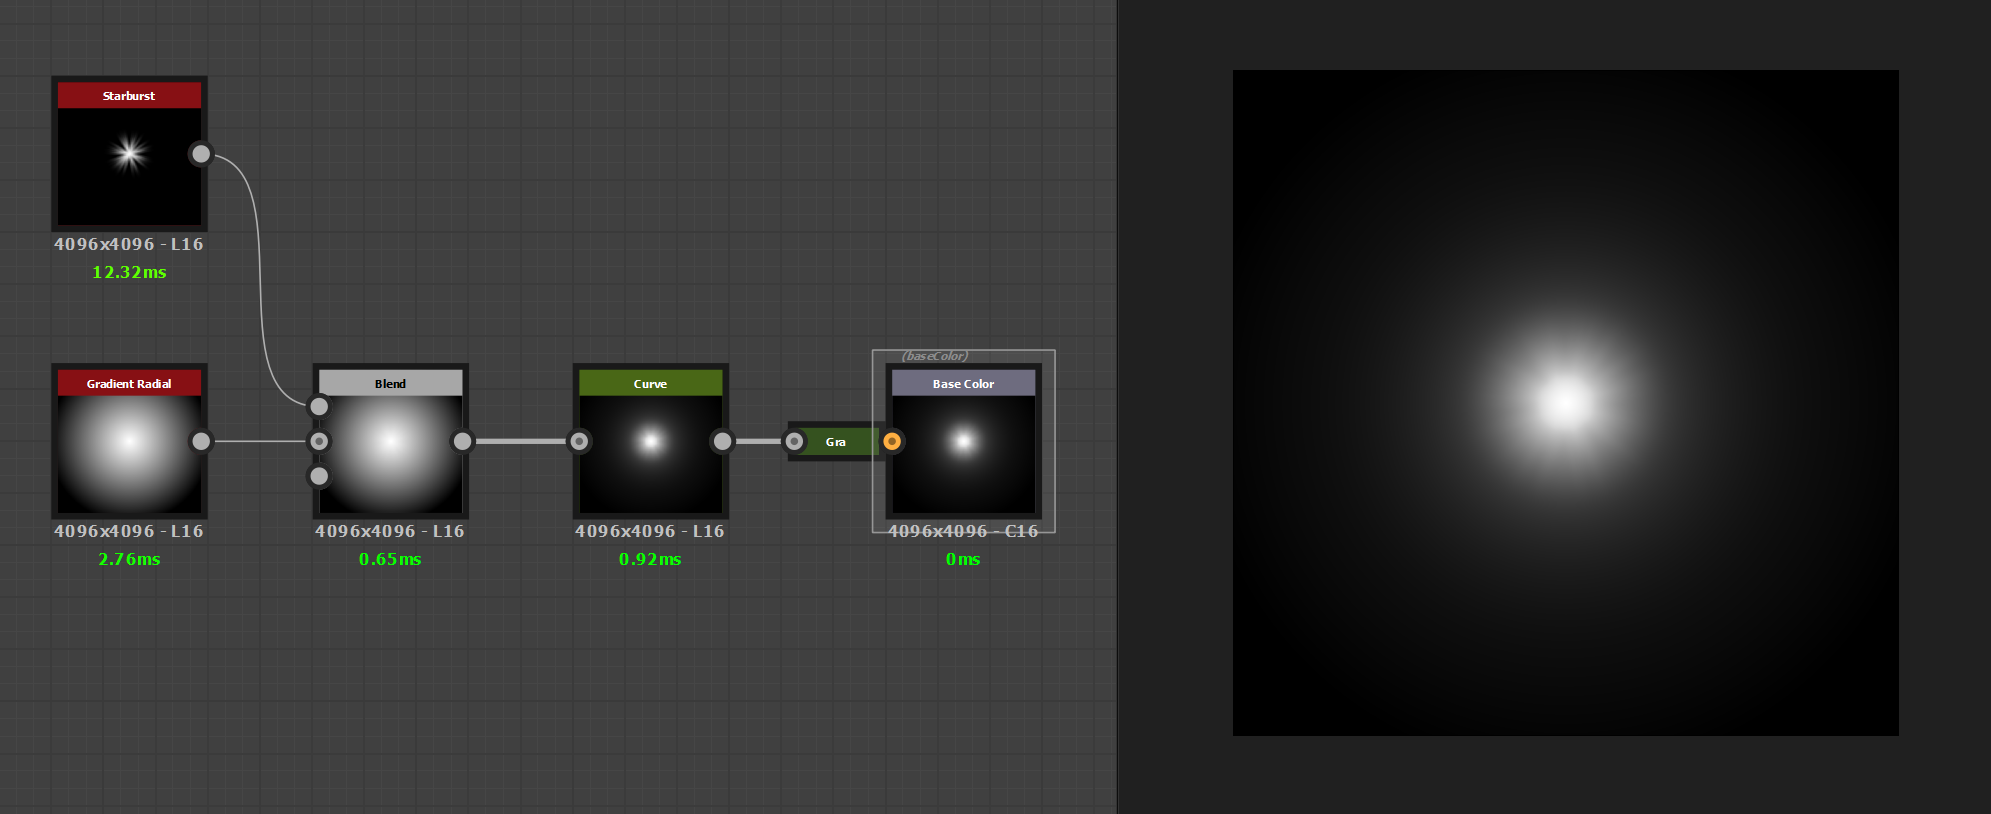
I ended up layering flat sun sprites of varying size and intensity combined with a glowing sphere in the center to create my sun. One layer being very large and subtle to create a nice ambient background color around the greater area of the sun.
Here’s what it looks like in Unreal:
While experimenting I noticed that the blurrier it is, the further away it appears. I believe it is because you can’t really discern its size. It can be demonstrated in this example where it appears much closer due to its edges being distinguishable.
By digging deeper into the sun Blueprint I made in Unreal I found a way to assign the color of all layers to a variable to more easily create suns in different colors
I’ve also added an easy way to control the sun’s distance, which really just is changing it’s scale but the perceived effect is how close or far it is. The intensity of the directional light shining from the sun, as well as the ambient glow are adapted to its proximity. This is demonstrated in this video:
Space Boxes
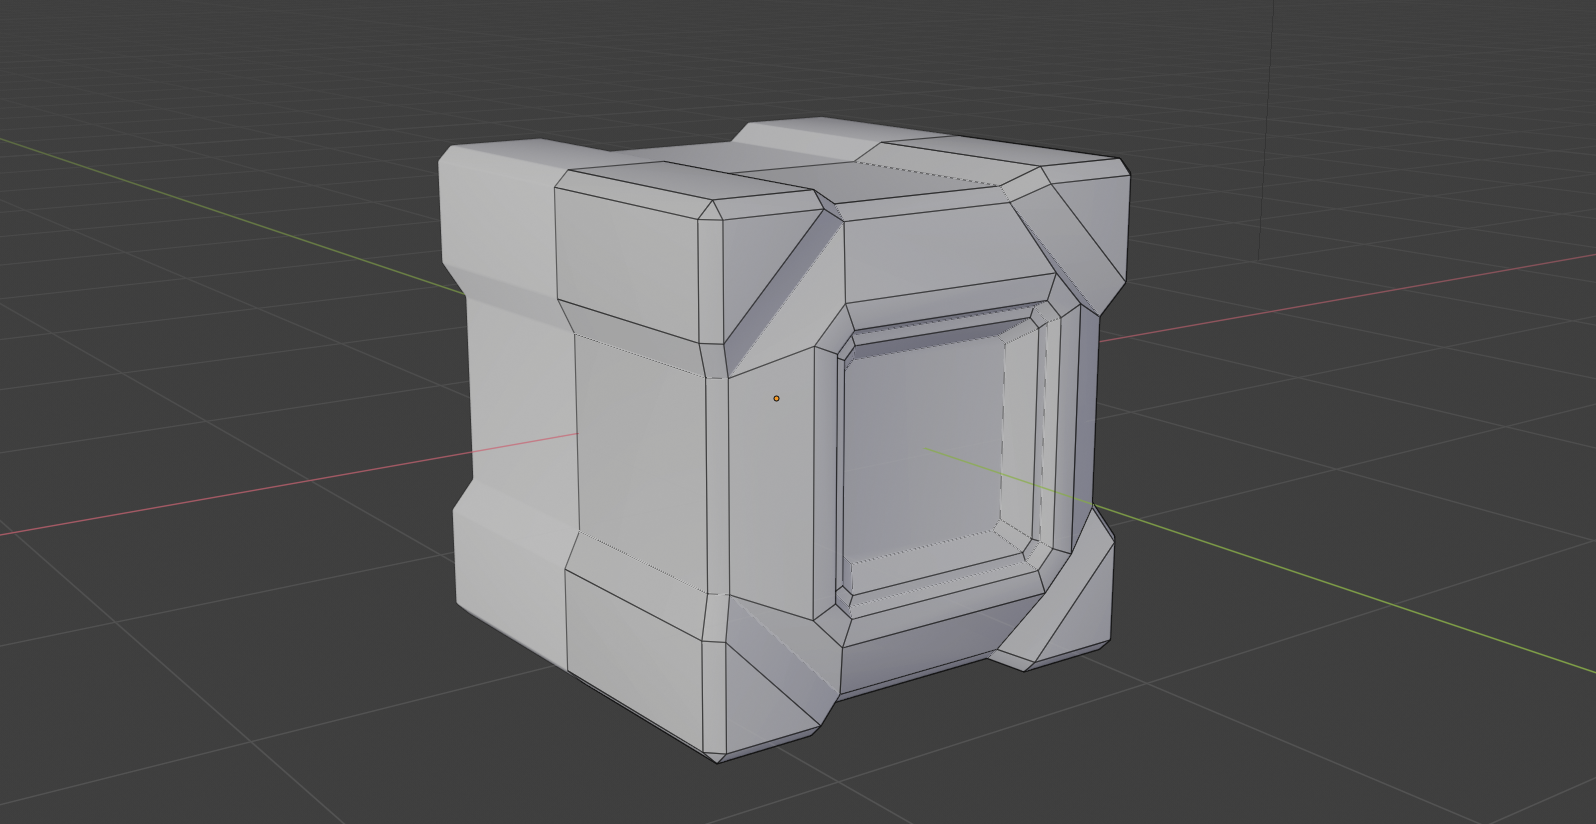
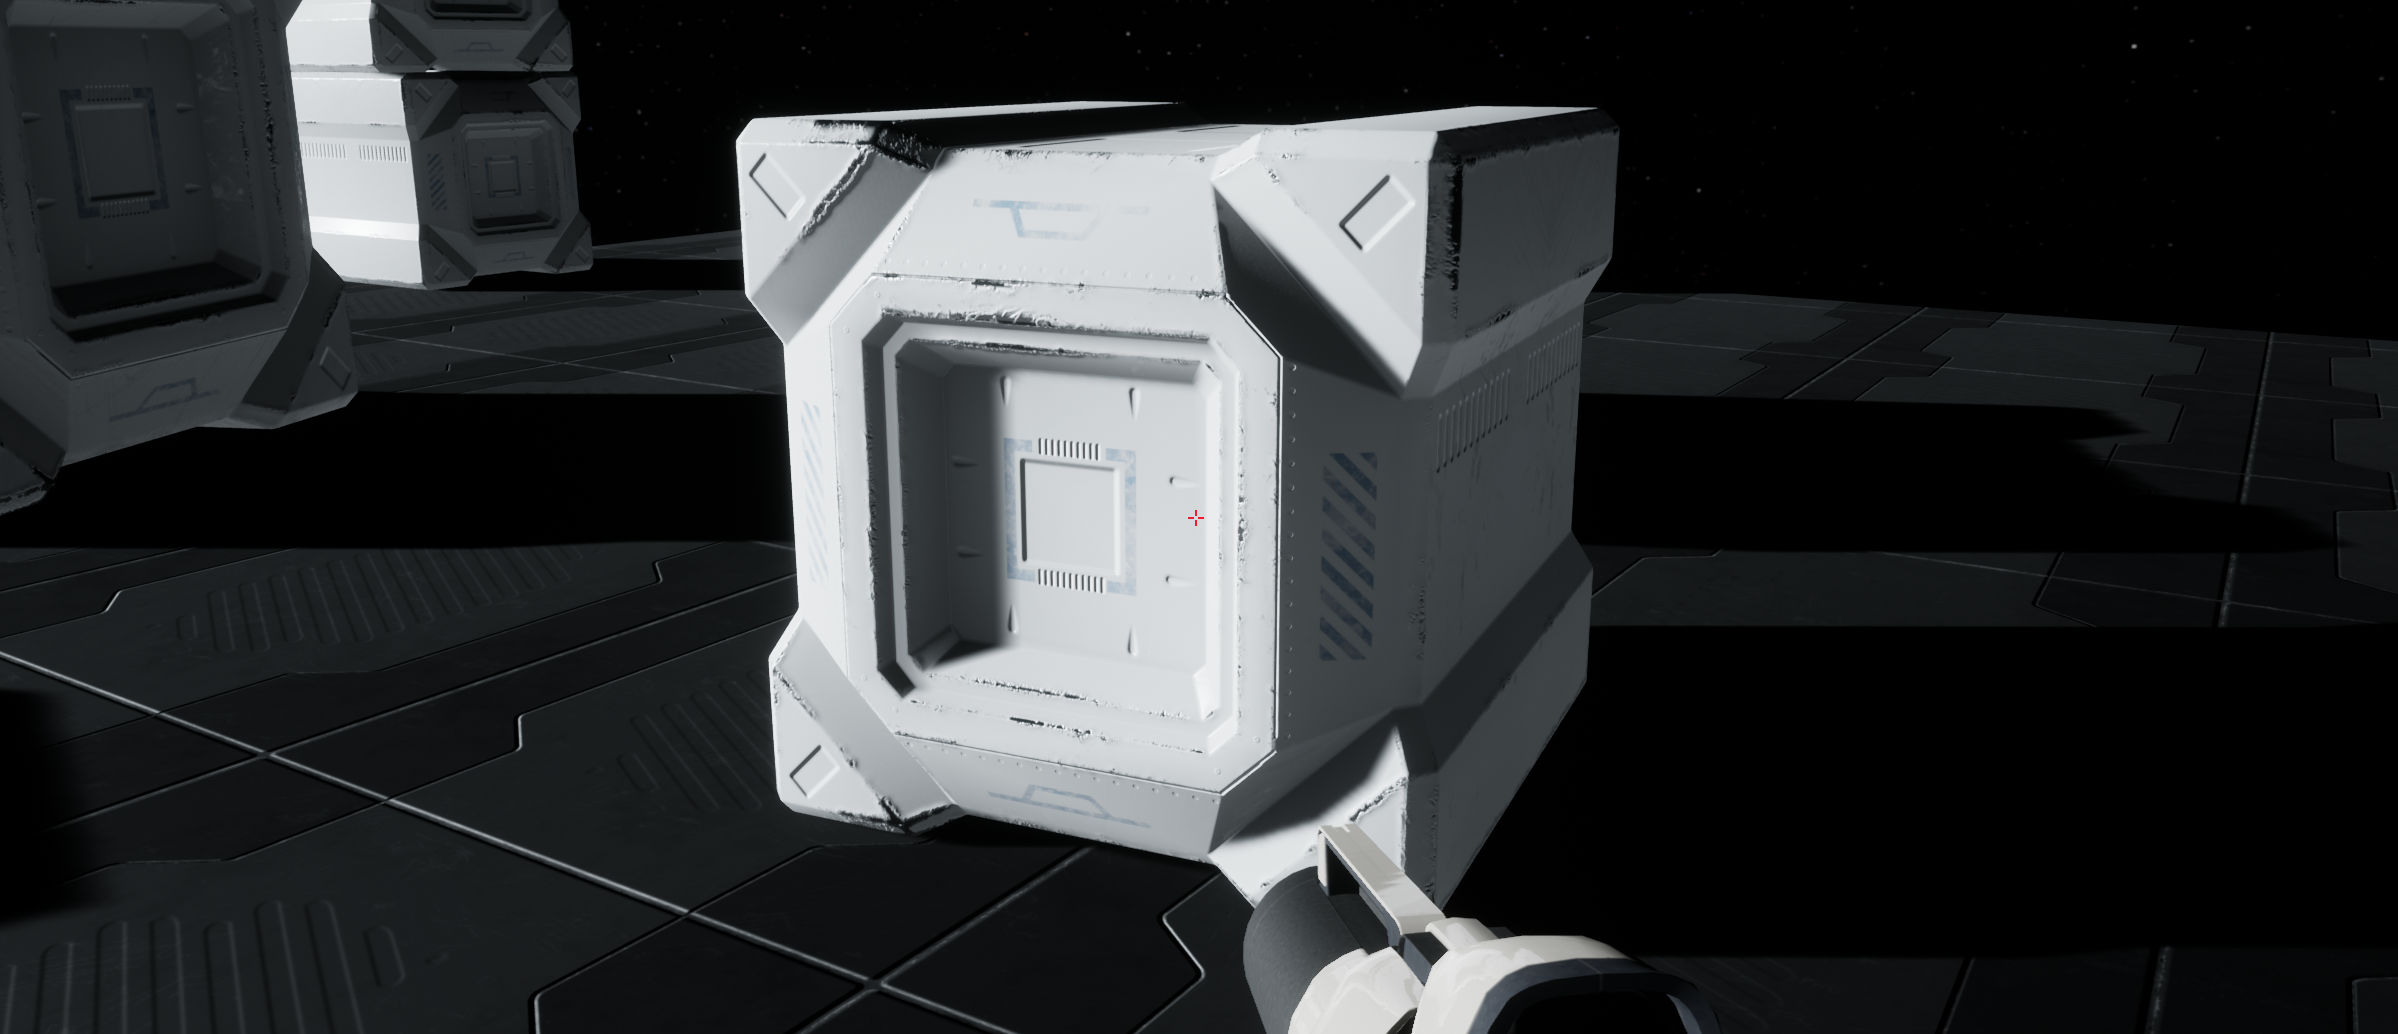
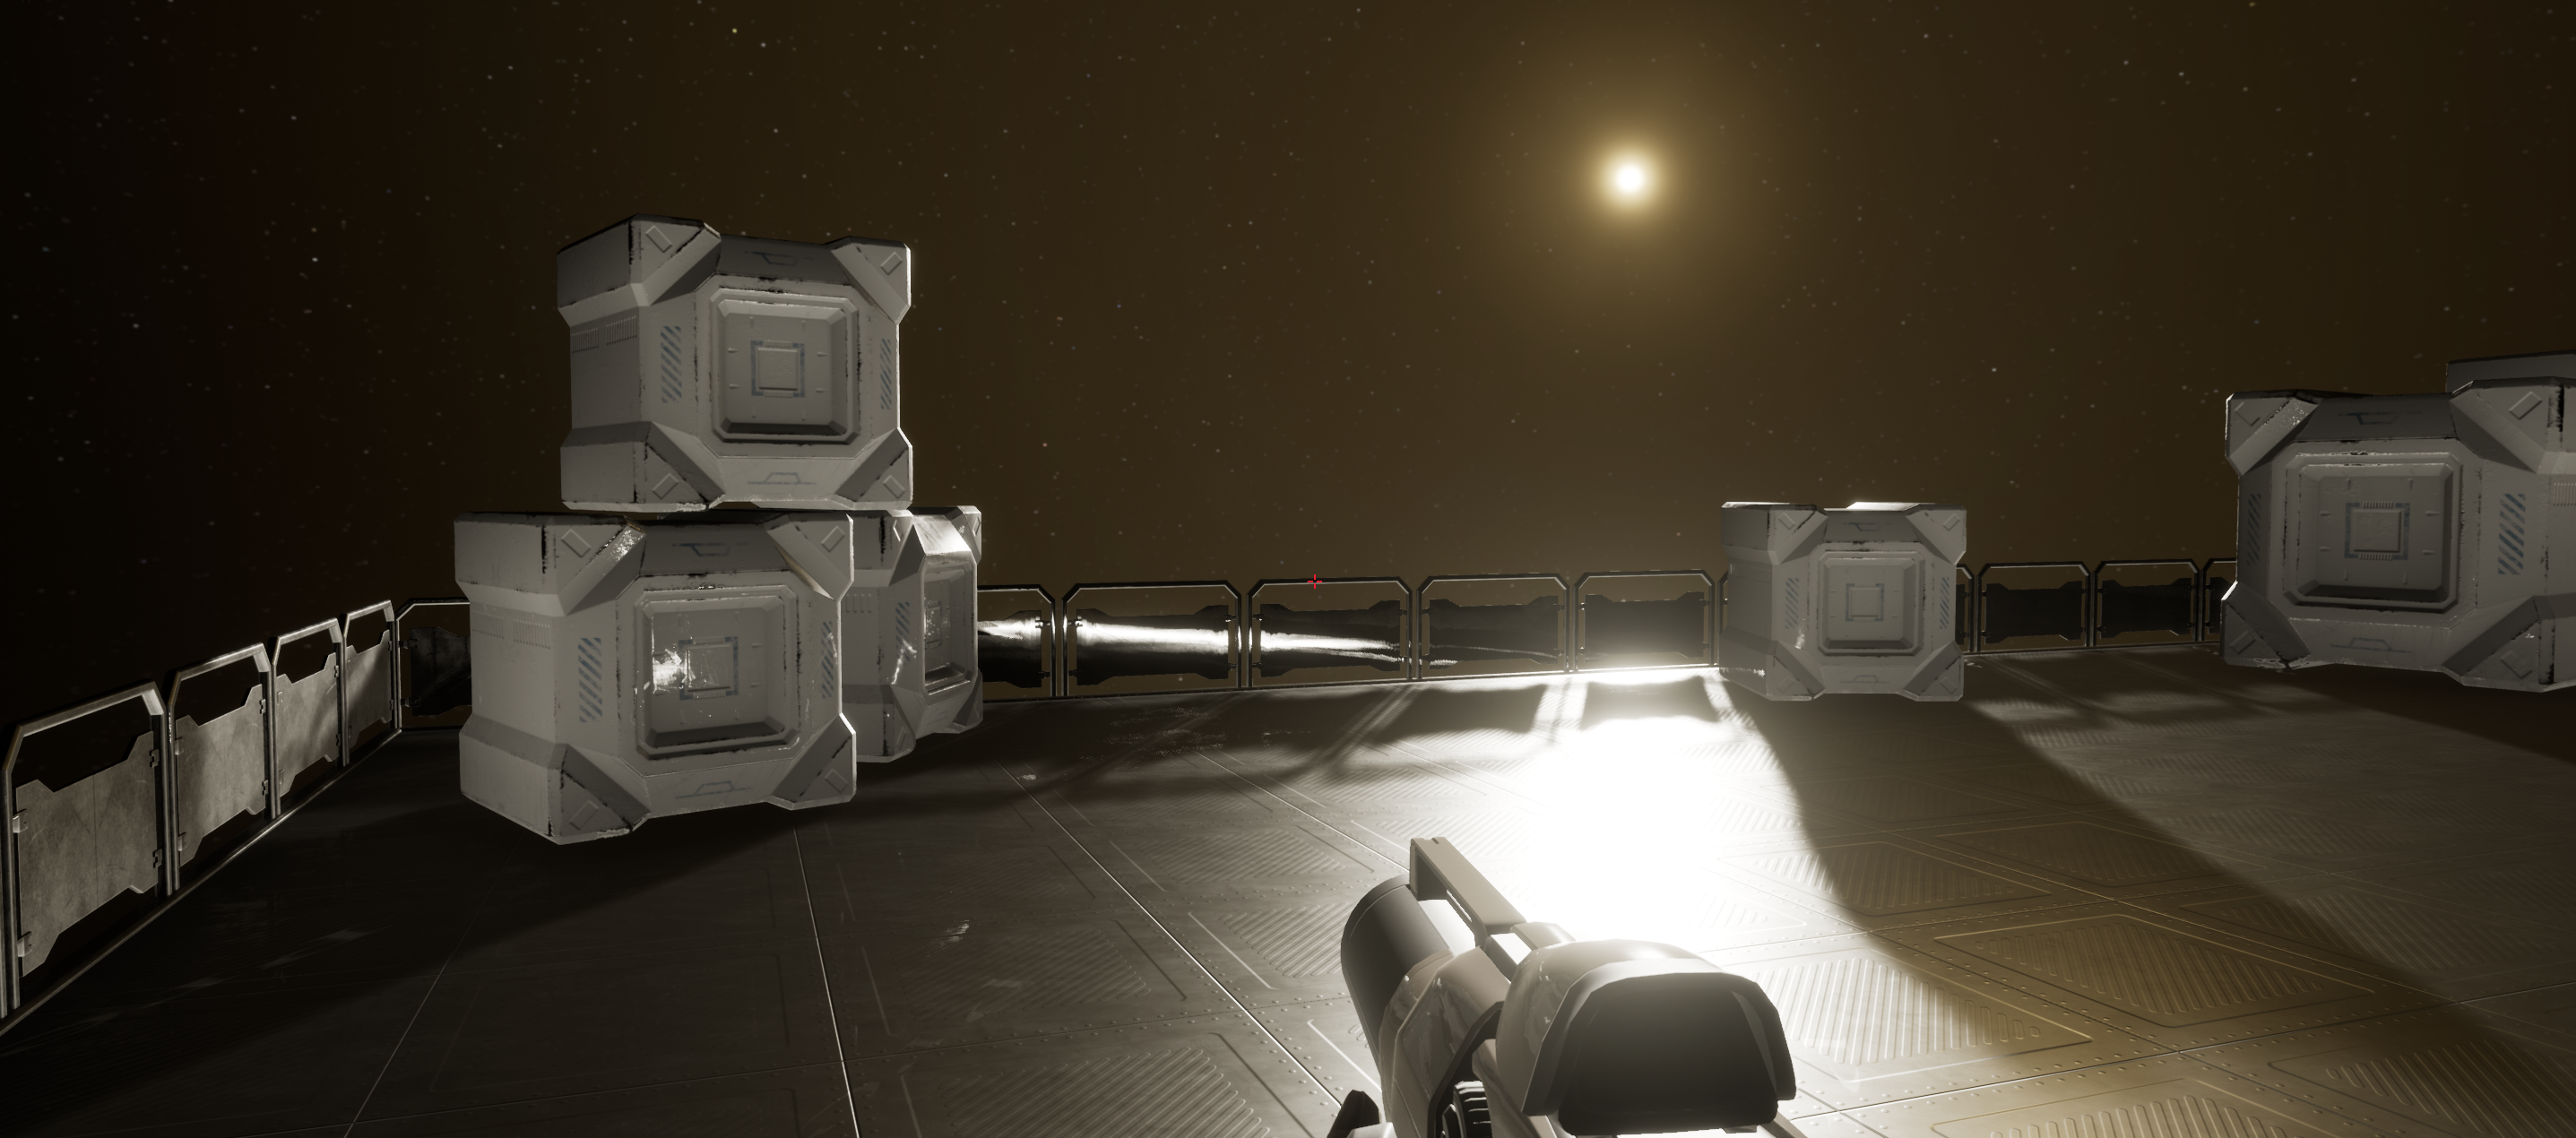
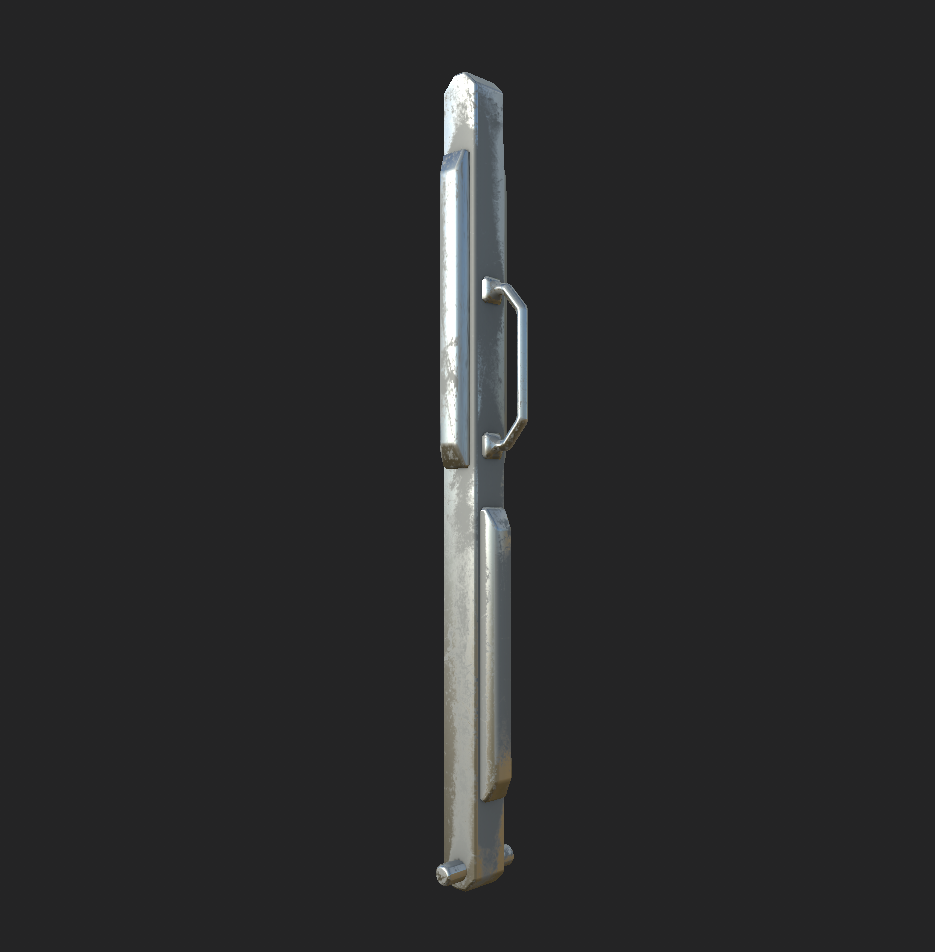
What is space without boxes? Totally fine, probably. But any space game still needs boxes that look sci-fi-y, obviously.
Since I can’t work on one thing for too long without getting bored, I pivoted from designing the space scape to upgrading the floor and the boxes that come with the default First Person example map in UE4.
Here’s the result:
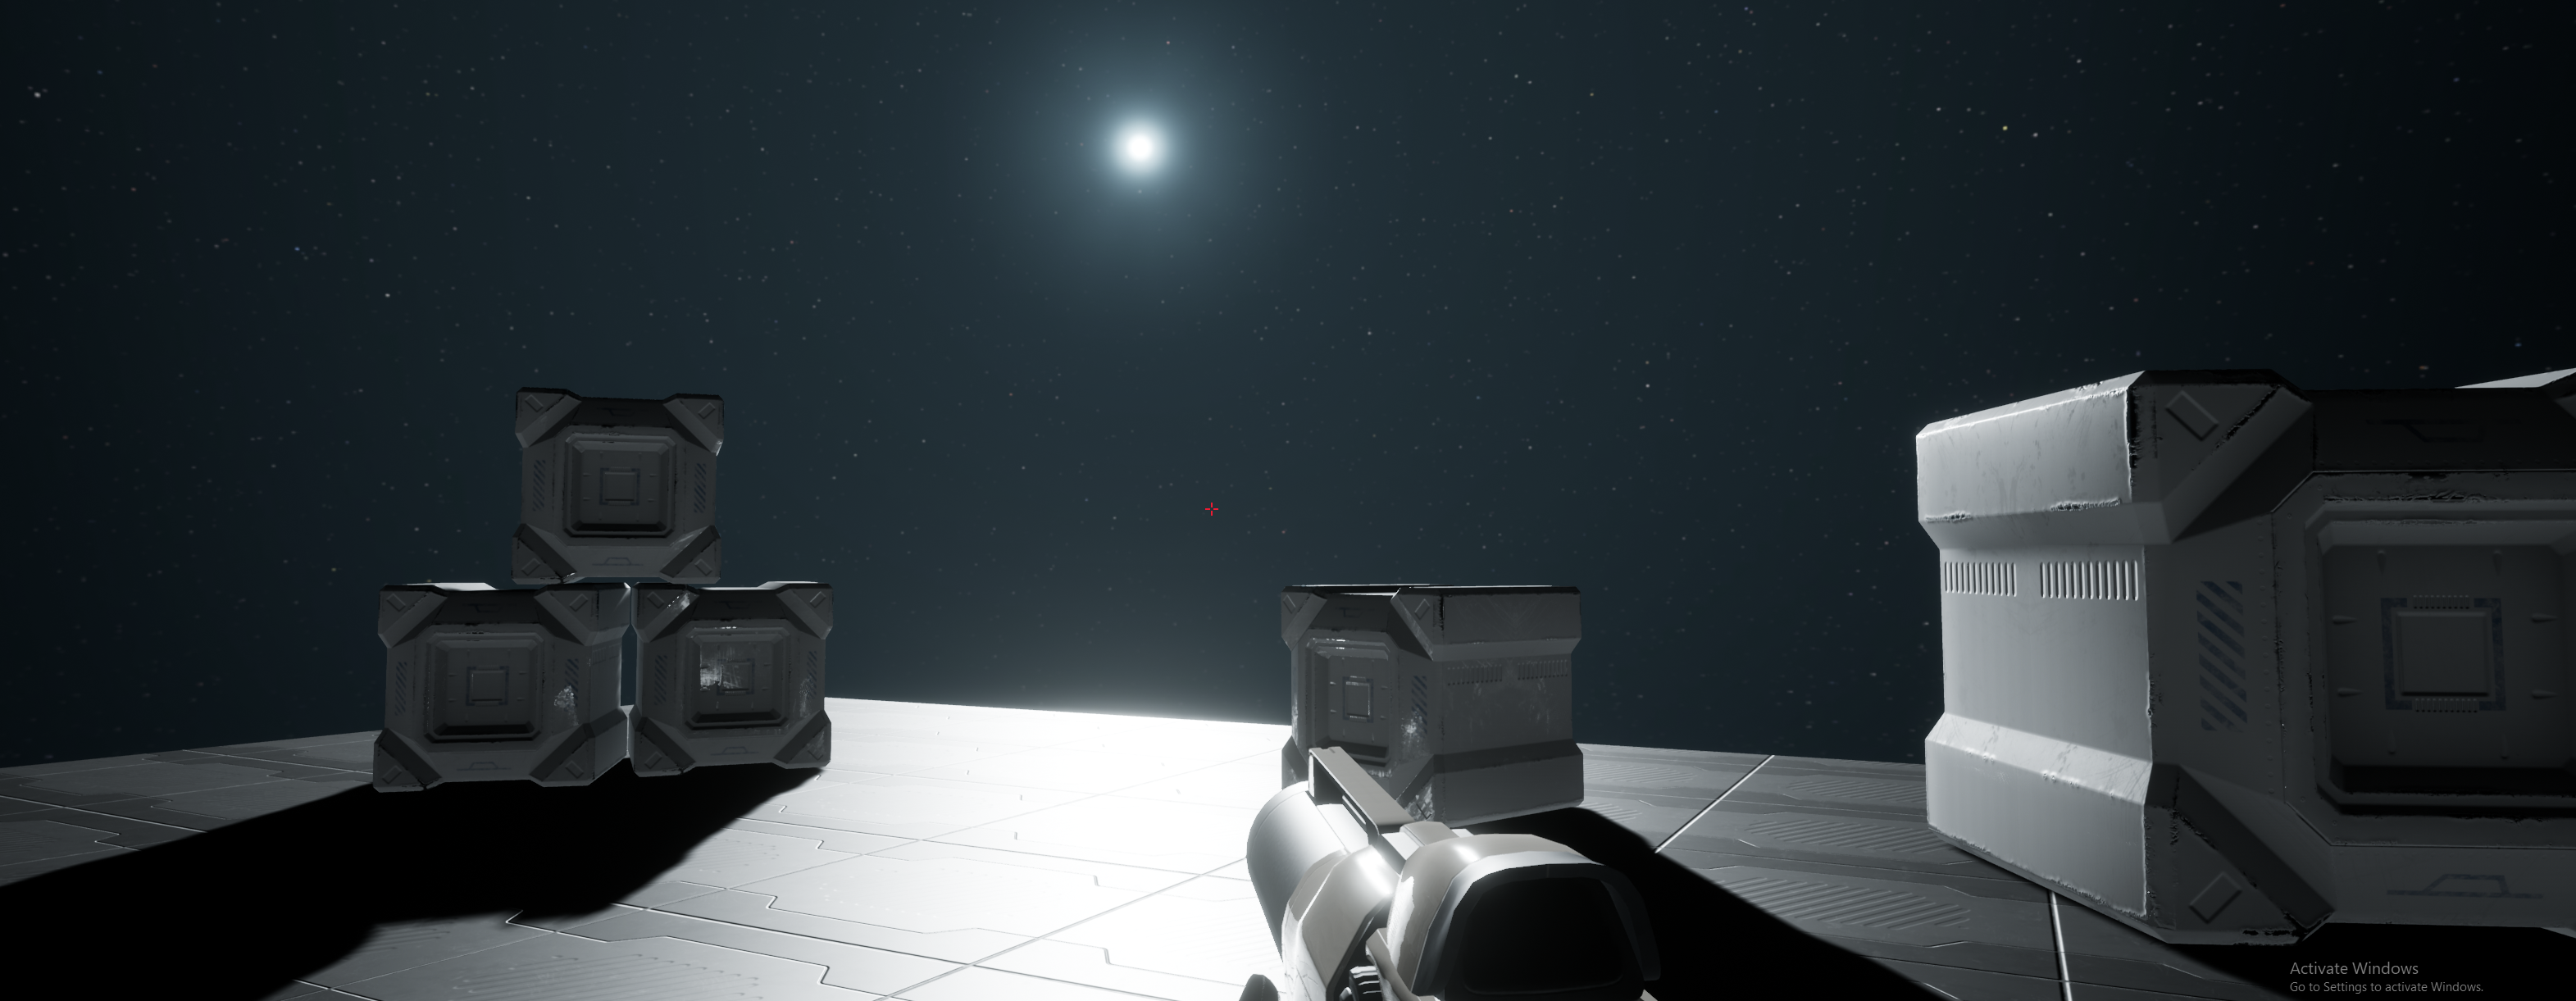
I modeled the box in Blender and textured it in Substance Painter. The box material is painted metal with worn edges, this article describes a good method to achieve that. After the base was made I added a bunch of completely arbitrary details to the normal map and the base color map to make it look more interesting. This is with only the base material, and this is with the completely arbitrary details. And here’s a close up of the space box in Unreal.
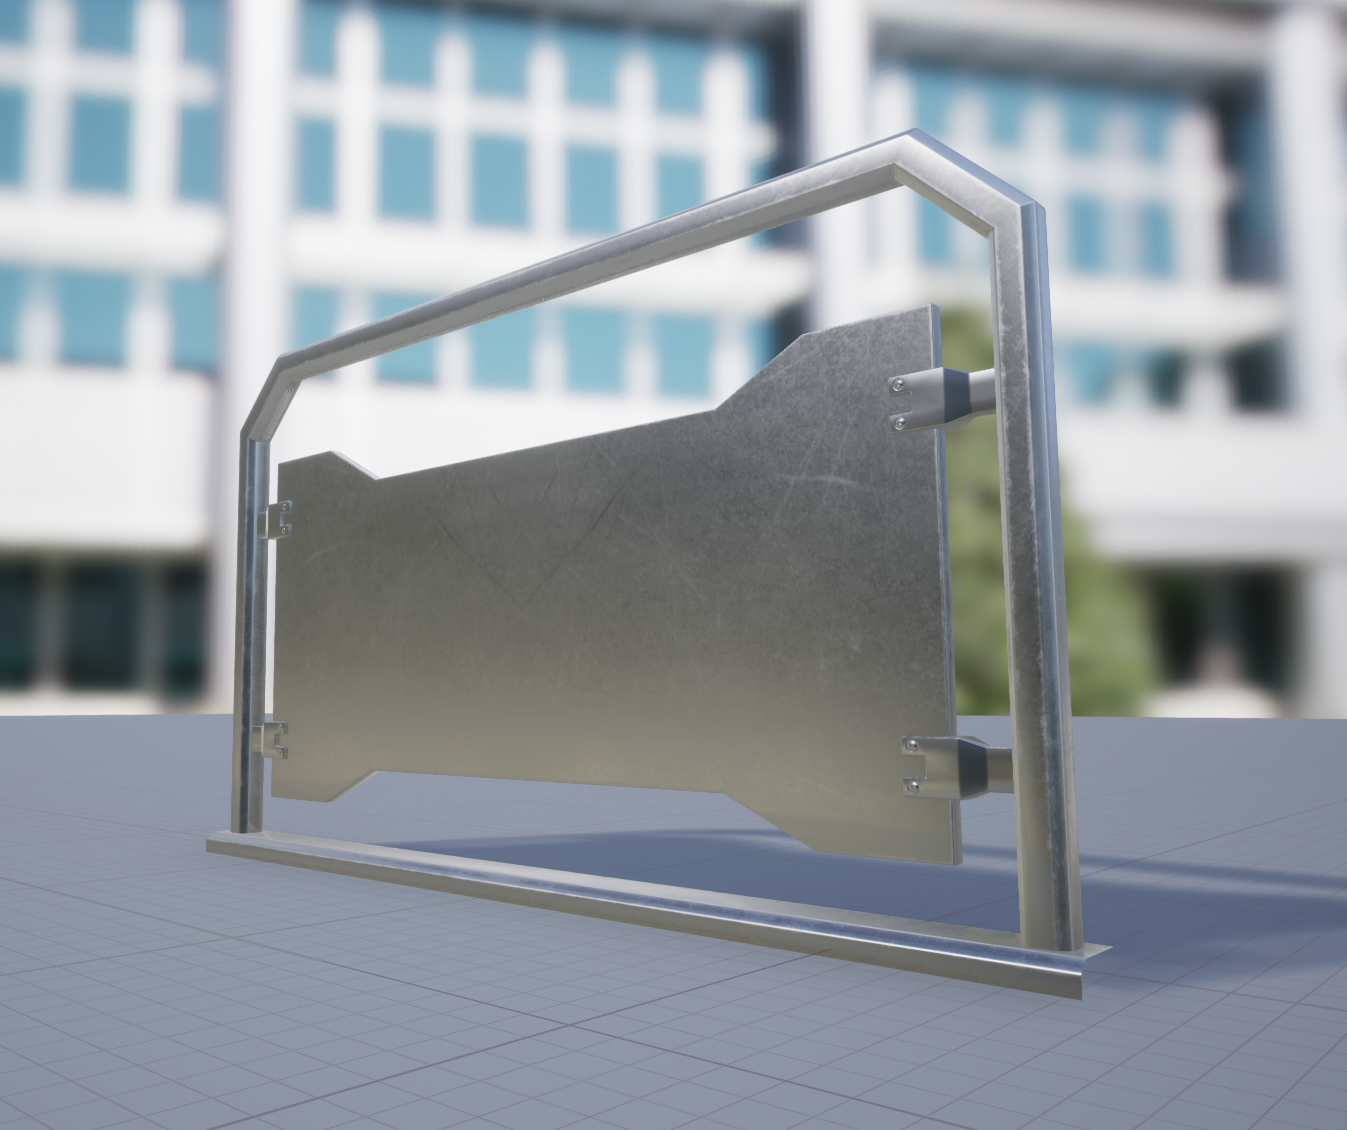
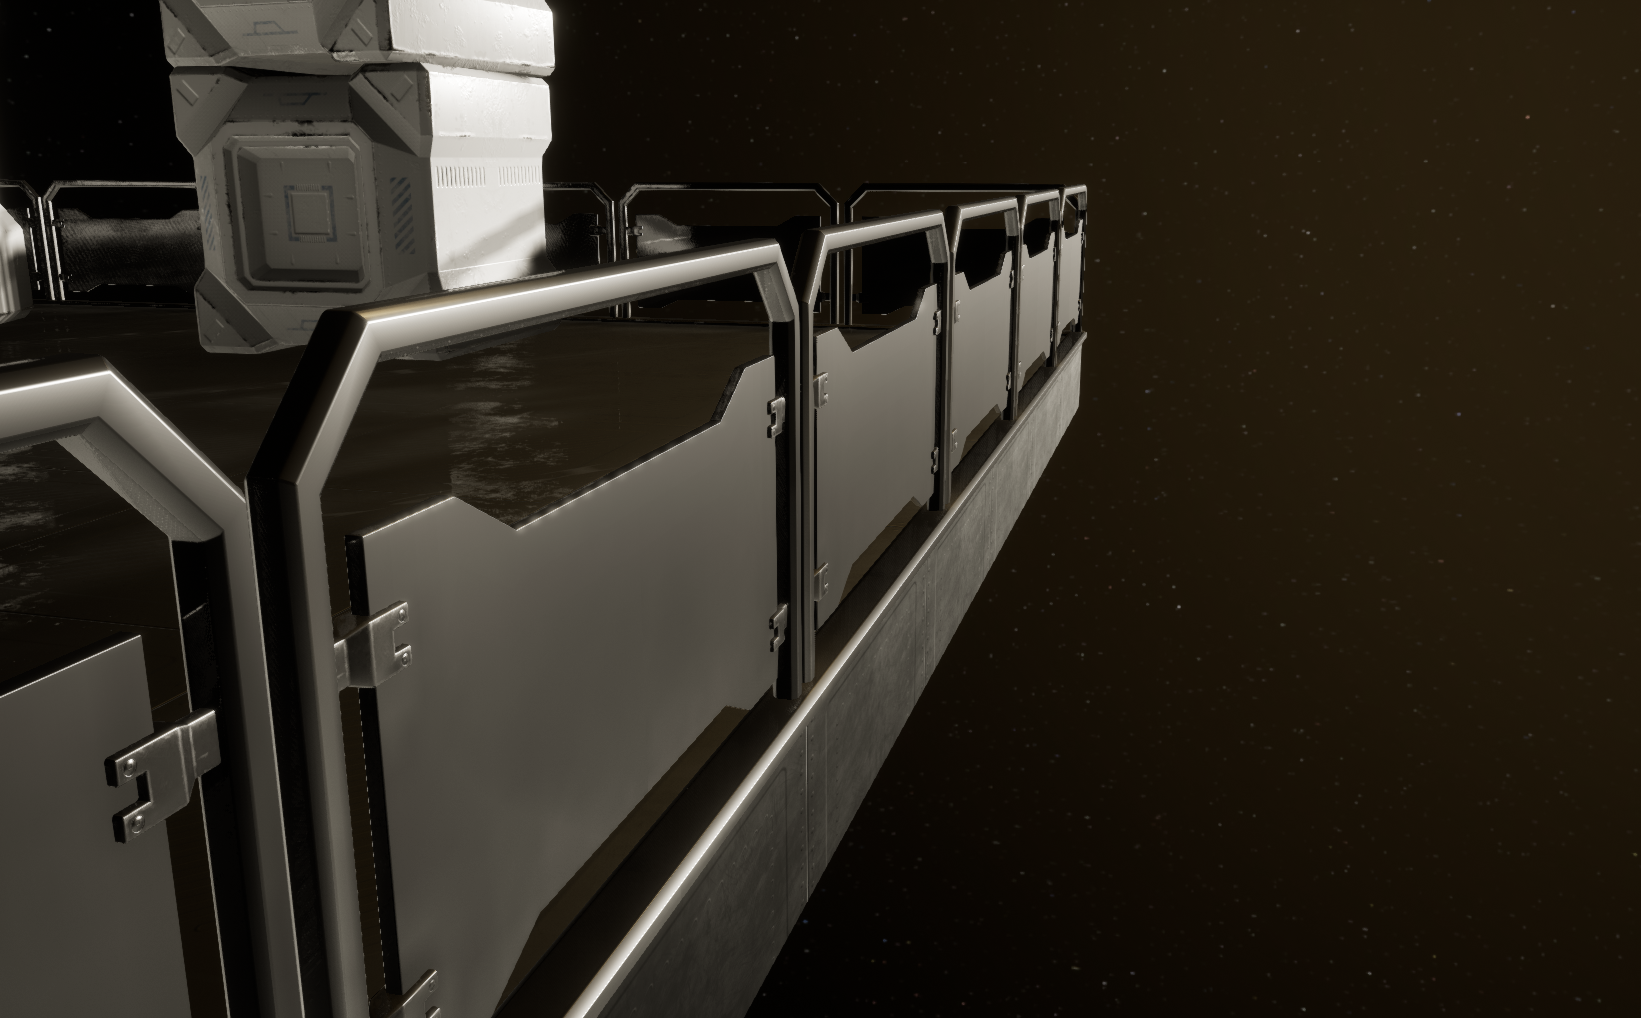
Metal
So making the space box made me think a lot about PBR materials, such as you make in e.g. Substance Designer/Painter. And specifically about metal. How do you make something look like metal? What is a metal material?
The answer is shine and wear. It’s easy to make a material shiny (or reflective) in a 3D/Game engine but that doesn’t make it look like metal. To make it look like metal you ruin the shine by adding many layers of roughness like scratches, edge wear and dirtiness etc. I.e to create a convincing illusion in a “perfect” world of ones and zeros, you make it imperfect. In PBR terms you create a roughness map that you apply to your mesh’s surface.
Is this metal? No this is metal. And here’s without wear in the game level, and here’s with wear.
You may notice that the edges are extra worn. That can be accomplished by “baking” the curvature (edges) of the mesh into a mask that you can apply to the roughness map, to make the edges either extra rough or extra shiny. You may also notice that the metal plate of the fence has repeating patterns and that’s because I’m lazy in Blender and have the model mirrored in the middle, it saves time. I will fix that sometime™.
More Metal
So I’ve been obsessing over metal lately. Star Citizen has great metal. So I’ve been running around in that game looking at metal. Especially metal floors. I realized that almost all materials in Star Citizen have a little fine graininess in the surface, including non-painted metals floors when looking really closely. I guess that makes a lot of sense since no surface in the real world is perfectly smooth. So by adding a very fine grainy roughness to most materials, even if subtly, it will reflect the light a little less uniformly, to make it seem more believable.
I created a “base metal” material in Substance Designer with many of the “levels” parameters exposed, so they would be editable in UE4. After dragging some sliders up and down, here’s the result:
And here’s a close up showing the fine grained surface somewhat clearer.
Next up is to create floor plates, since one massive metal floor isn’t very realistic. Star Citizen does this by slapping on decals everywhere.
Let there be lamp
Having no real plan with anything I decided to make a lamp post to practice my modeling skills in Blender. It ended up looking kind of sci-fi-y even though none of the details make any sense whatsoever. The parts (eg leg, pole etc) a modeled as separate objects in Blender (left), textured in Substance Designer and then manually assembled in UE4 (right):

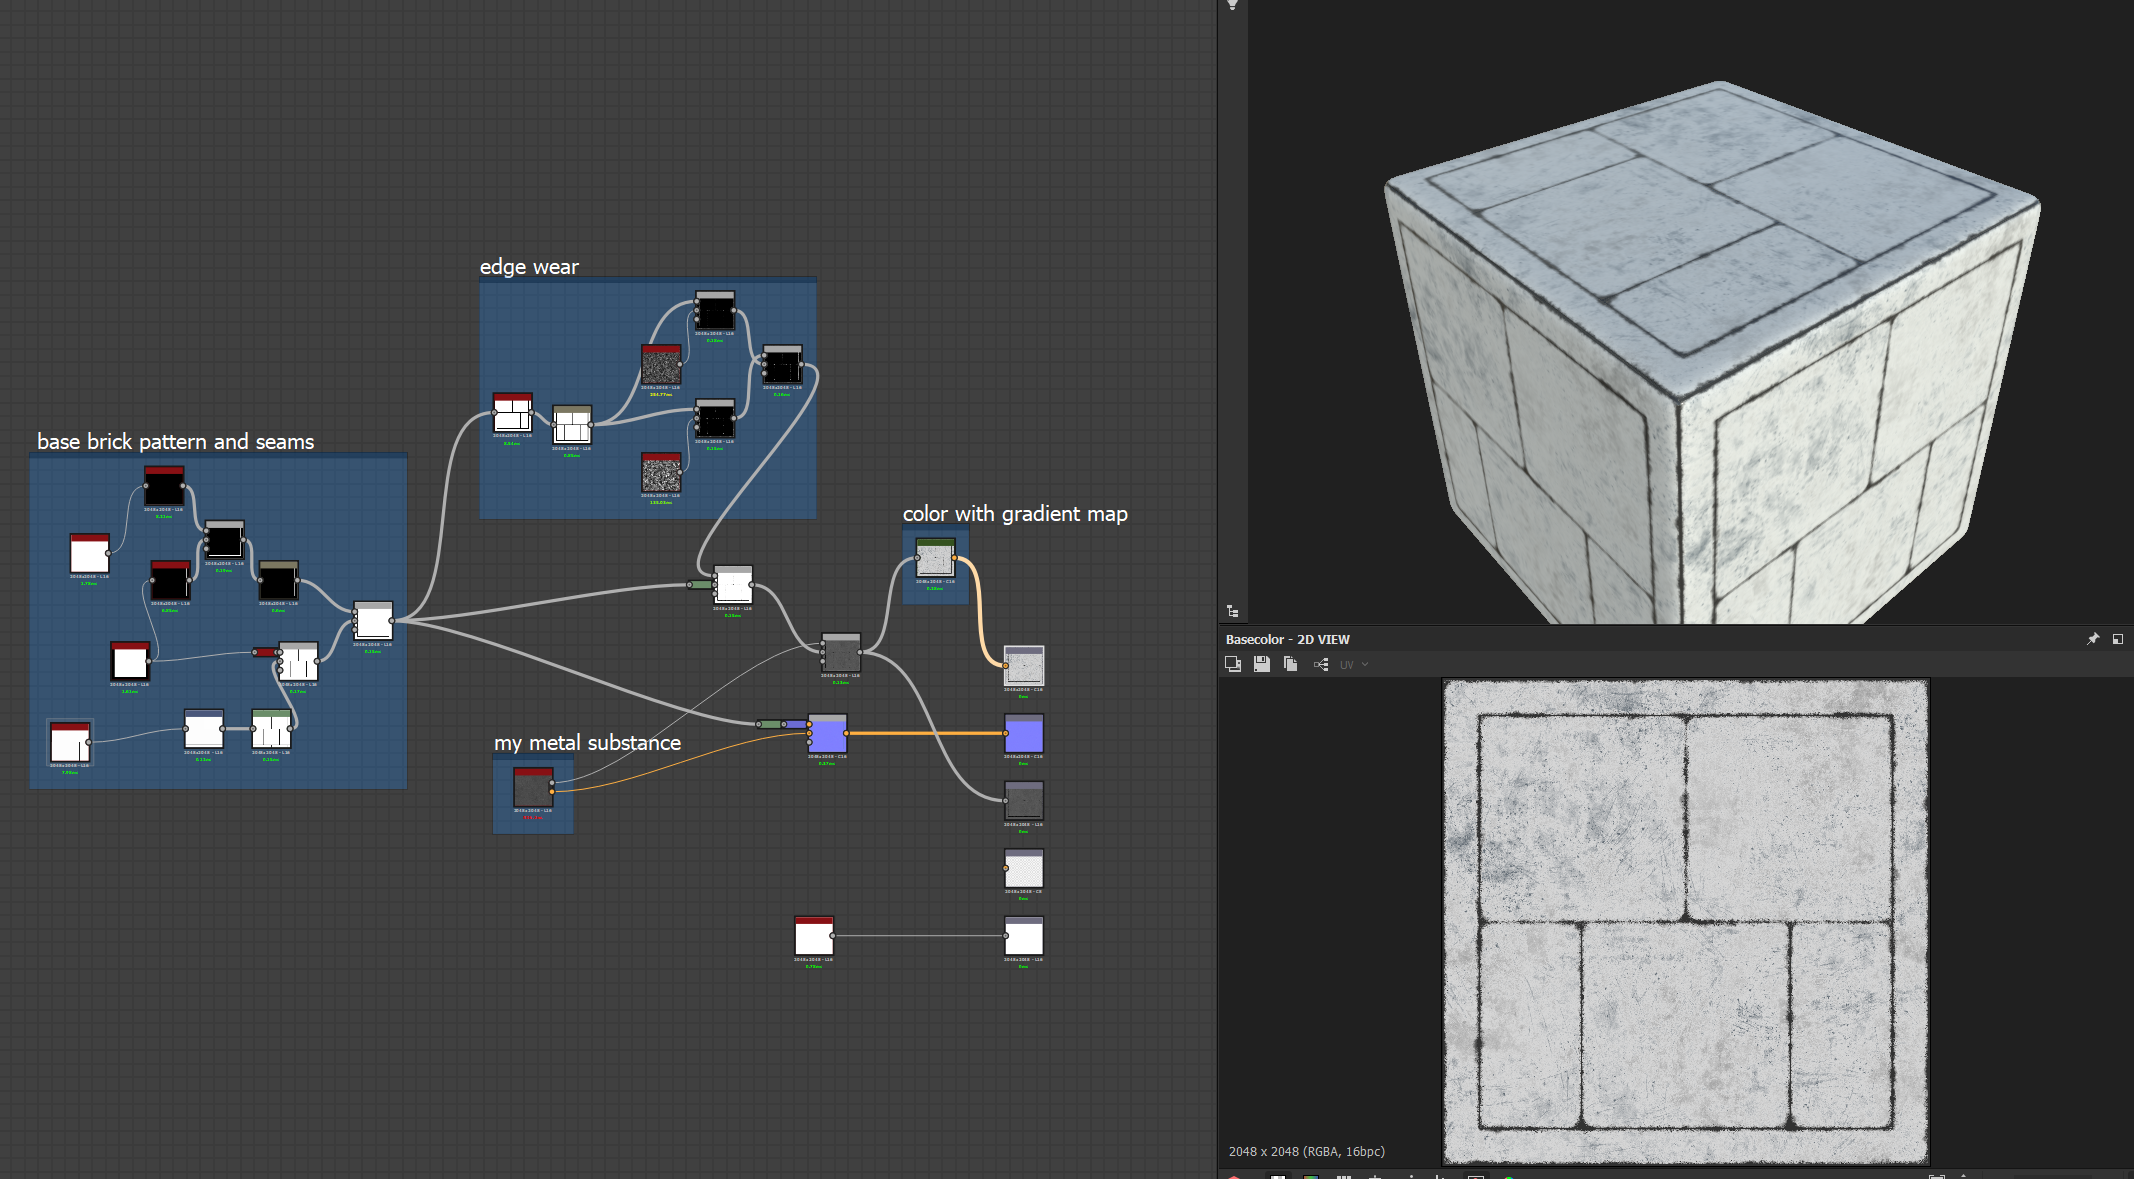
I also added new floor plates, using a procedural material that I set up in Substance Designer. The main input is a node that generates a “brick pattern”, then there are tons of filters and masks than create the worn painted metal plate look. I exposed a parameter from the “brick node” which makes it possible to, in UE4, have different amounts of metal plates, and since everything is procedural, the colors and wear & tear updates automatically.
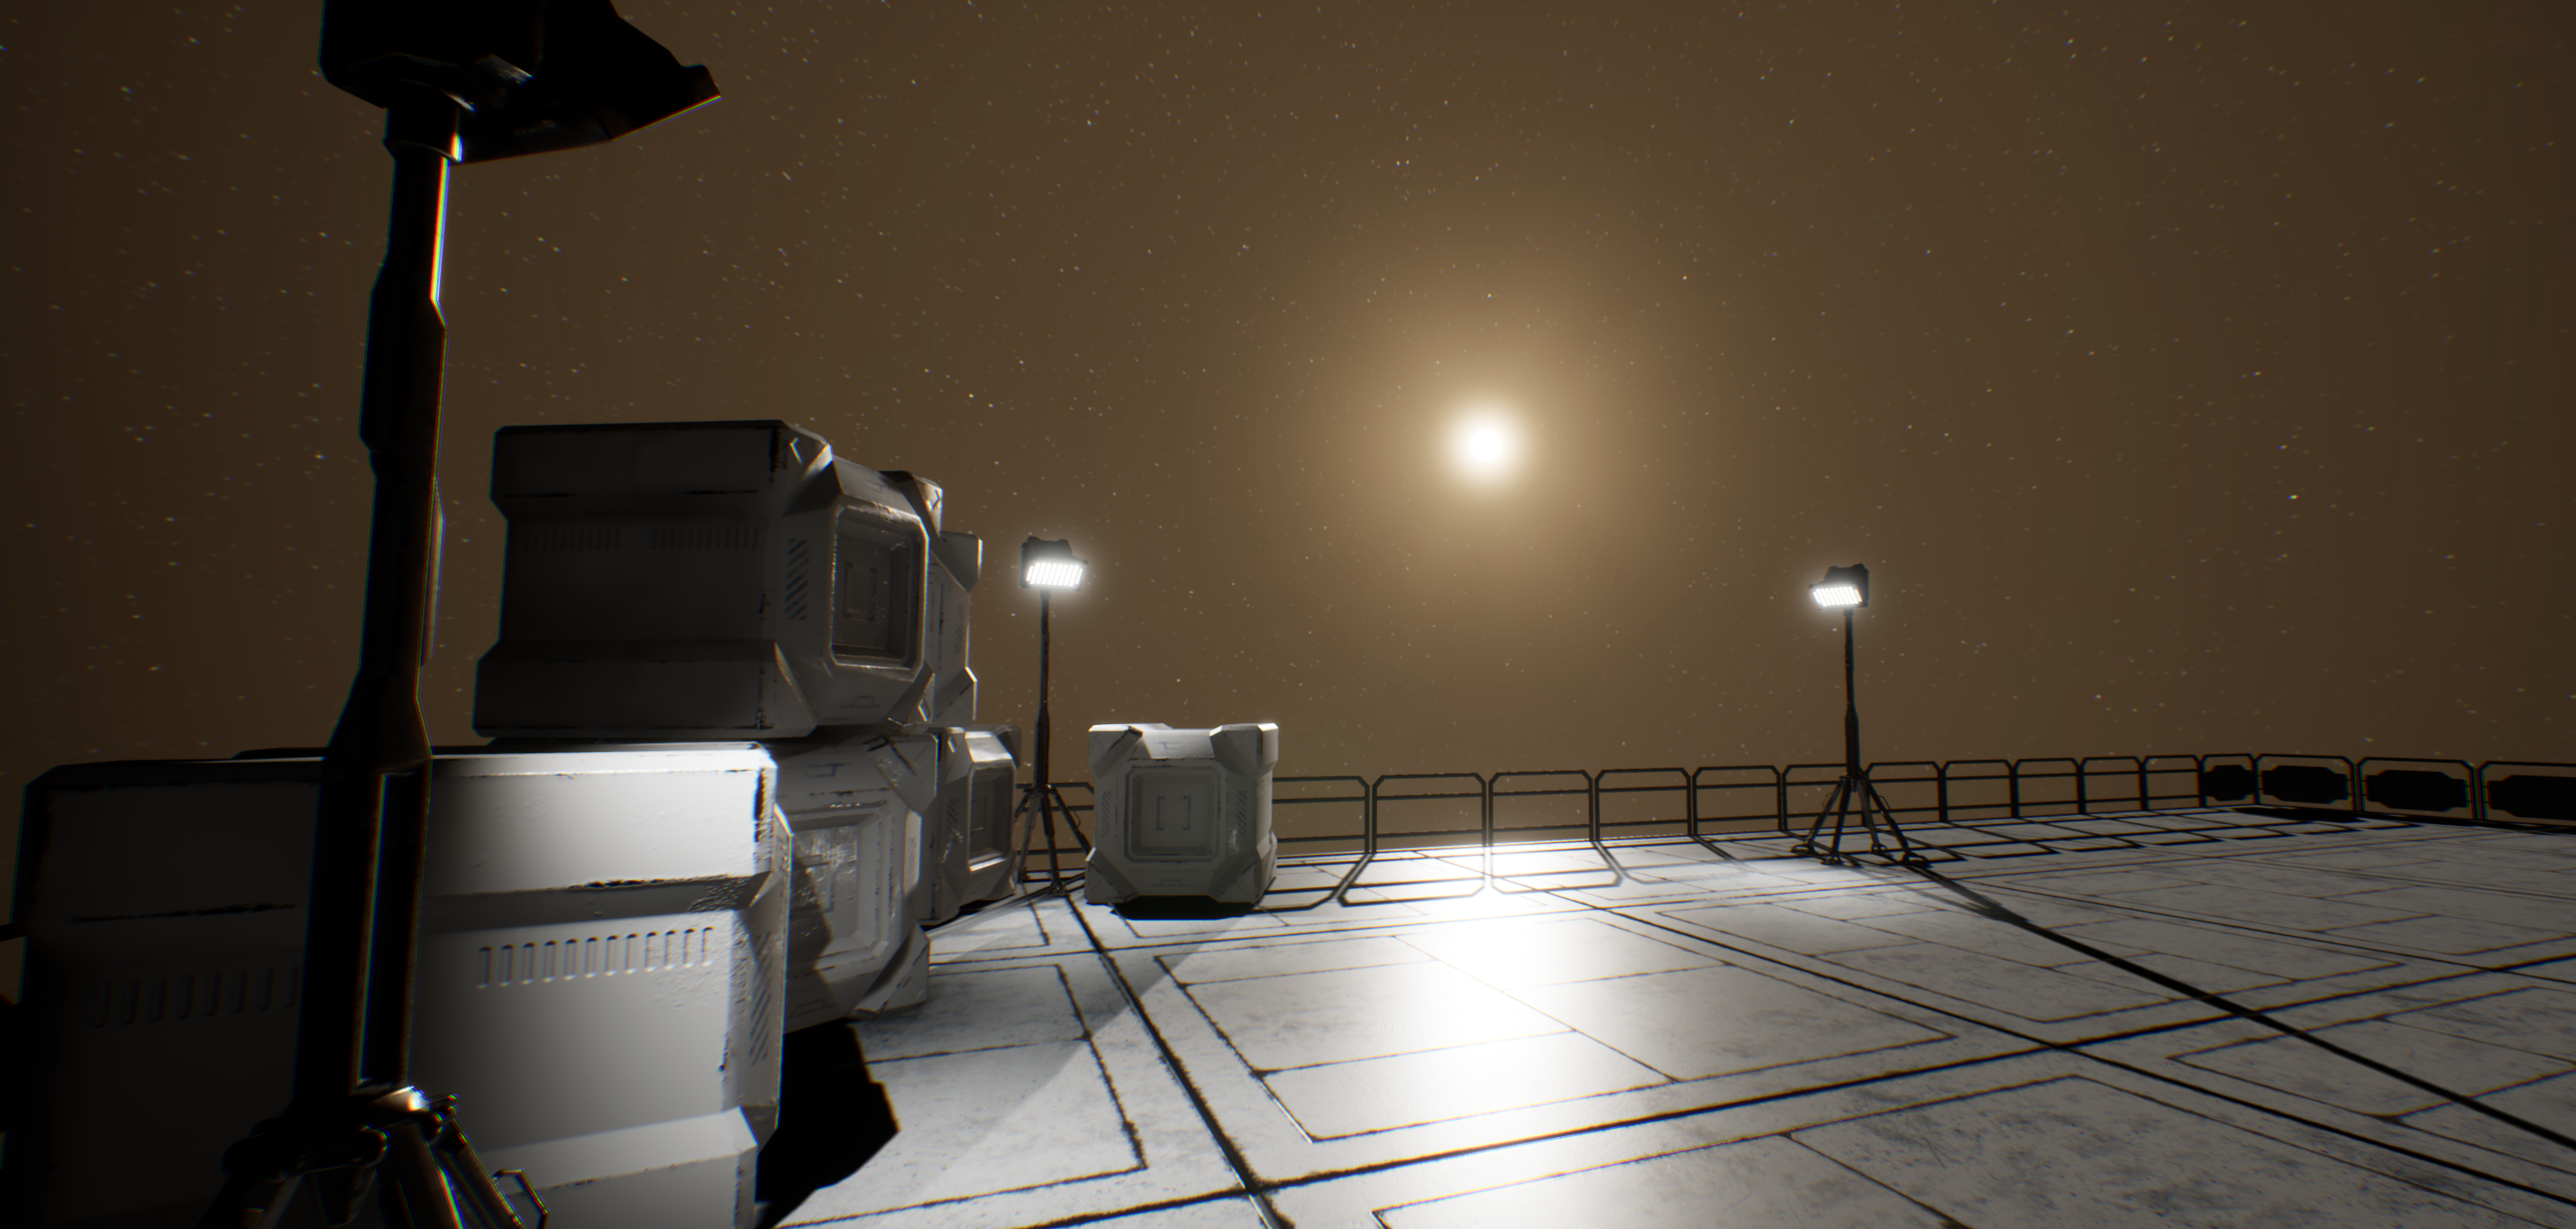
This is the updated look of the scene:
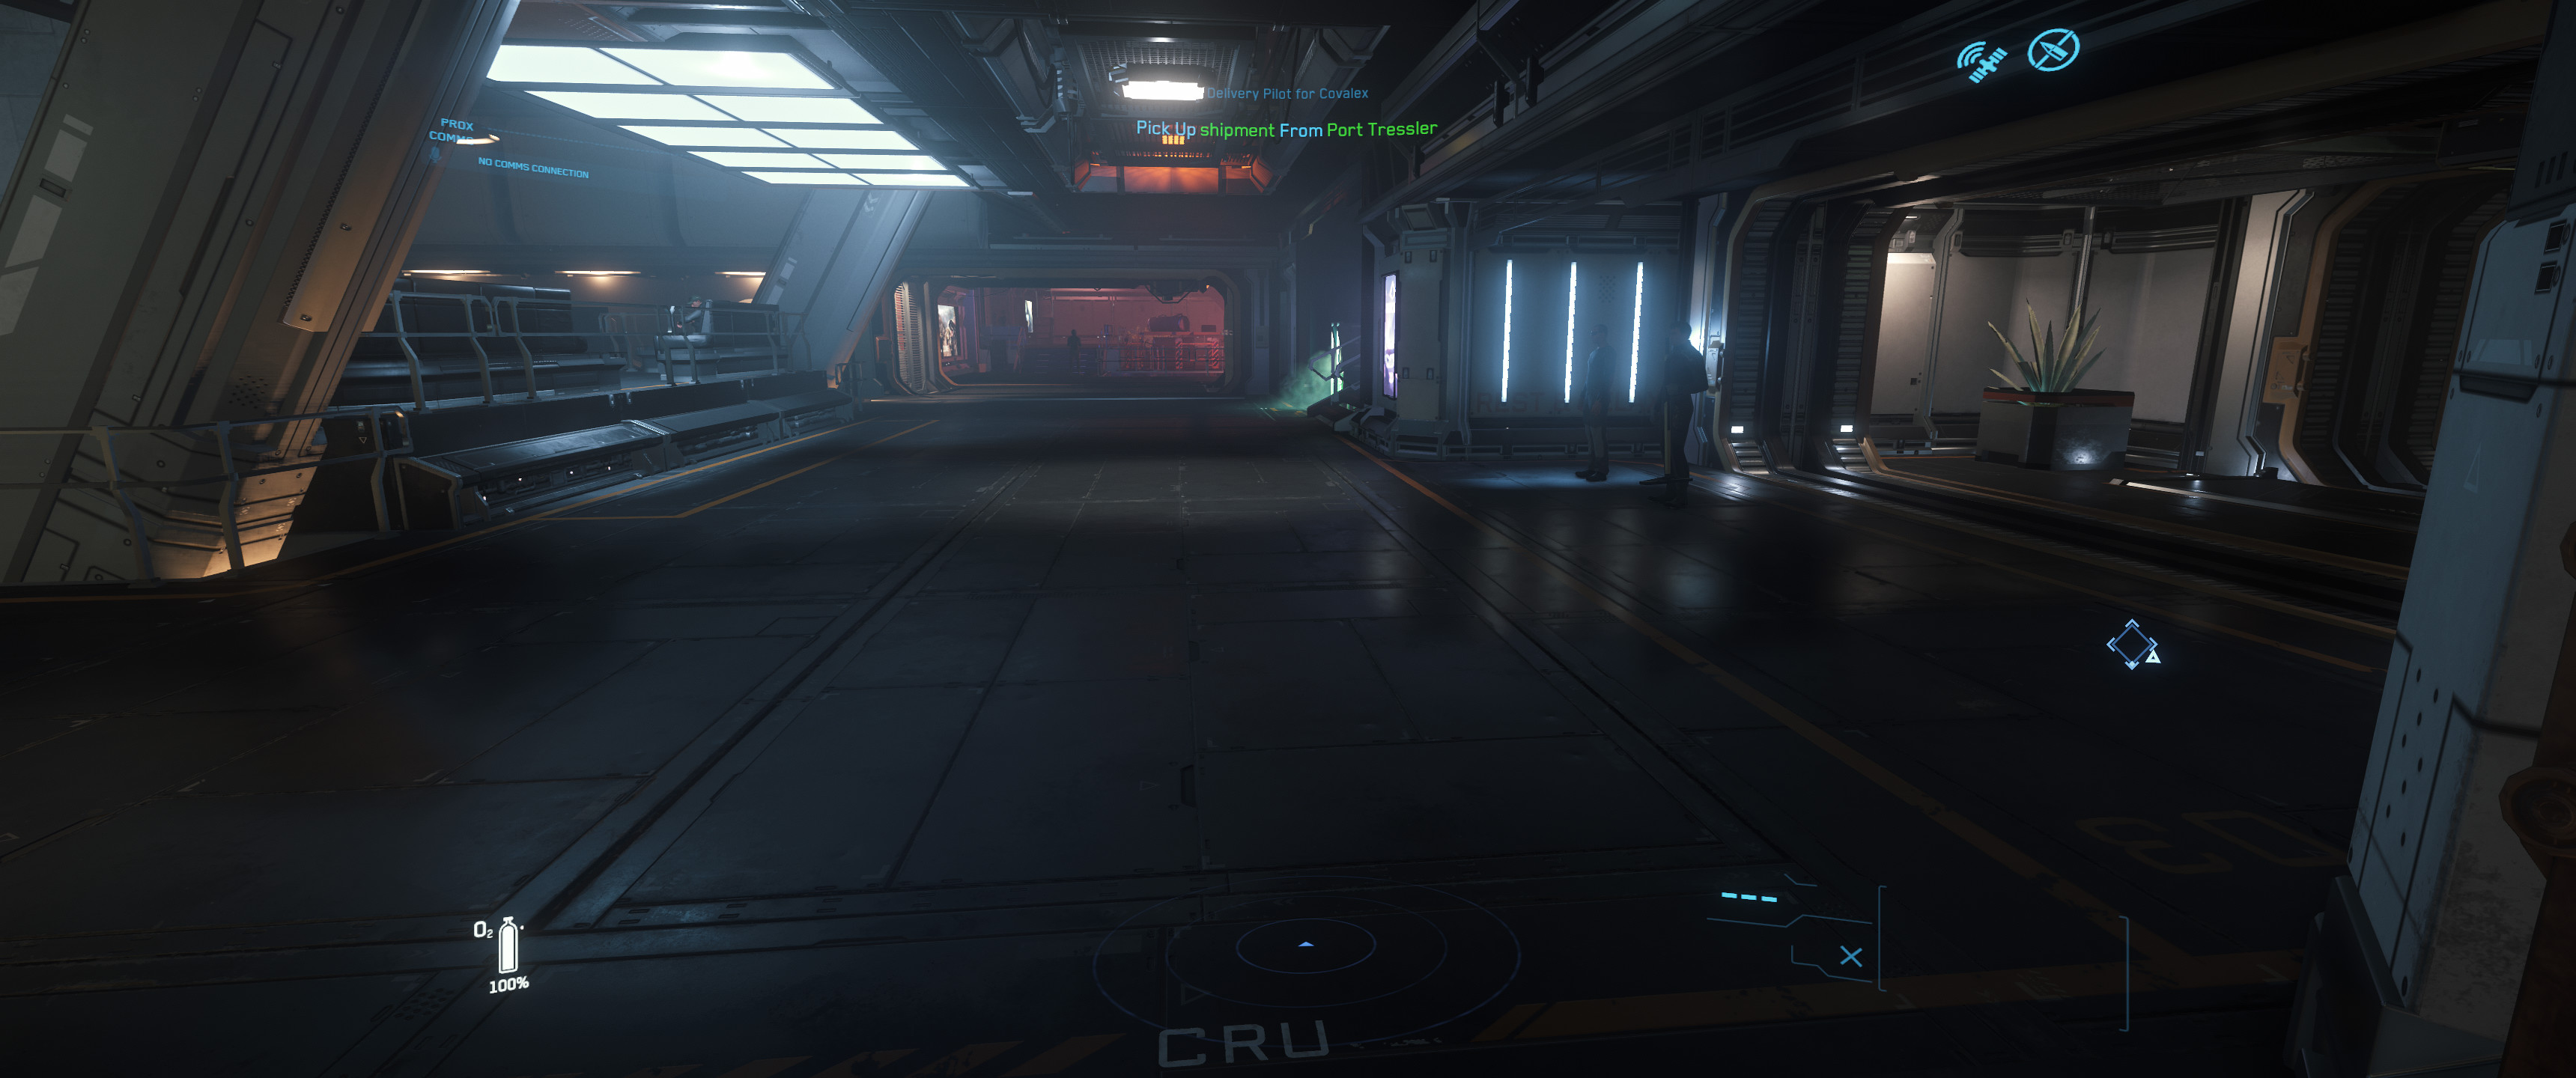
UI
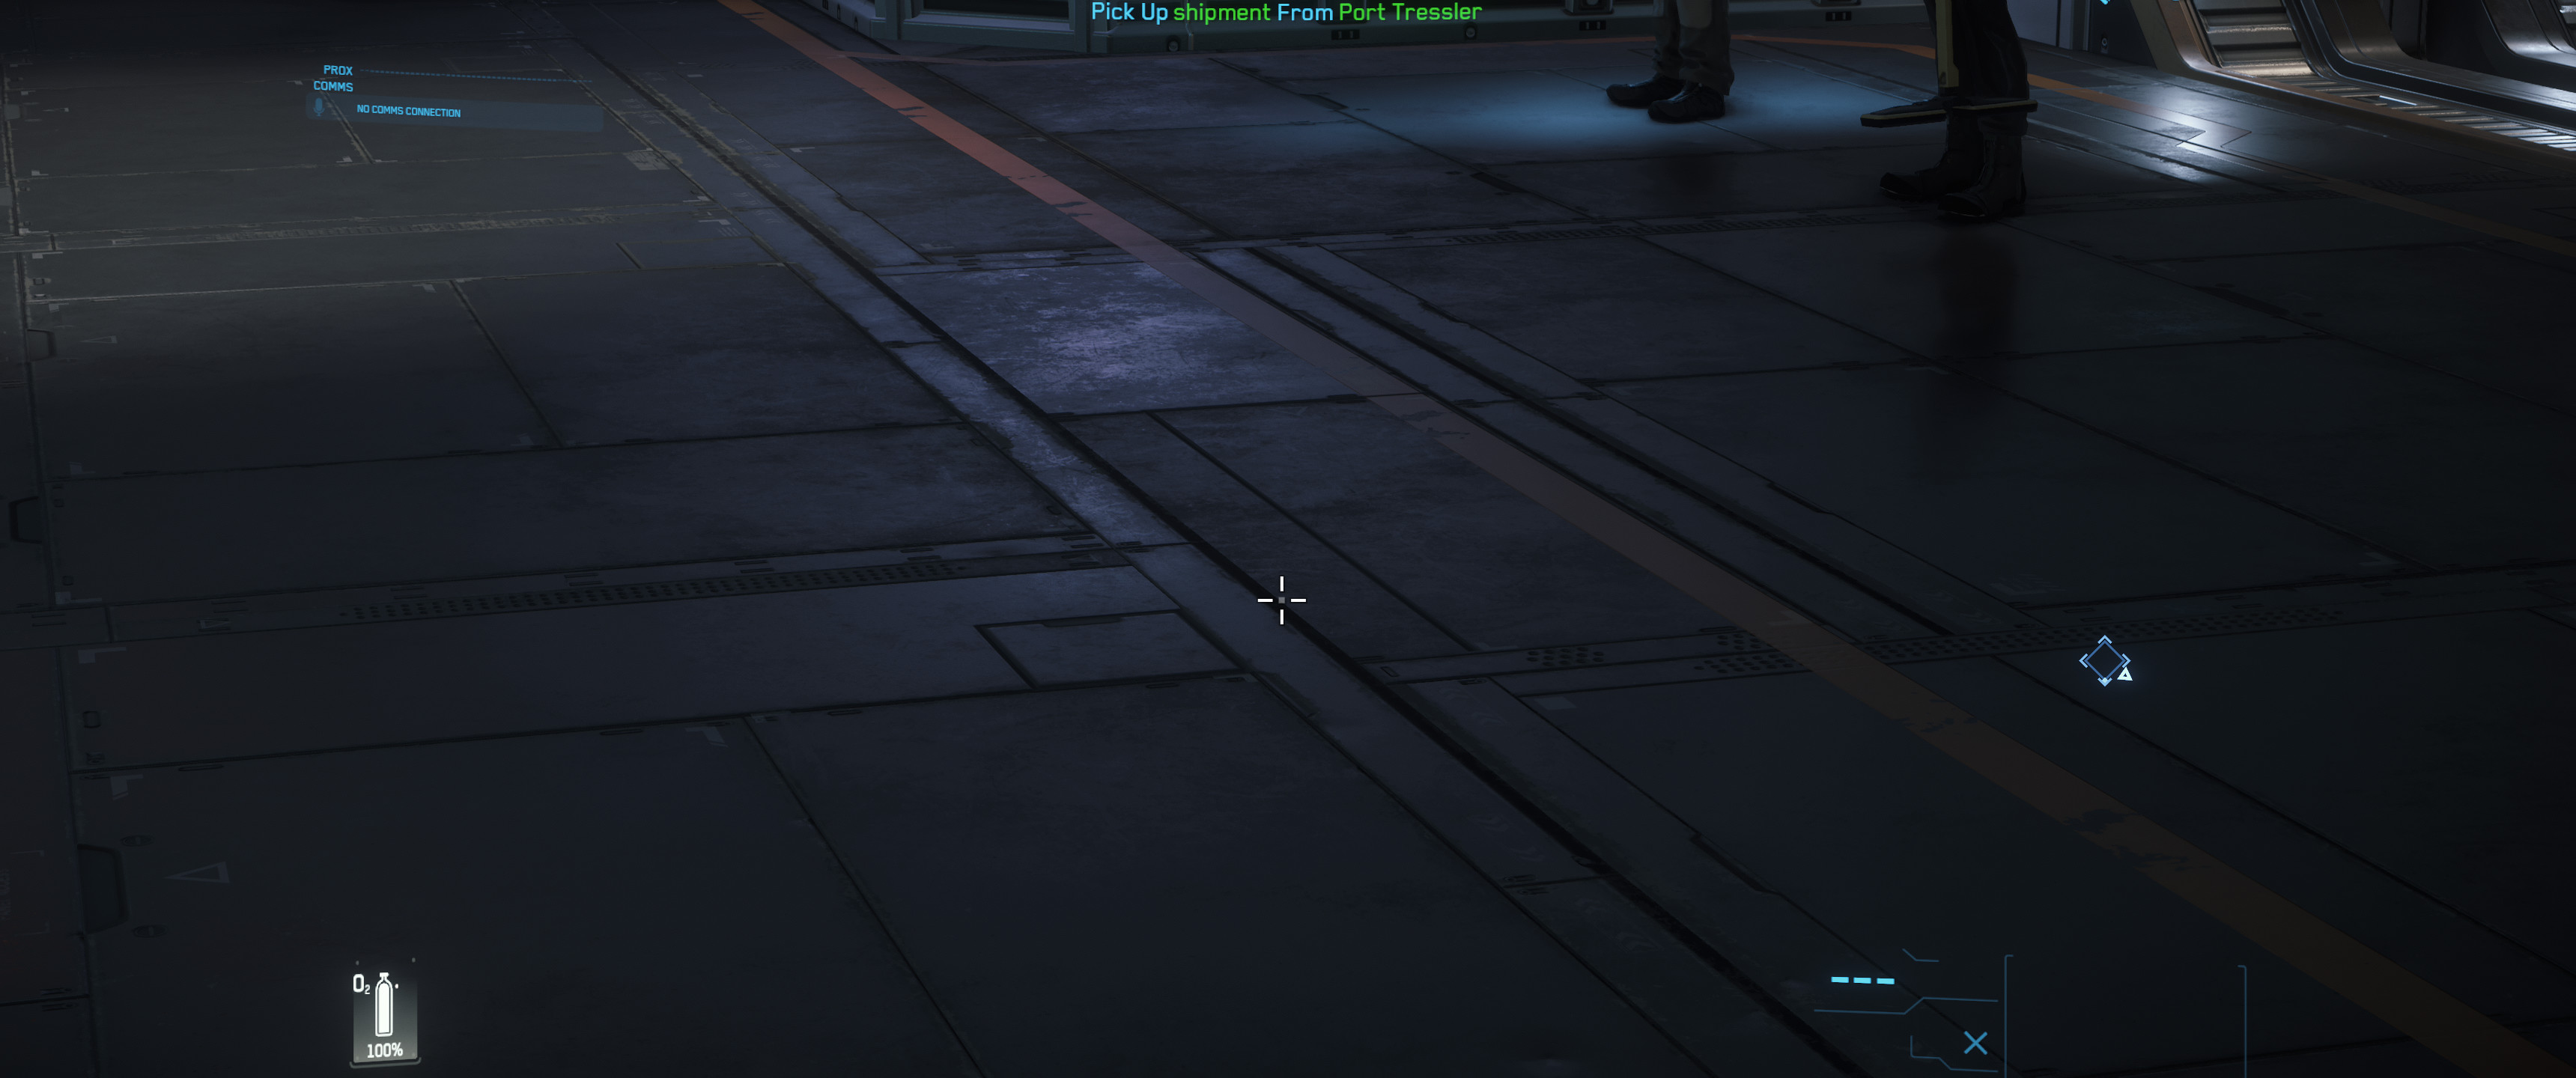
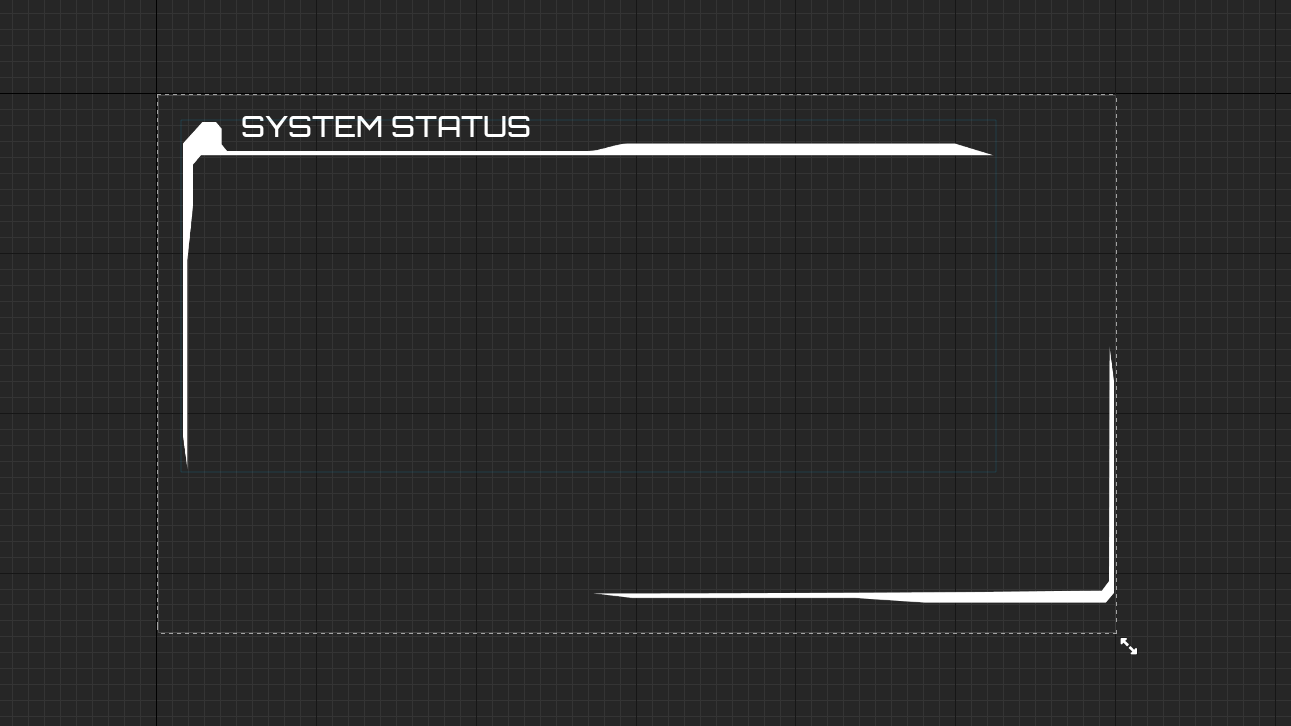
Time for some interactivity. I finally found out how to create interactive screens in the world, such as they have in e.g. Star Citizen. I.e it’s not a UI on the computer screen but physical objects in the game you walk up to and click on.
I started by quickly designing a very cliché sci-fi looking UI in Figma, then imported the parts into a UI widget in UE. The text in the UI is a text element in UE and not an image. I assigned an emissive material to give it a faint glow.
I also modeled a screen thingy in Blender:
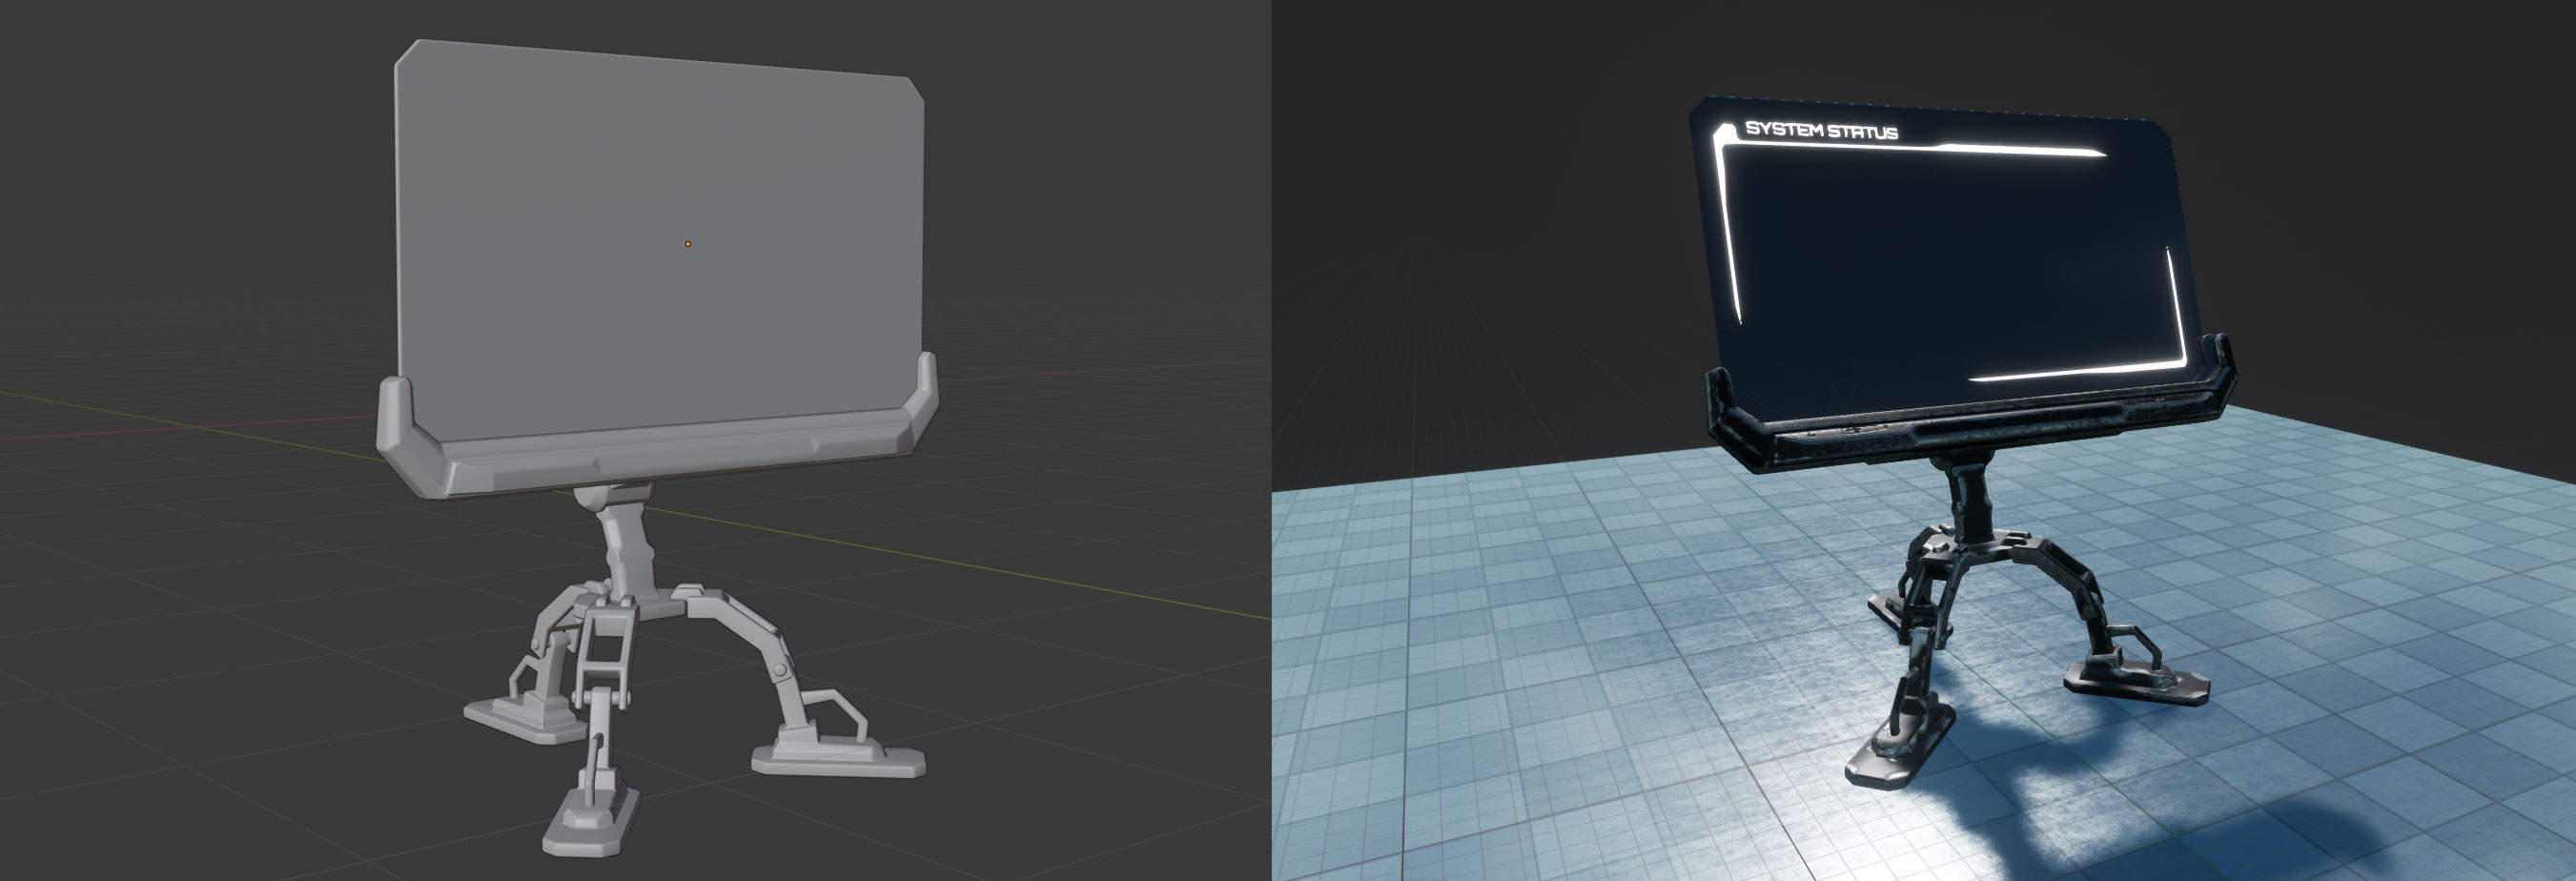
The screen material is translucent with subsurface scattering.
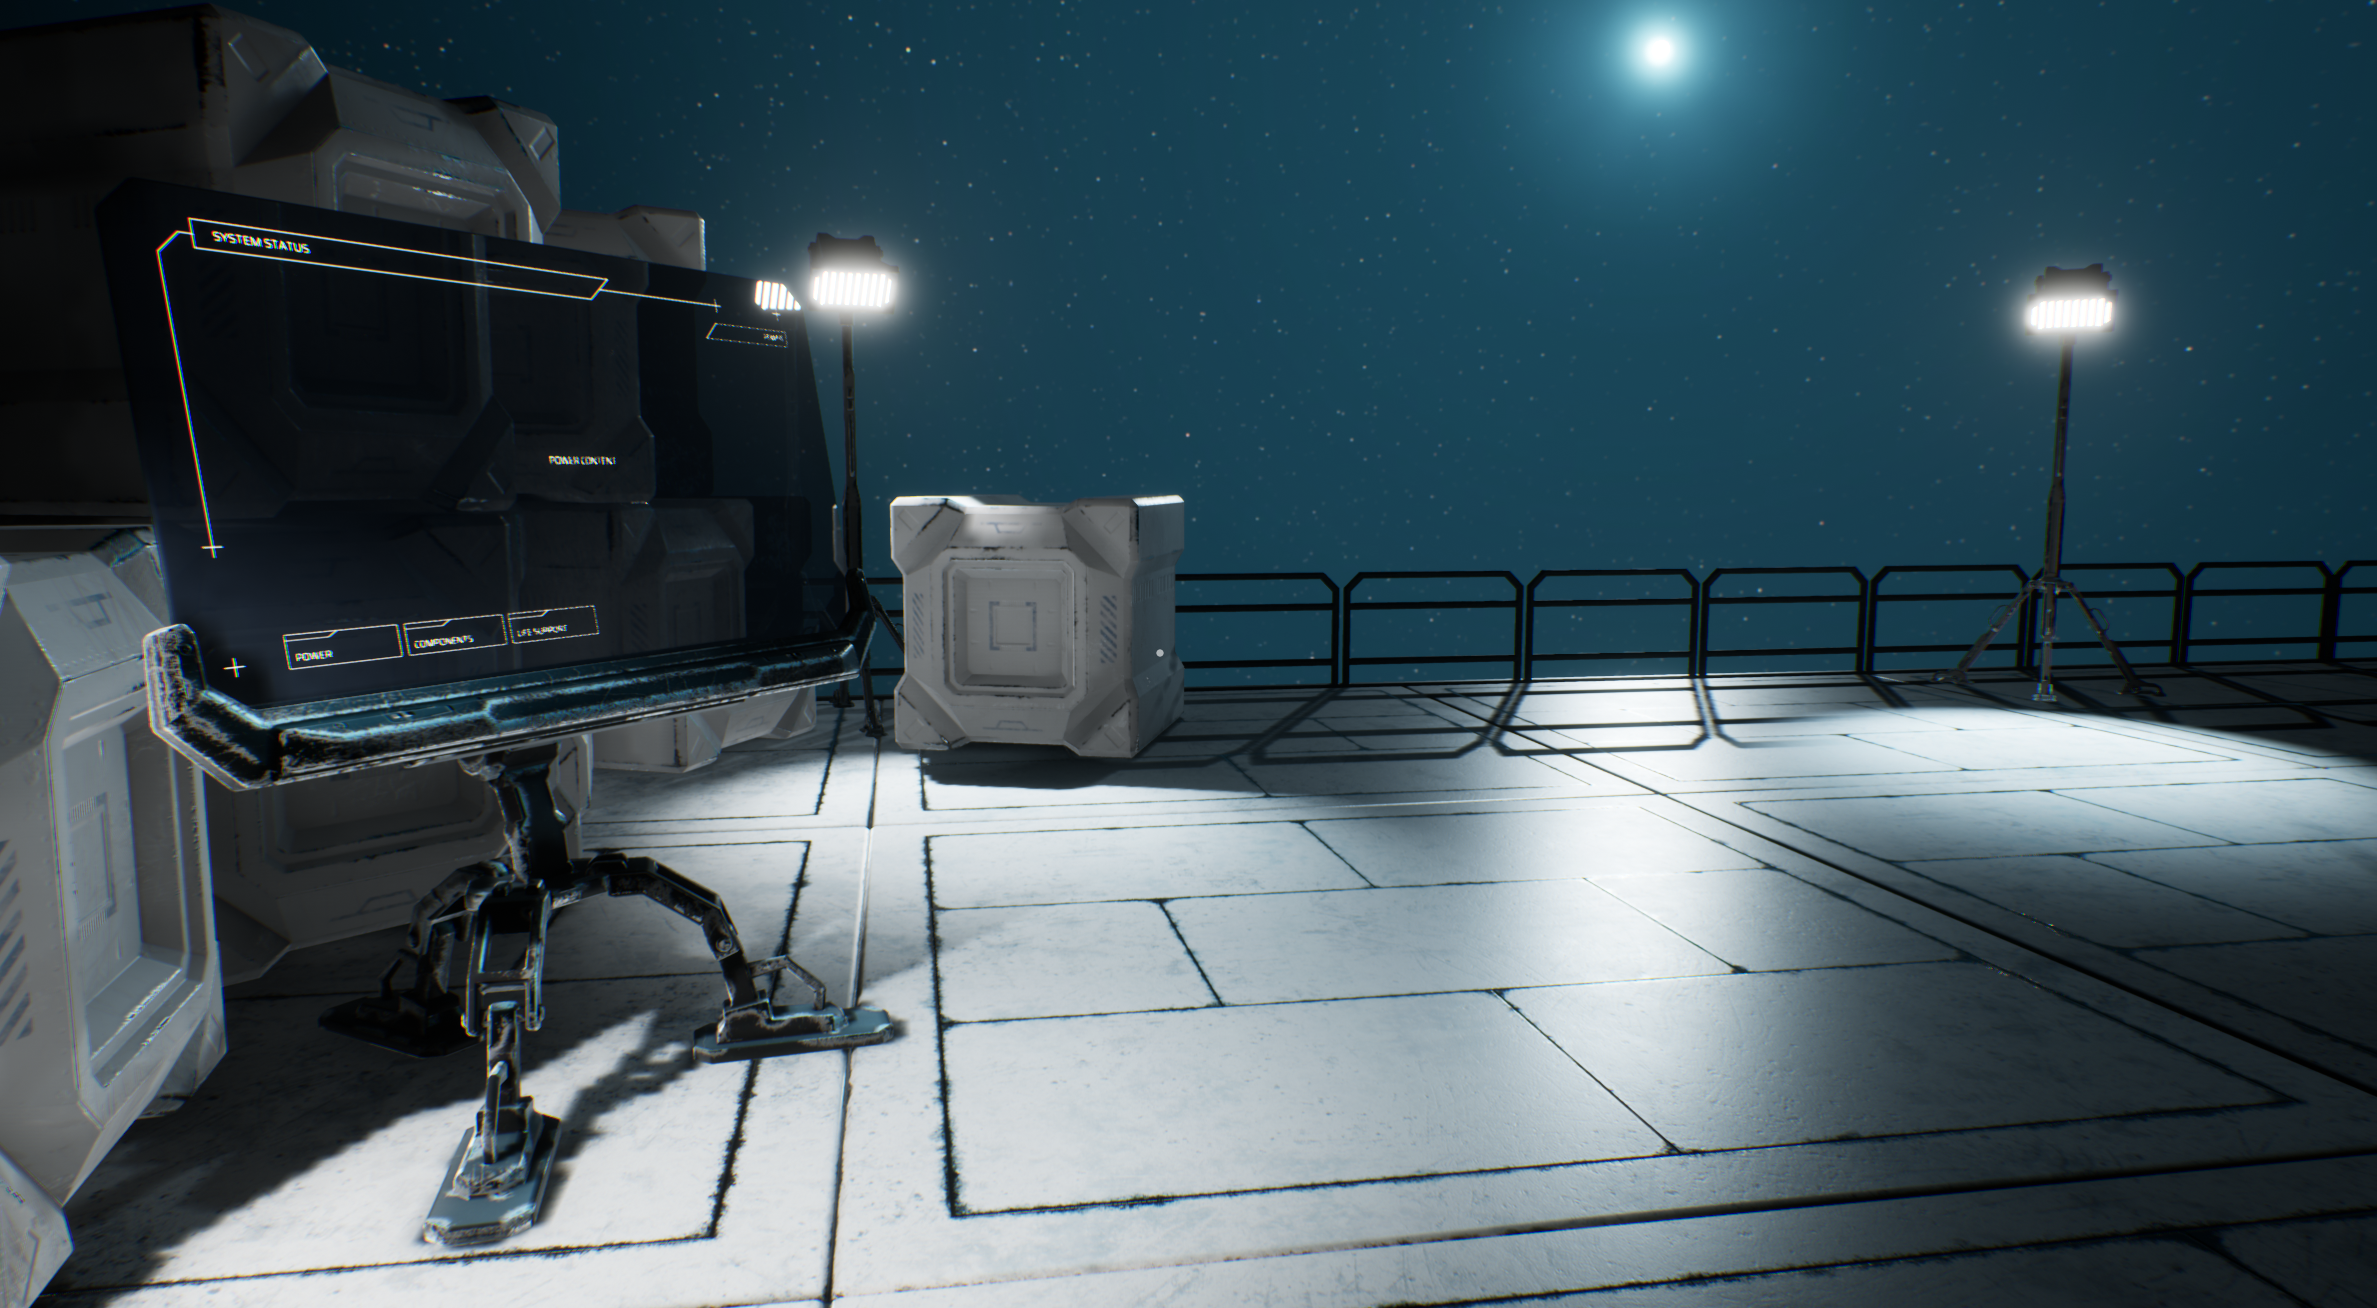
The final scene now looks like:
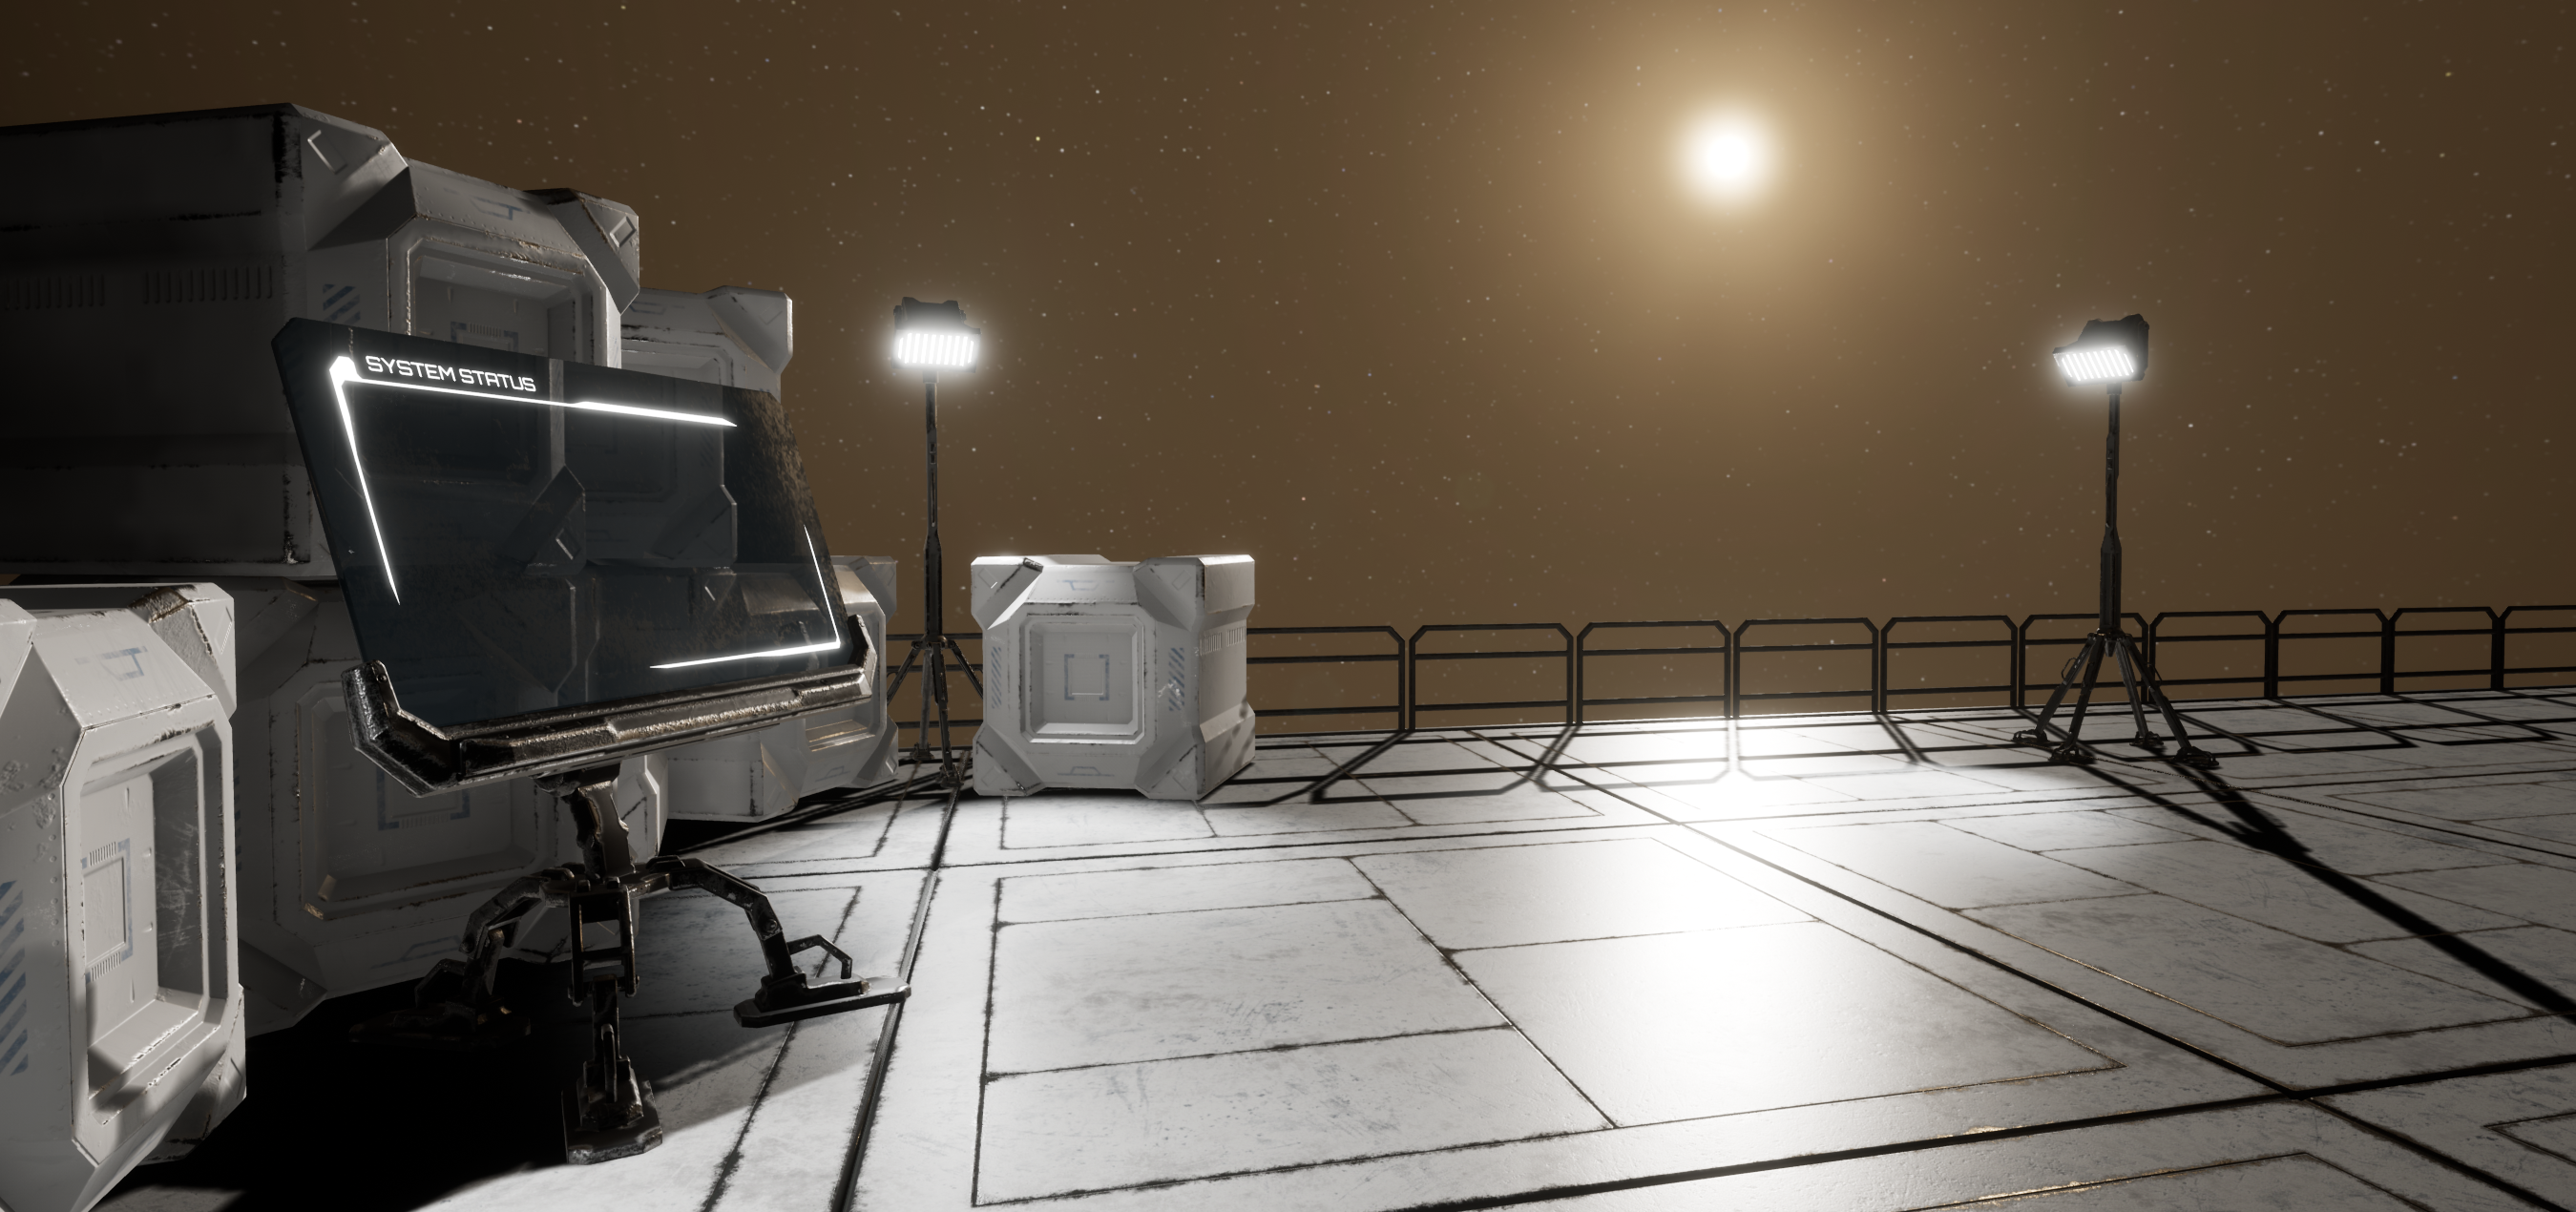
Notice how the screen has smudges and uneveness. Never forget that nothing in real life is perfect! Always add wear and tear.
Next up is to make it actually interactive, and make it look good!
Interactivity
So I found out how to make interactive UIs in 3D space.
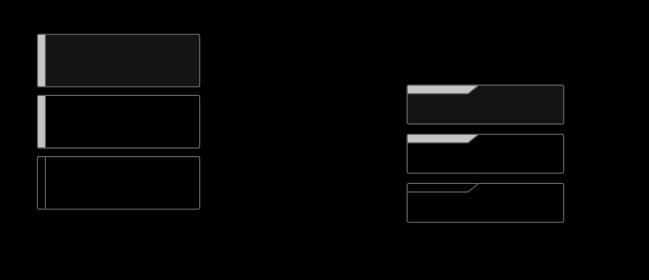
The previous UI design was not very nice so I first spent some time redesigning the UIs in Figma. Including some buttons with hover and clicked state. This is the updated result in game:
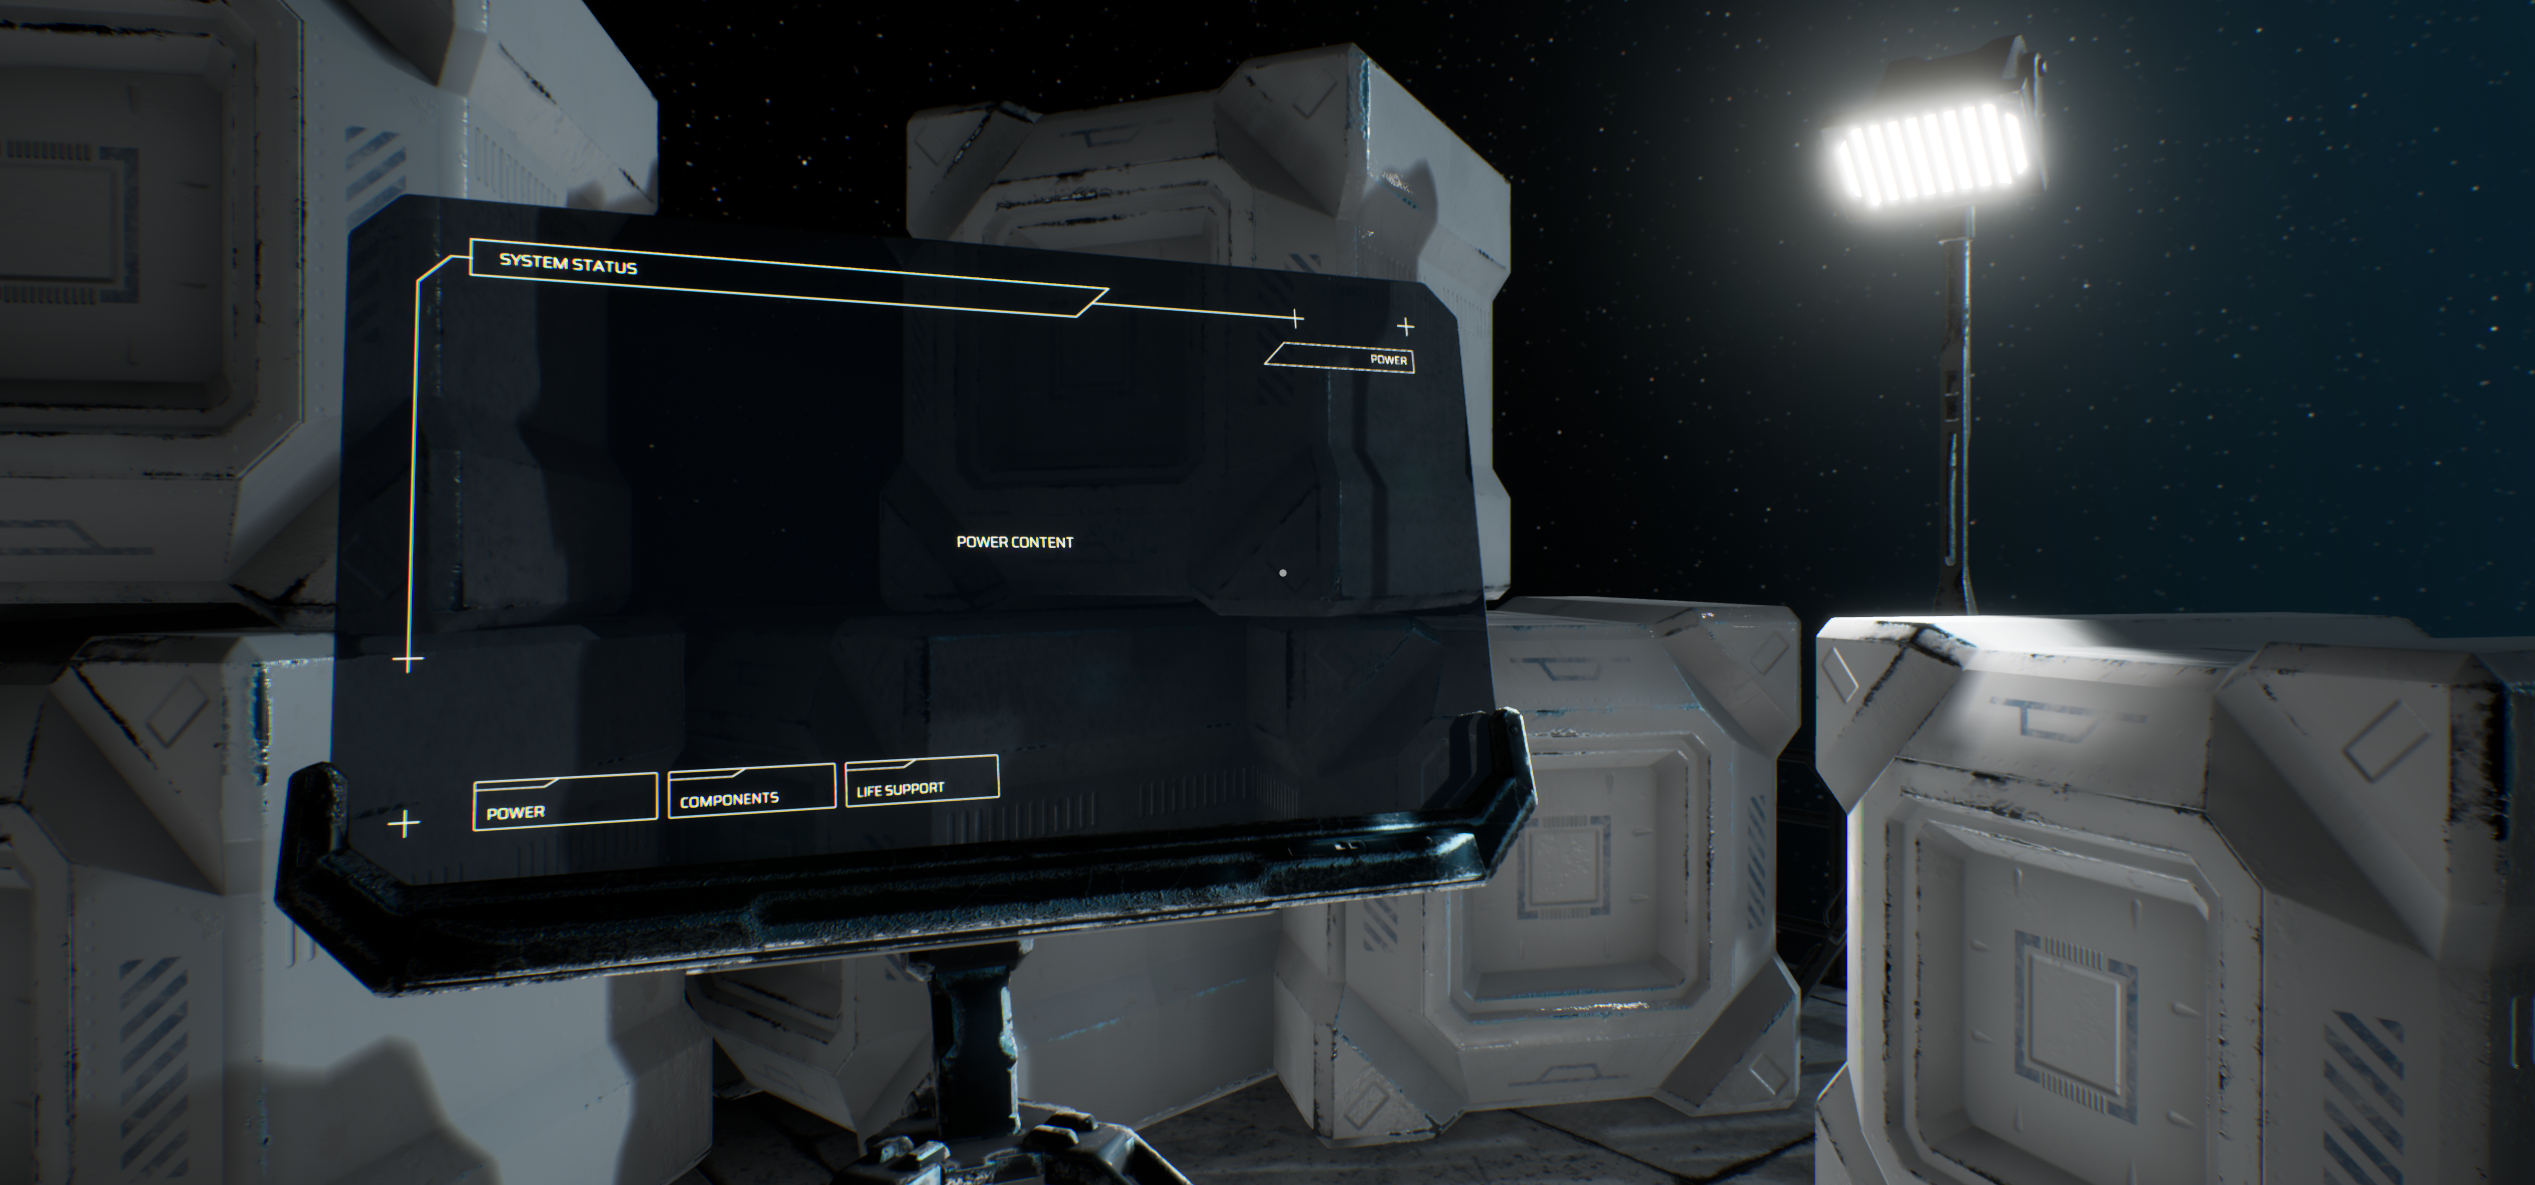
Eventually I managed to figure out how to make an interactive “tab view” where the you can switch tabs by clicking on buttons. Here’s a demo video of the tab interactivity:
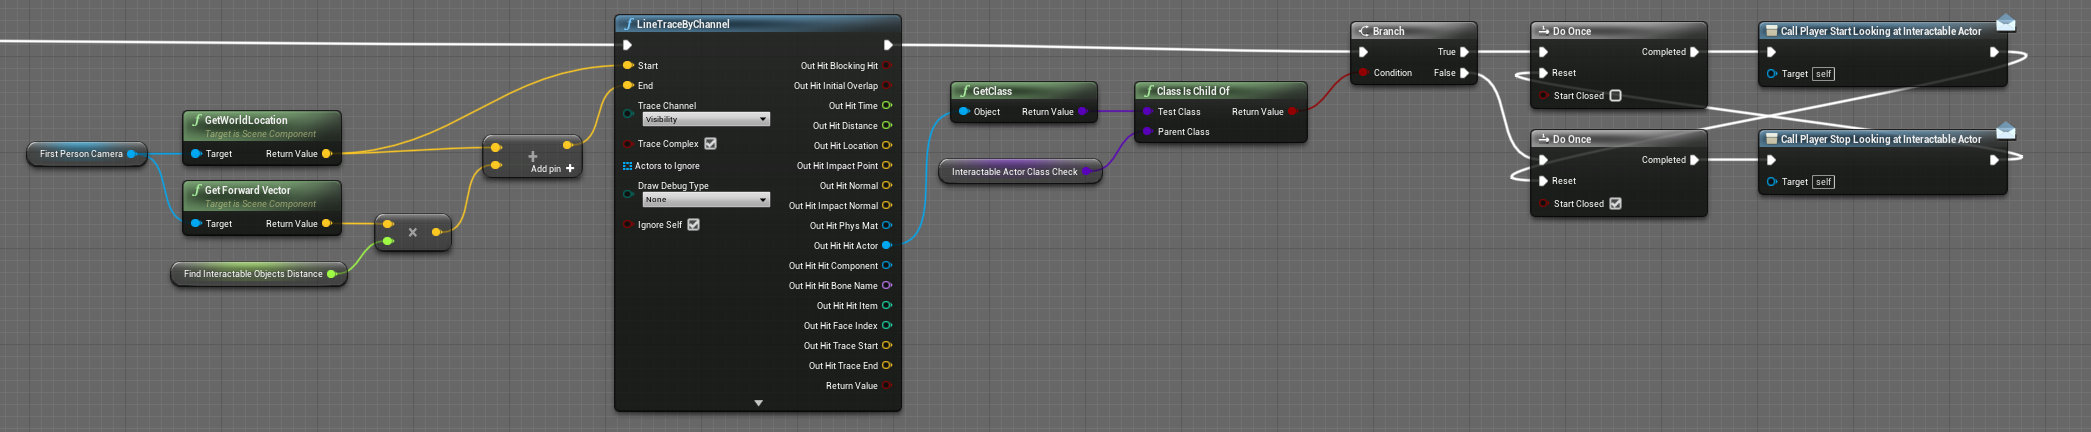
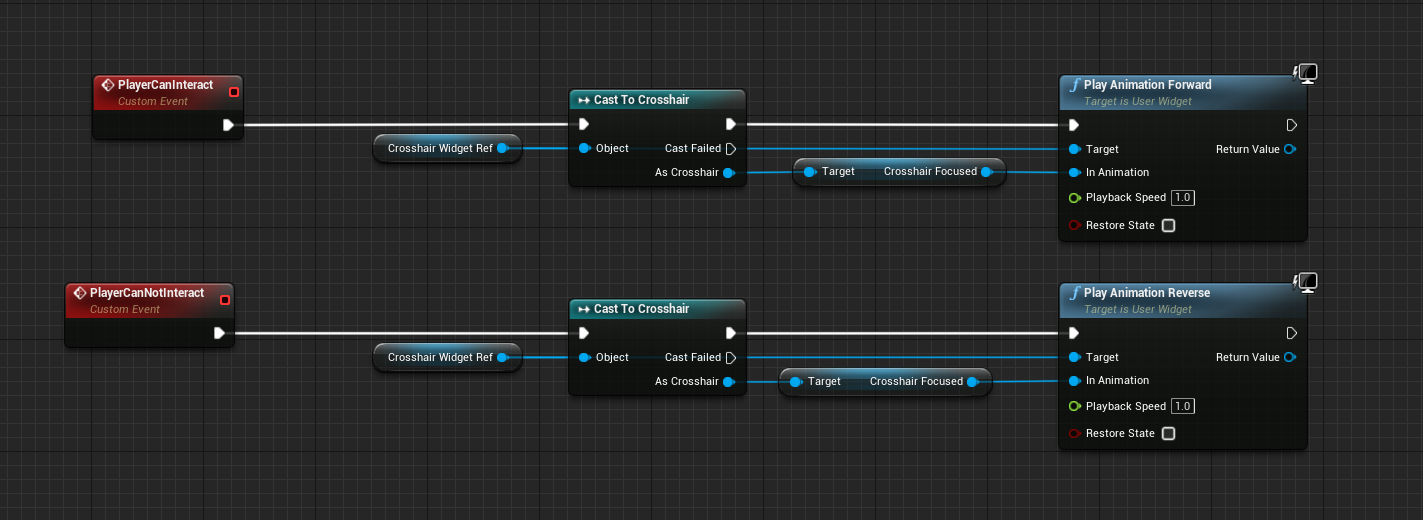
If you look closely in the beginning of the video, the “crosshair dot” animates when it moves on top of the display. It scales up and gets more opaque.
That’s achieved through a widget animation combined with a line trace that checks for Actors extending a class (“Blueprint”) that I called “InteractableComponent”. If the line trace collision returns true for that check, an event is fired that is subscribed to in the main HUD Blueprint, and that one tells the animation to start.
To be continued…